Purpose
This guide explains how to create a Purchase Order (PO) by selecting lines, reviewing line details, and saving the PO for approval and processing.
Prerequisites
Before creating a Purchase Order, ensure that:
- A vendor has been created in the system.
- The Service Order contains existing accounting/expense charge lines for the vendor in RedSky.
- The charge lines are not already associated with another active Purchase Order.
Important: A Purchase Order can only be created from existing vendor accounting lines. If no charge lines exist for the vendor on the Service Order, there will be no lines available for selection while creating the PO.
Step 1: Open the Purchase Order Module
You can start creating a Purchase Order from:
- Dashboard
- PO List
A new Purchase Order number is generated automatically and displayed at the top of the screen.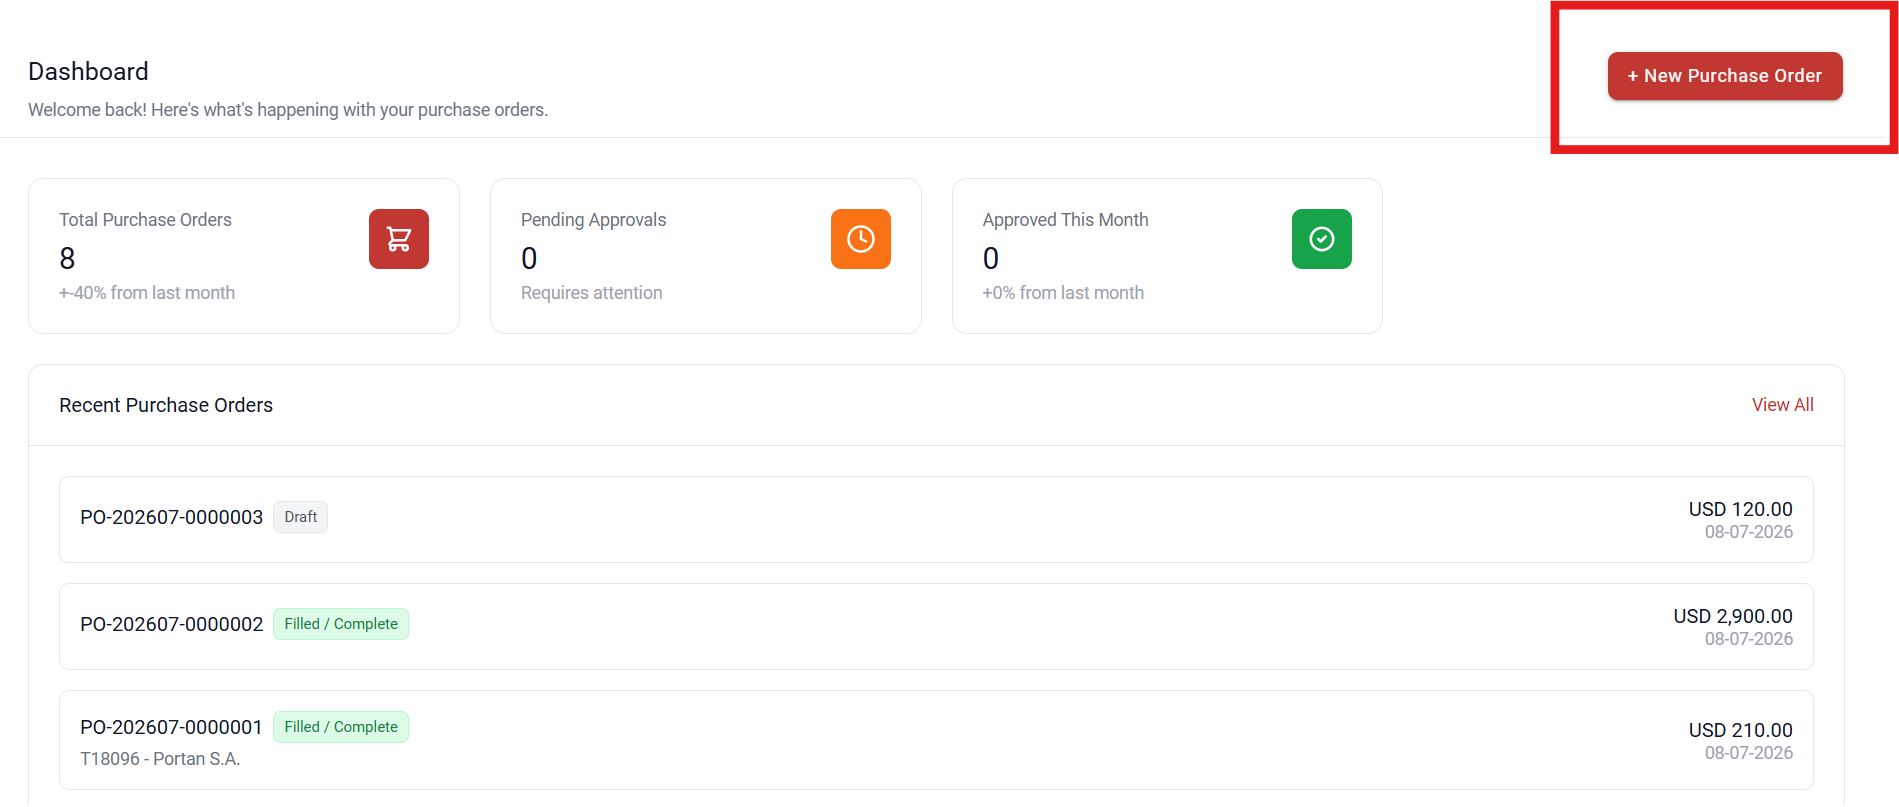
Step 2: Select the Vendor
On the Create Purchase Order screen:
- Search for the vendor by entering:
- Vendor Name, or
- Vendor Code
- Select the required vendor from the search results.
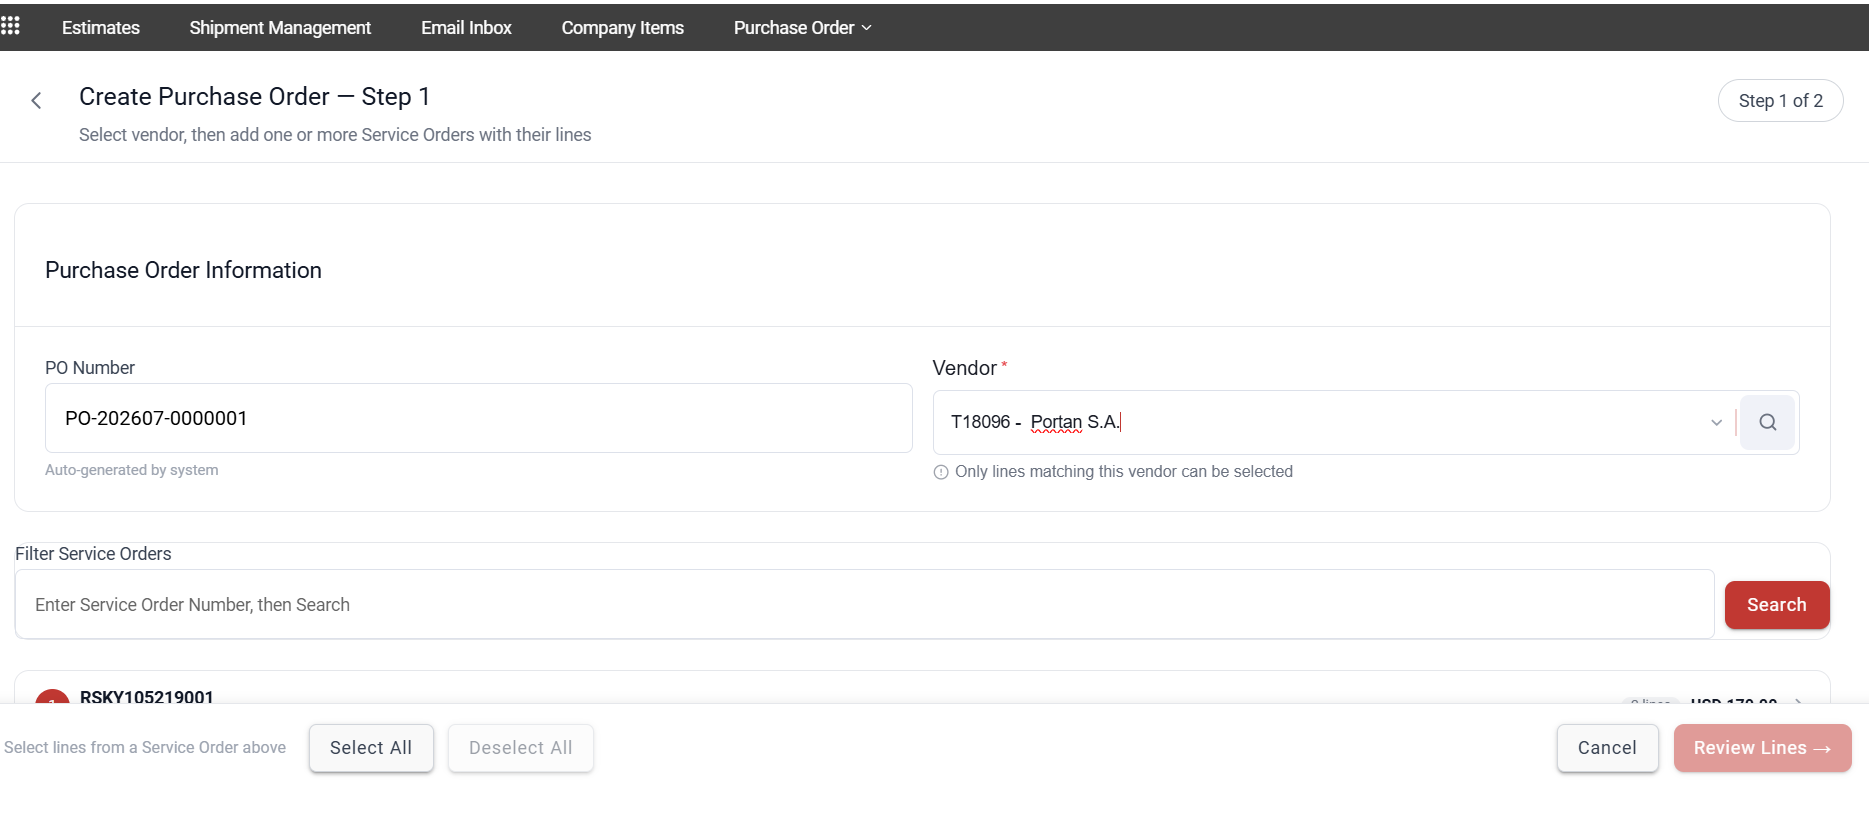
- As soon as a vendor is selected, the Service Order search filter becomes available. Enter the Service Order number without hyphens (-) and click Search to locate the accounting charge lines associated with that specific Service Order. The matching charge lines will then be displayed and available for selection in the Purchase Order.
Once the vendor is selected, the system automatically retrieves all available charge lines associated with that vendor.
Step 3: Select Service Order Charge Lines
The system displays:
- Service Order Number
- Customer Name
- Available Charge Lines
- Line Amounts
Charge lines are grouped by Service Order.
For each Service Order:
- Expand the Service Order section if required.
- Select the checkbox beside each line for either Estimate or Revision amount to include in the PO.
- Multiple lines can be selected.
- Lines from multiple Service Orders may be included in the same PO.
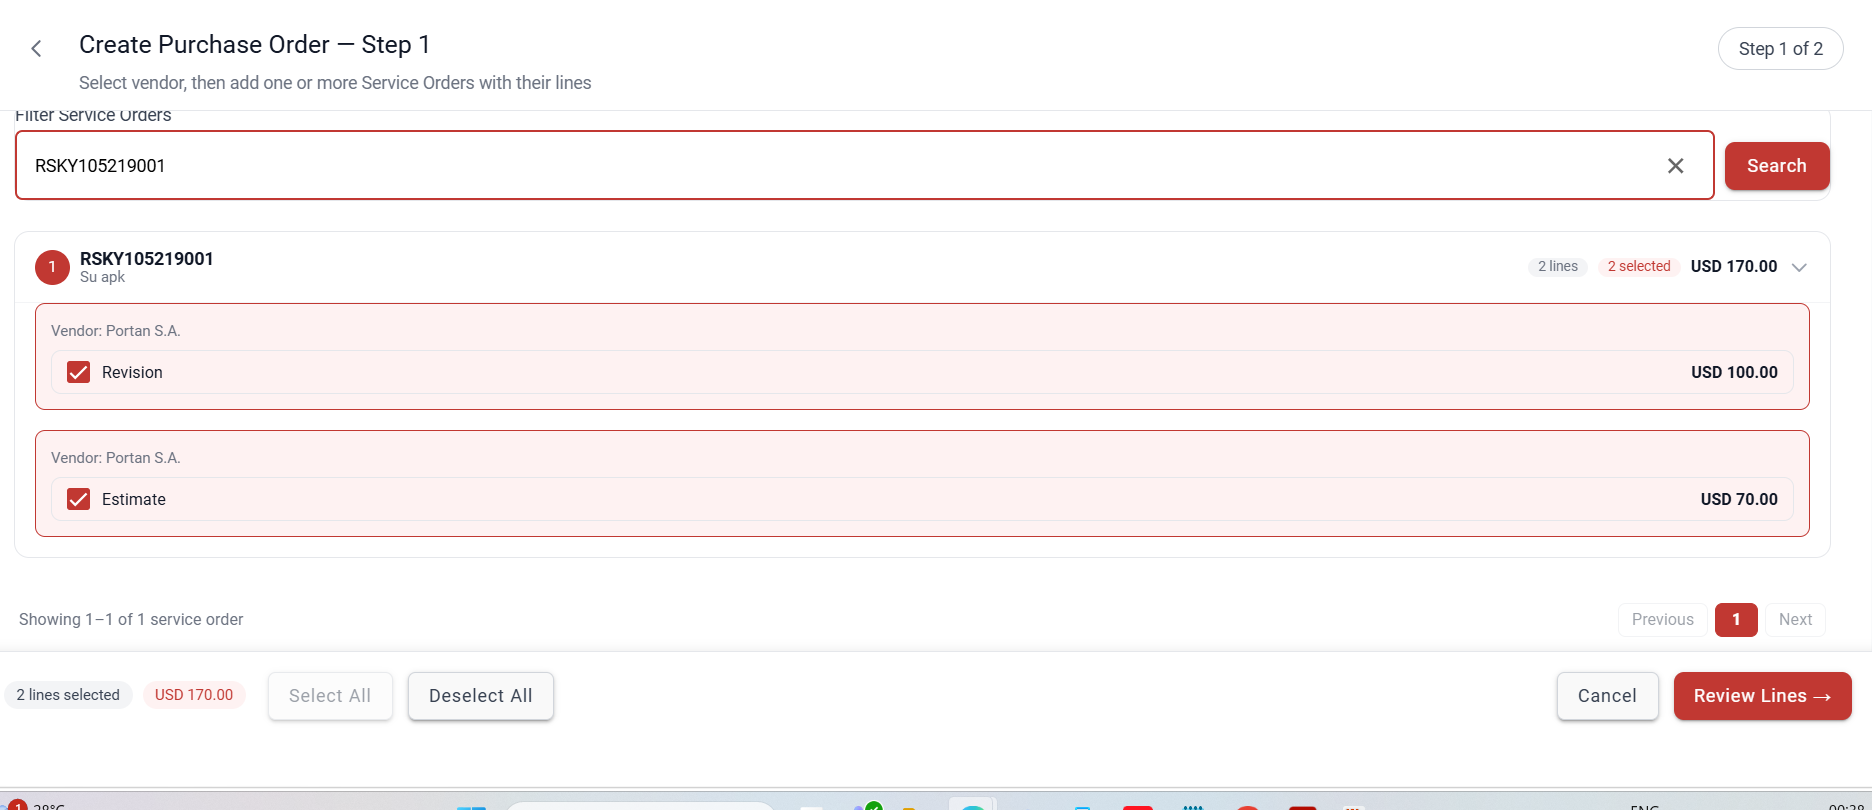
Note: Charge lines already used on another active PO are disabled and cannot be selected. This prevents duplicate ordering and invoicing.
Step 4: Review Selected Amounts
As lines are selected, the system automatically displays:
- Number of selected lines
- Total PO value
Additional options available:
- Select All
- Deselect All
After selecting the required lines, click Review Lines.
Step 5: Review and Update Line Details
In the Review Lines screen, each selected line displays:
- Service Order
- Description
- Rate
- Quantity
- Tax Type
- Tax Percentage
- Amount
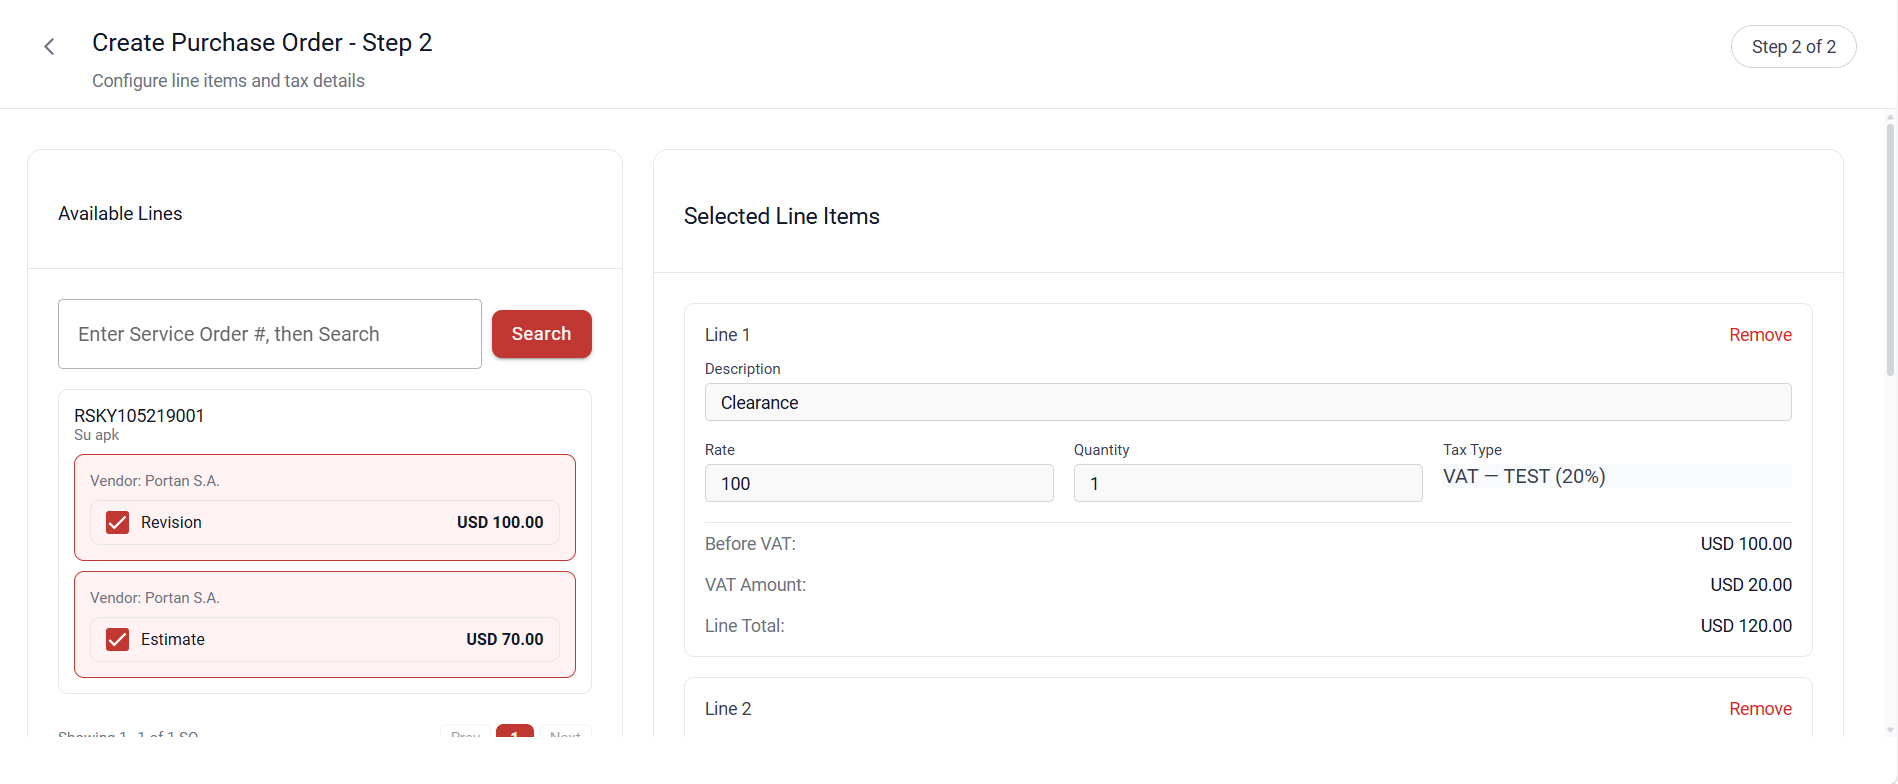
Rate
- Represents the cost per unit.
- Auto-populated from the Service Order.
- Can be modified if required.
- Must be greater than zero.
Quantity
- Defaults to 1.
- Can be updated.
- Must be greater than zero.
Amount
Calculated automatically:
Amount = Rate × Quantity
This field cannot be edited manually.
Step 7: Remove Unwanted Lines
If a line should not be included:
- Click the Remove option for the line.
- The line is removed from the PO.
Note: At least one line item must remain on the Purchase Order.
Step 8: Review PO Totals
The system automatically calculates the totals.
Subtotal
Subtotal = Sum of all line amounts
Tax
Tax = Amount × Tax %
(VAT lines only)
Total
Total = Subtotal + Tax
Example
Tax: USD 200.00
Total: USD 1,700.00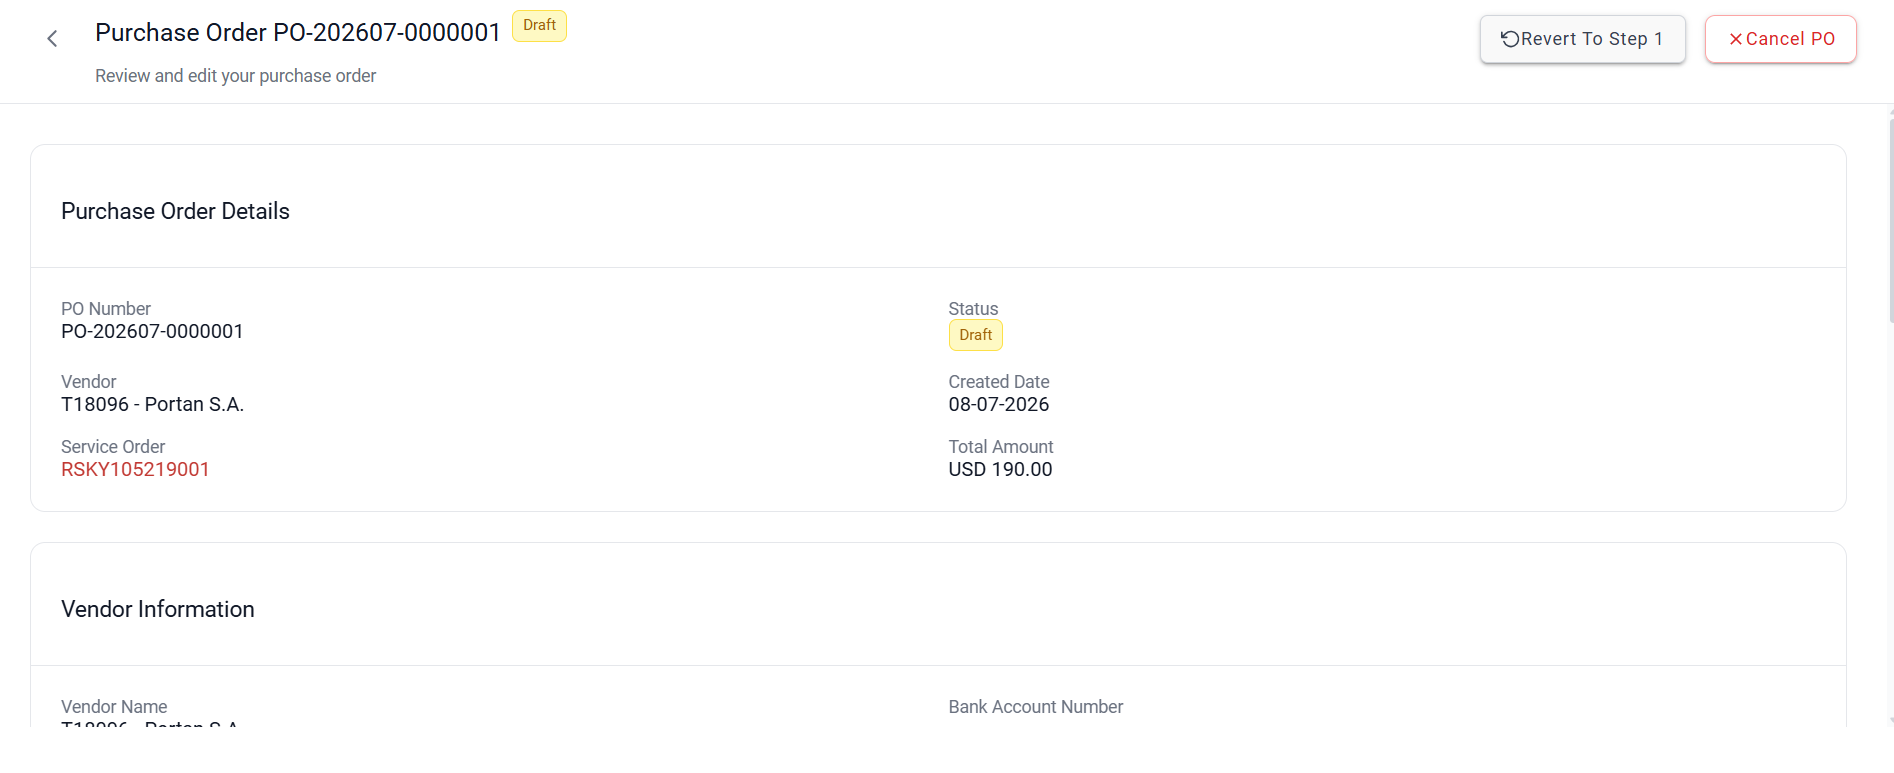
Step 9: Save the Purchase Order
After reviewing all information:
- Click Save Draft / Continue.
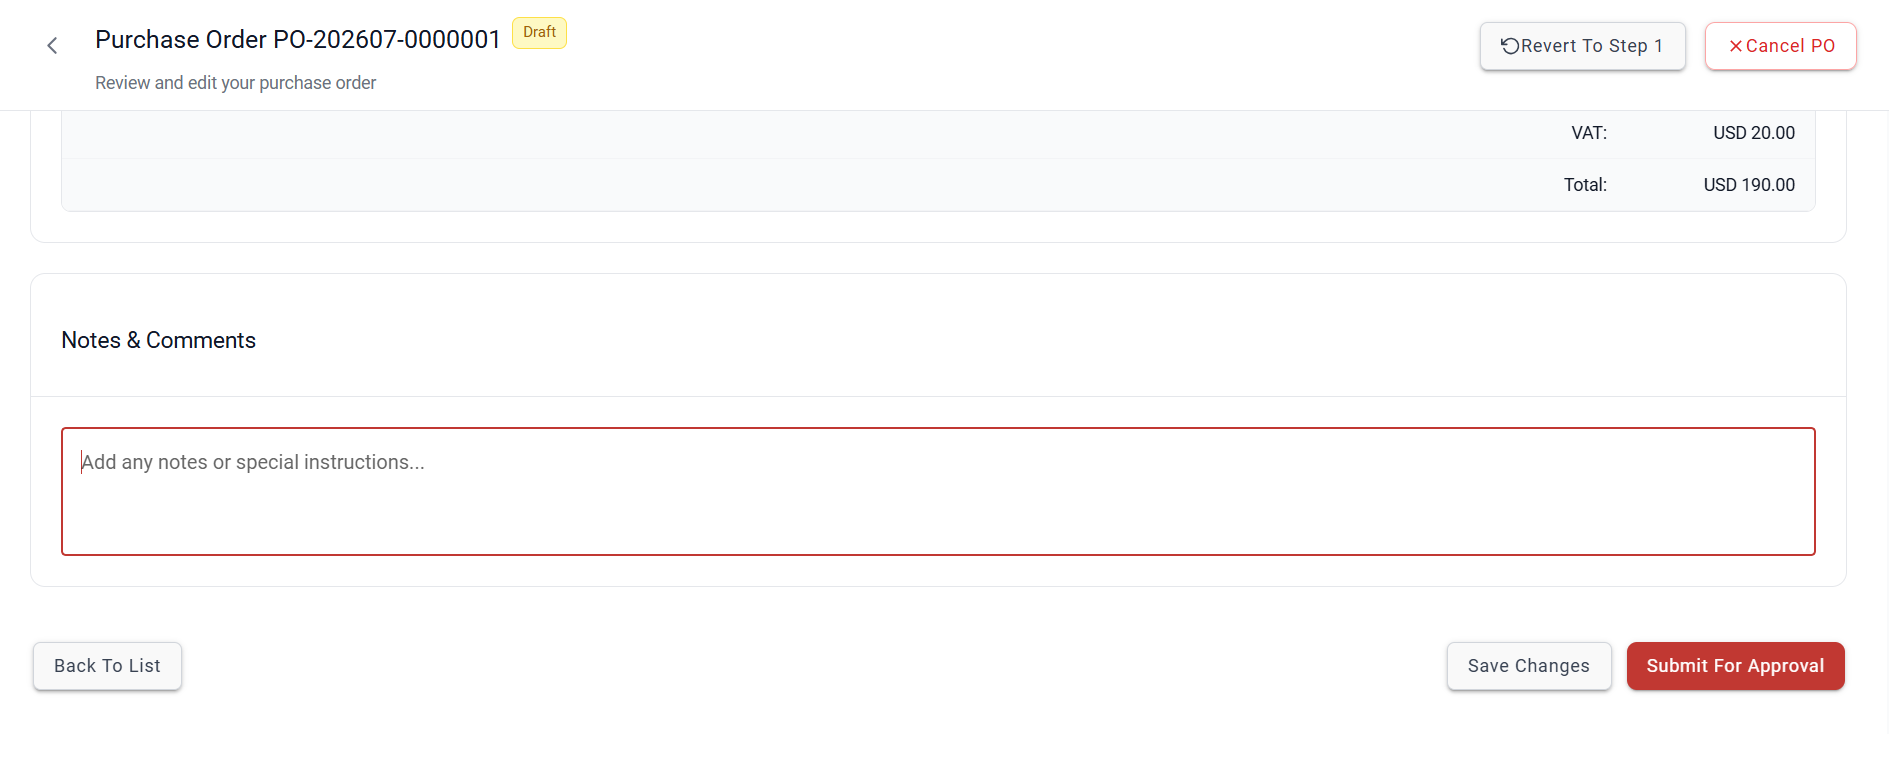
- The Purchase Order is saved with Draft status.
- The Draft Review screen opens for further review.
Summary
Creating a Purchase Order allows users to:
- Convert vendor accounting charge lines into formal Purchase Orders.
- Consolidate charges from one or more Service Orders.
- Review and adjust vendor costs before submission.
- Apply taxes and custom charges where required.
- Save the PO as a Draft for approval and further processing.
The Purchase Order will follow the standard lifecycle:
Draft → Issued → Ordered → Completed → Invoice.
Was this article helpful?
That’s Great!
Thank you for your feedback
Sorry! We couldn't be helpful
Thank you for your feedback
Feedback sent
We appreciate your effort and will try to fix the article