Purpose
This guide explains how to create a Vendor Invoice against an existing Purchase Order (PO), including selecting the Purchase Order, reviewing invoice lines, uploading the vendor invoice document, and submitting the invoice for approval.
Prerequisites
Before creating an invoice:
- You must have access to create and process Vendor Invoices.
- The vendor invoice document must be received from the supplier.
- The related Purchase Order must be in Completed status.
- Verify the invoice number, invoice date, vendor details, and invoice amount before processing.
Step 1: Open the Invoice Screen
Navigate to the Invoice list and click the New Invoice button located in the top-right corner of the screen.
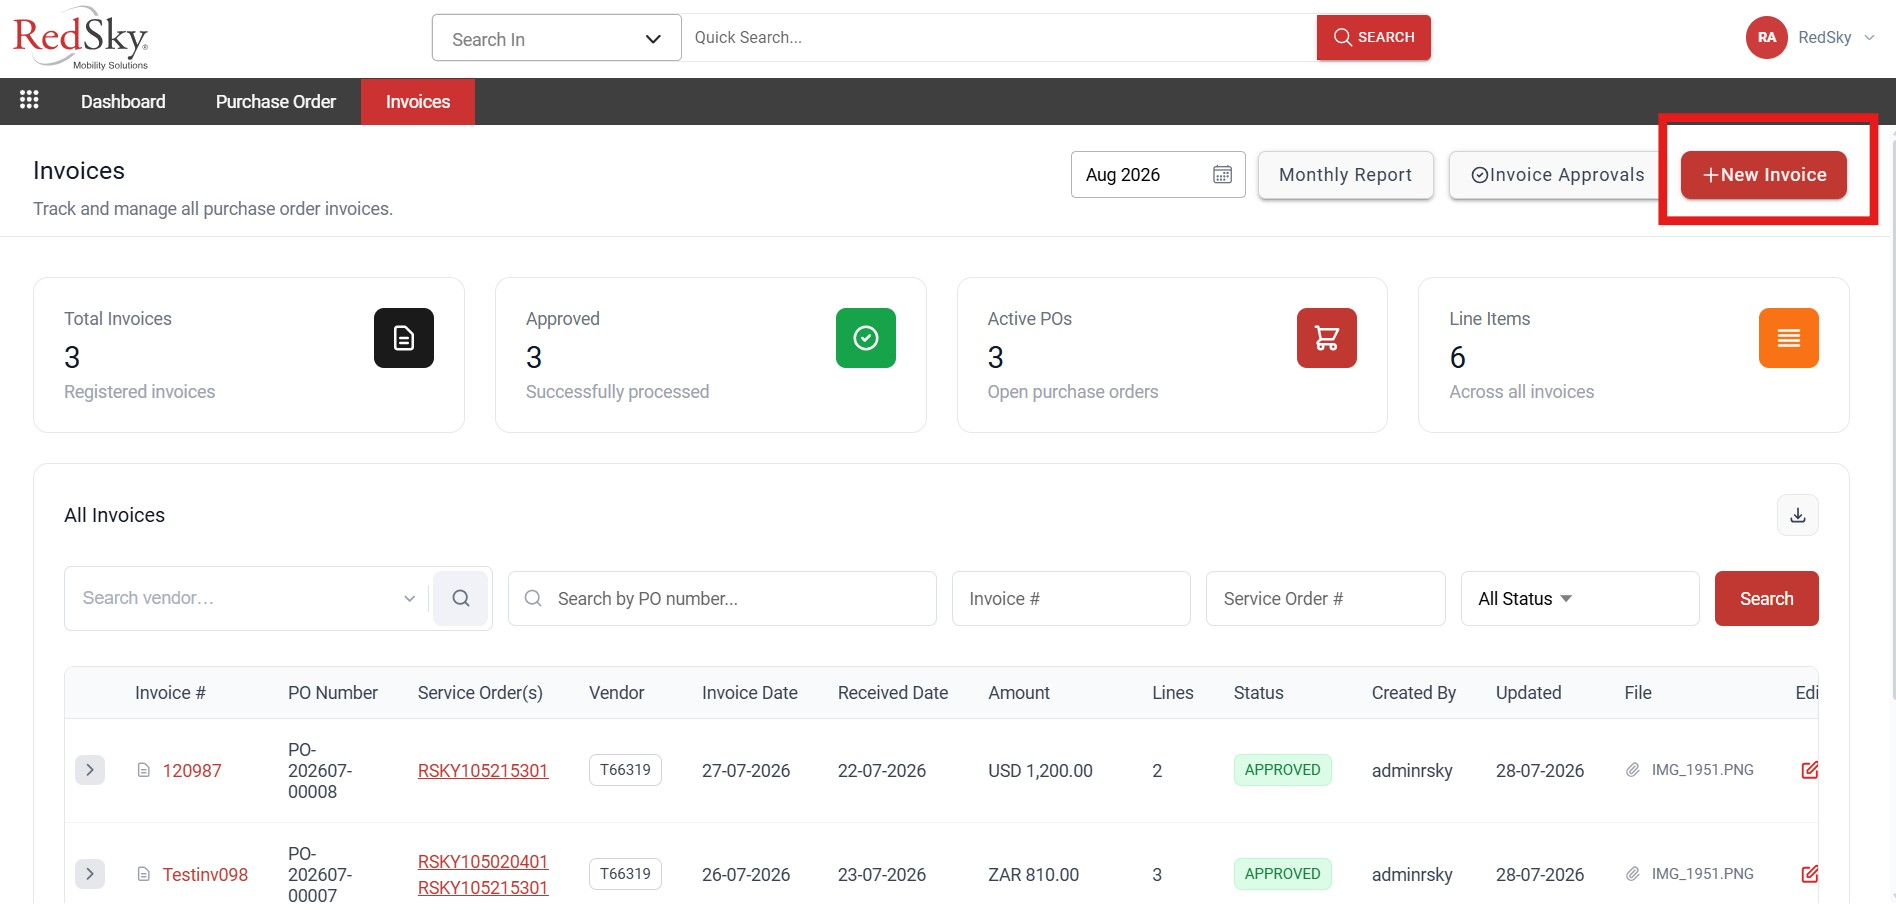
The Invoice Creation screen displays the following sections:
- Invoice Information
- Purchase Order Lines
- Invoice Lines
- Vendor Invoice Upload
- Additional Notes
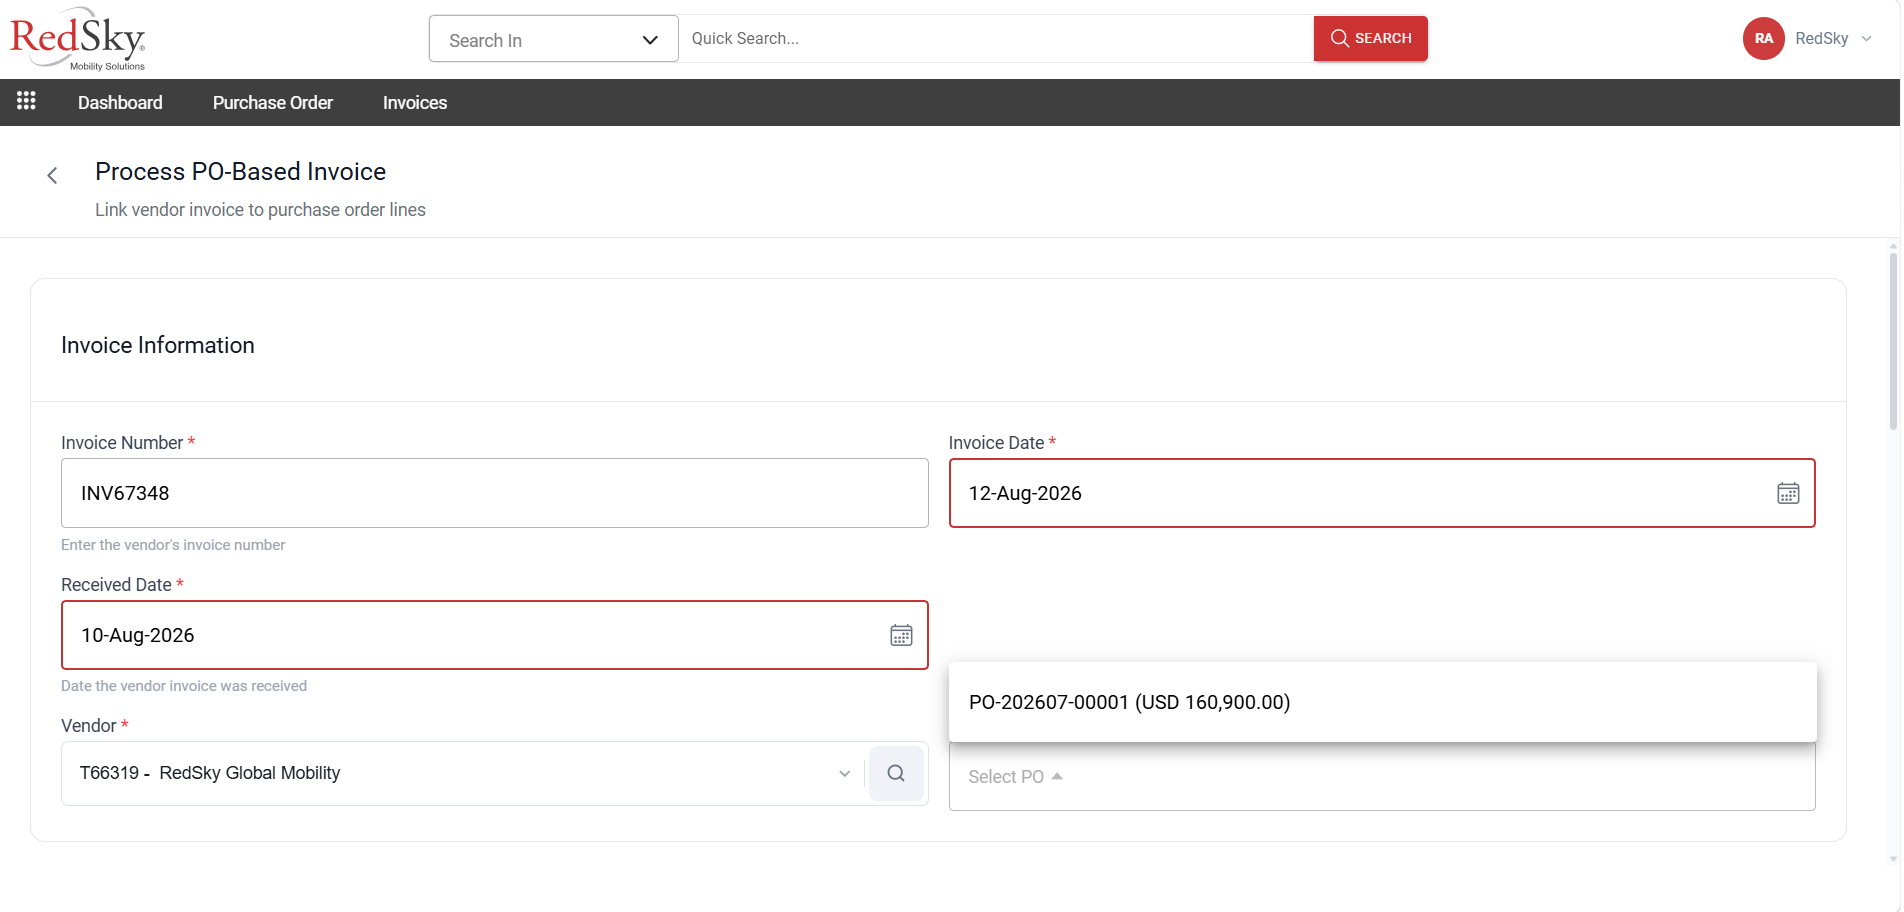
Step 2: Enter Invoice Information
Complete the Invoice Information section.
- Enter the vendor's Invoice Number.
- Select the Invoice Date.
- Enter the Received Date, which is the date the invoice was received from the vendor.
- Select the Vendor.
- Select the related Purchase Order. Once the vendor is selected, the system displays all available Purchase Orders for that vendor in the dropdown list.
Step 3: Select Purchase Order Lines
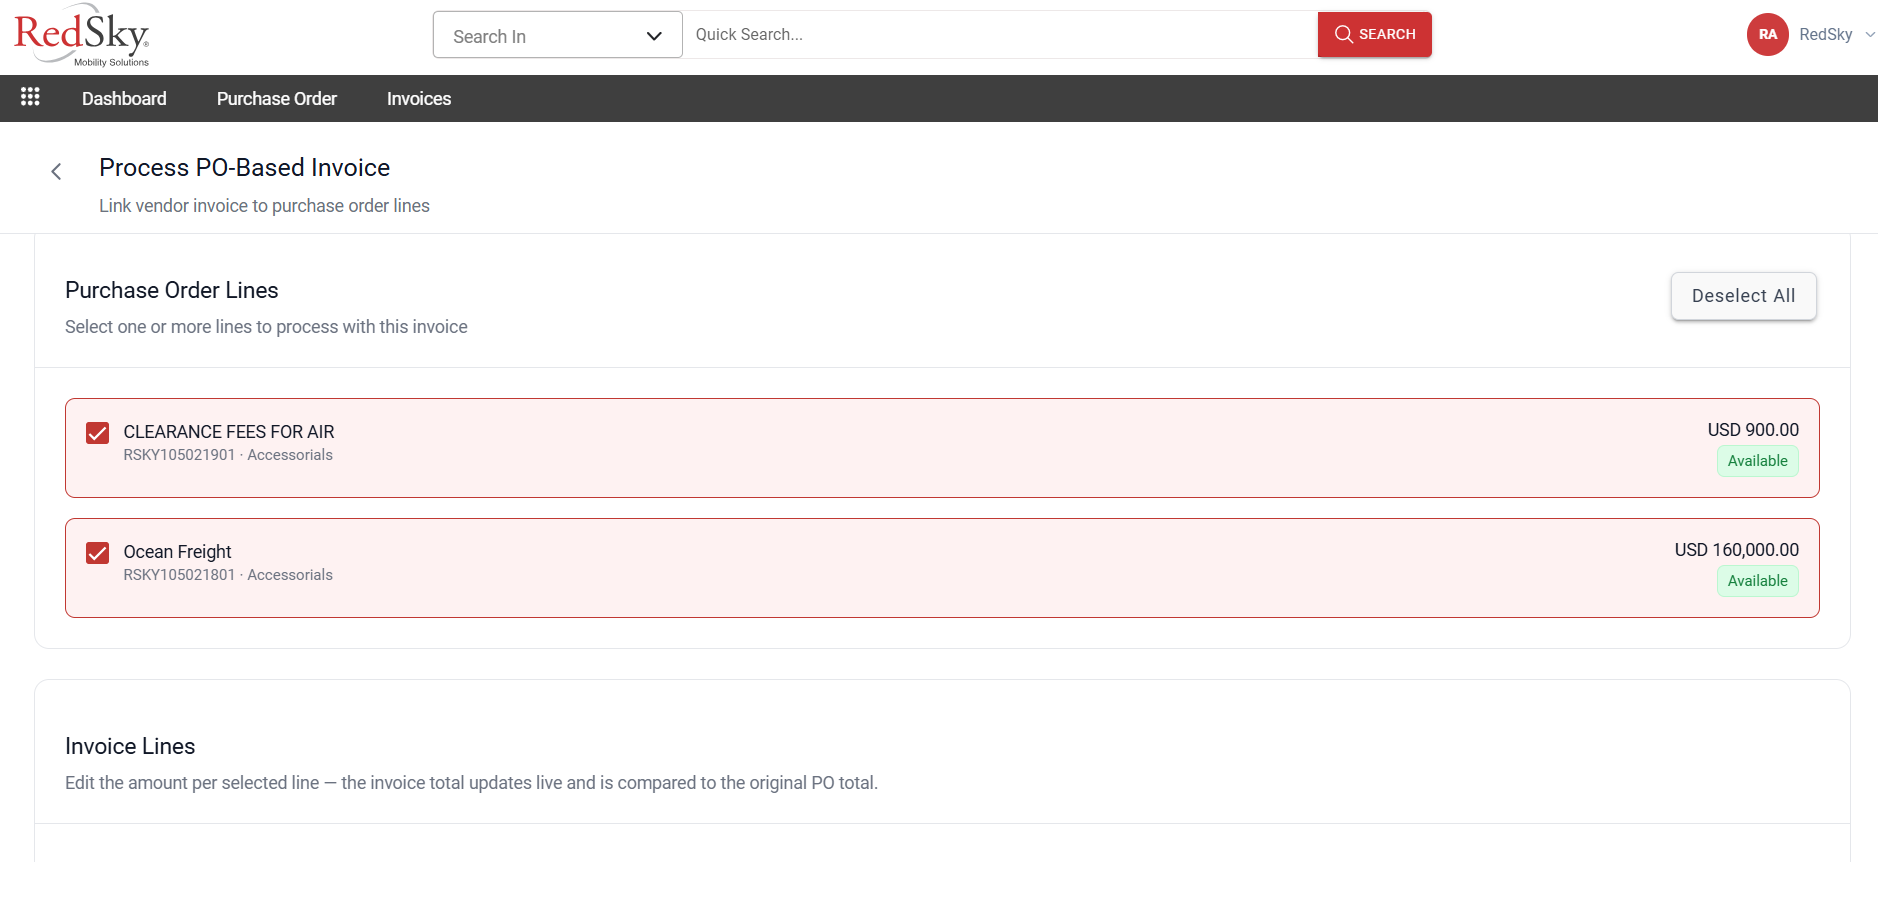
After completing the Invoice Information section and selecting a Purchase Order, the system automatically displays all lines associated with the selected PO.
- Review all available Purchase Order lines.
- Select the required lines by clicking the checkbox next to each line.
- The selected lines will be included in the invoice.
Step 4: Review and Update Invoice Lines
The selected Purchase Order lines appear in the Invoice Lines section in a table format.
- Review the selected invoice lines.
- Update the Subtotal Amount if required.
- The system automatically recalculates the applicable tax and total amount.
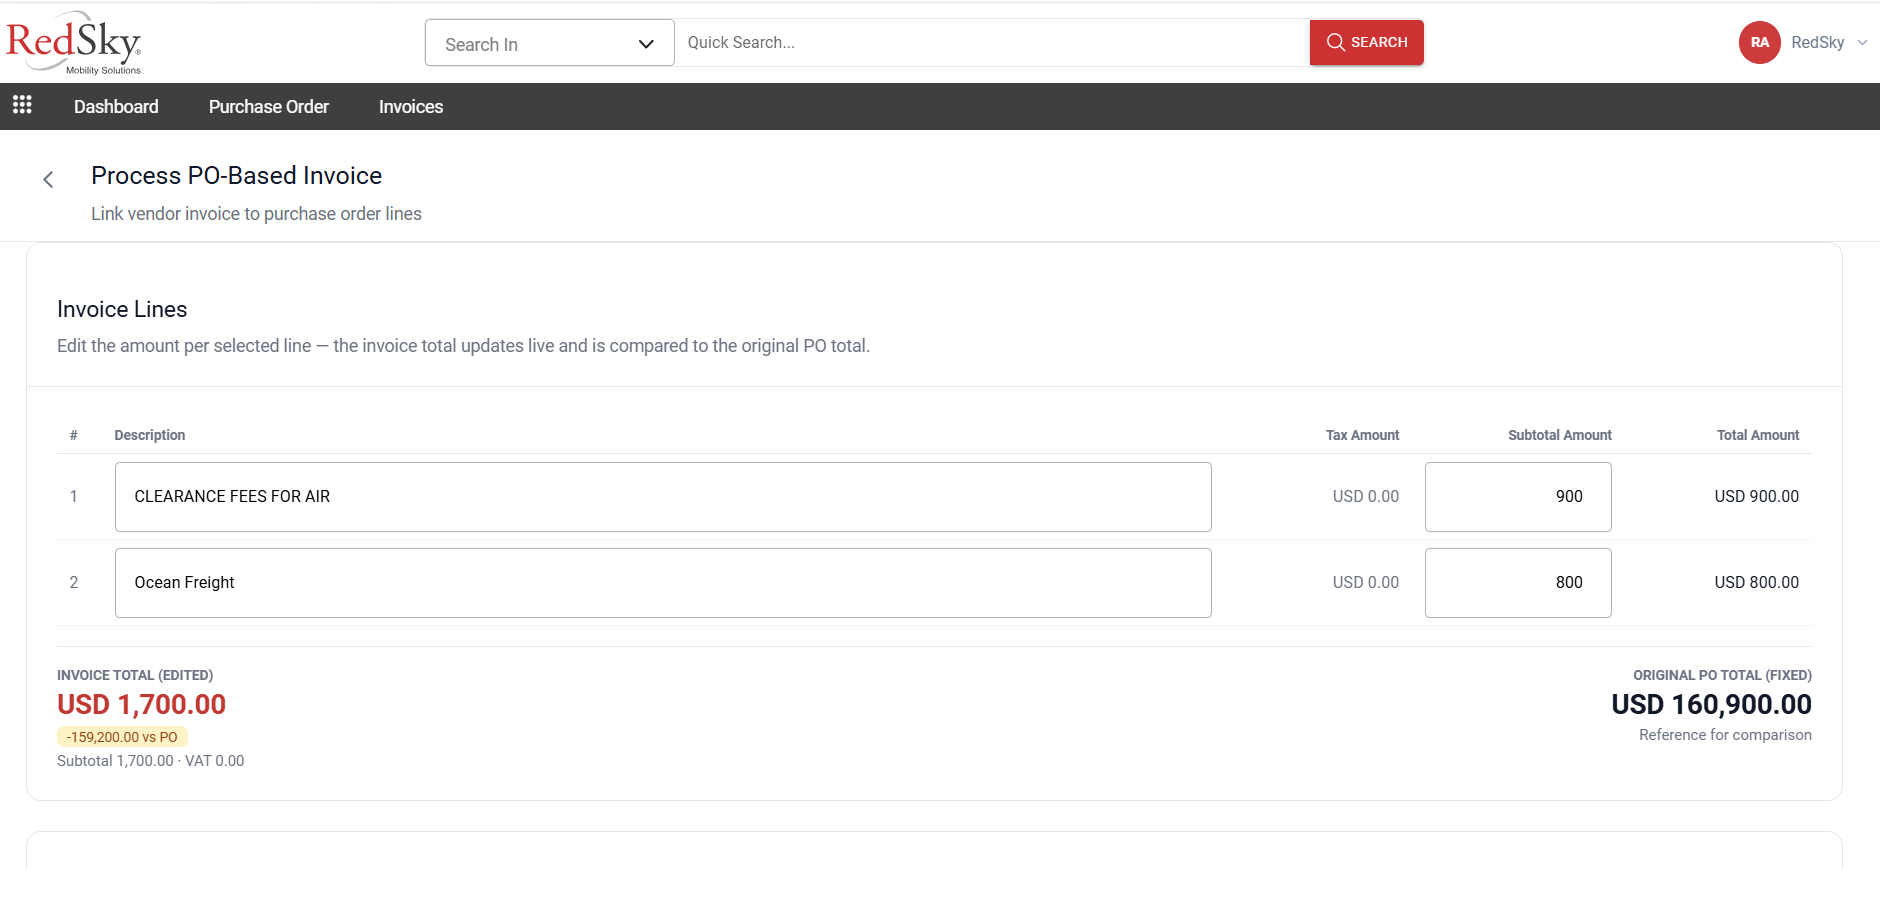
- The invoice Subtotal, Tax Amount, and Total Amount on the left side of the screen.
- The original Purchase Order amounts on the right side of the screen.
- A comparison of the invoiced values against the original PO values to help identify any changes made during invoicing.
Step 5: Upload the Vendor Invoice
Attach the invoice received from the vendor.
- Click Upload Invoice.
- Select the invoice file from your device or drag and drop the document into the upload area.
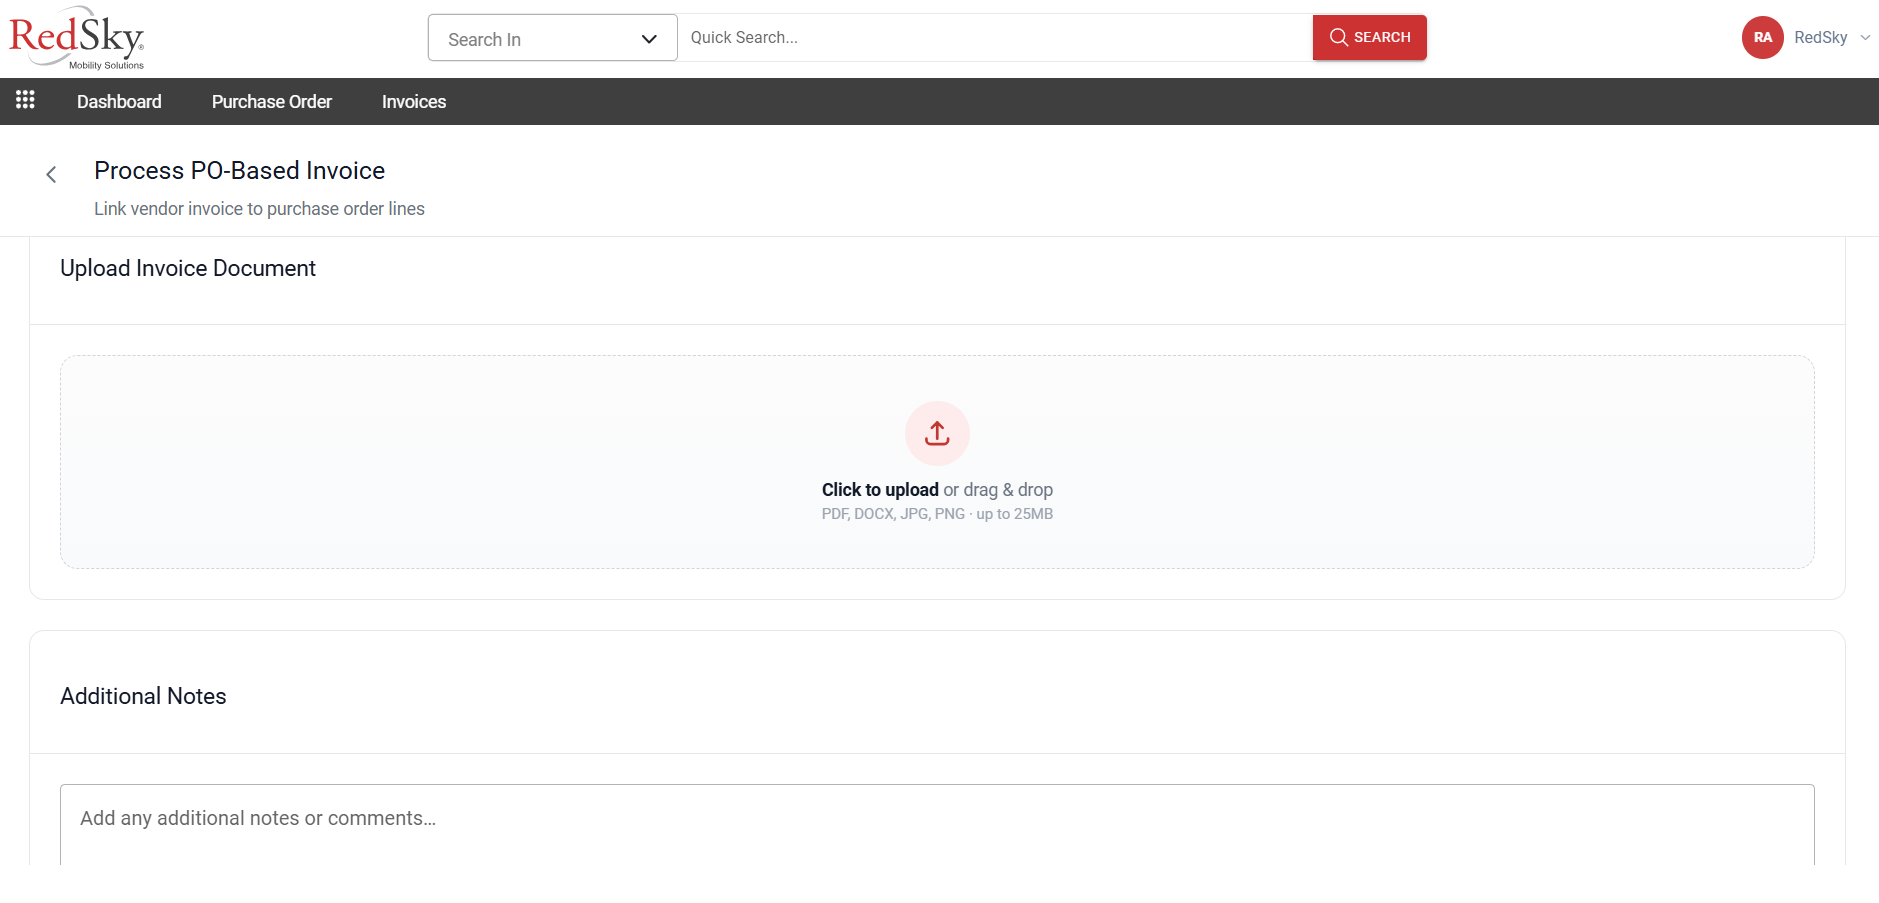
Step 6: Add Additional Notes
If required, enter any comments, explanations, or supporting information in the Additional Notes field.
Step 7: Save the Invoice
Once all details have been reviewed:
- Review all invoice information and selected lines.
- Click Save Invoice.
- The invoice is saved and submitted for approval.
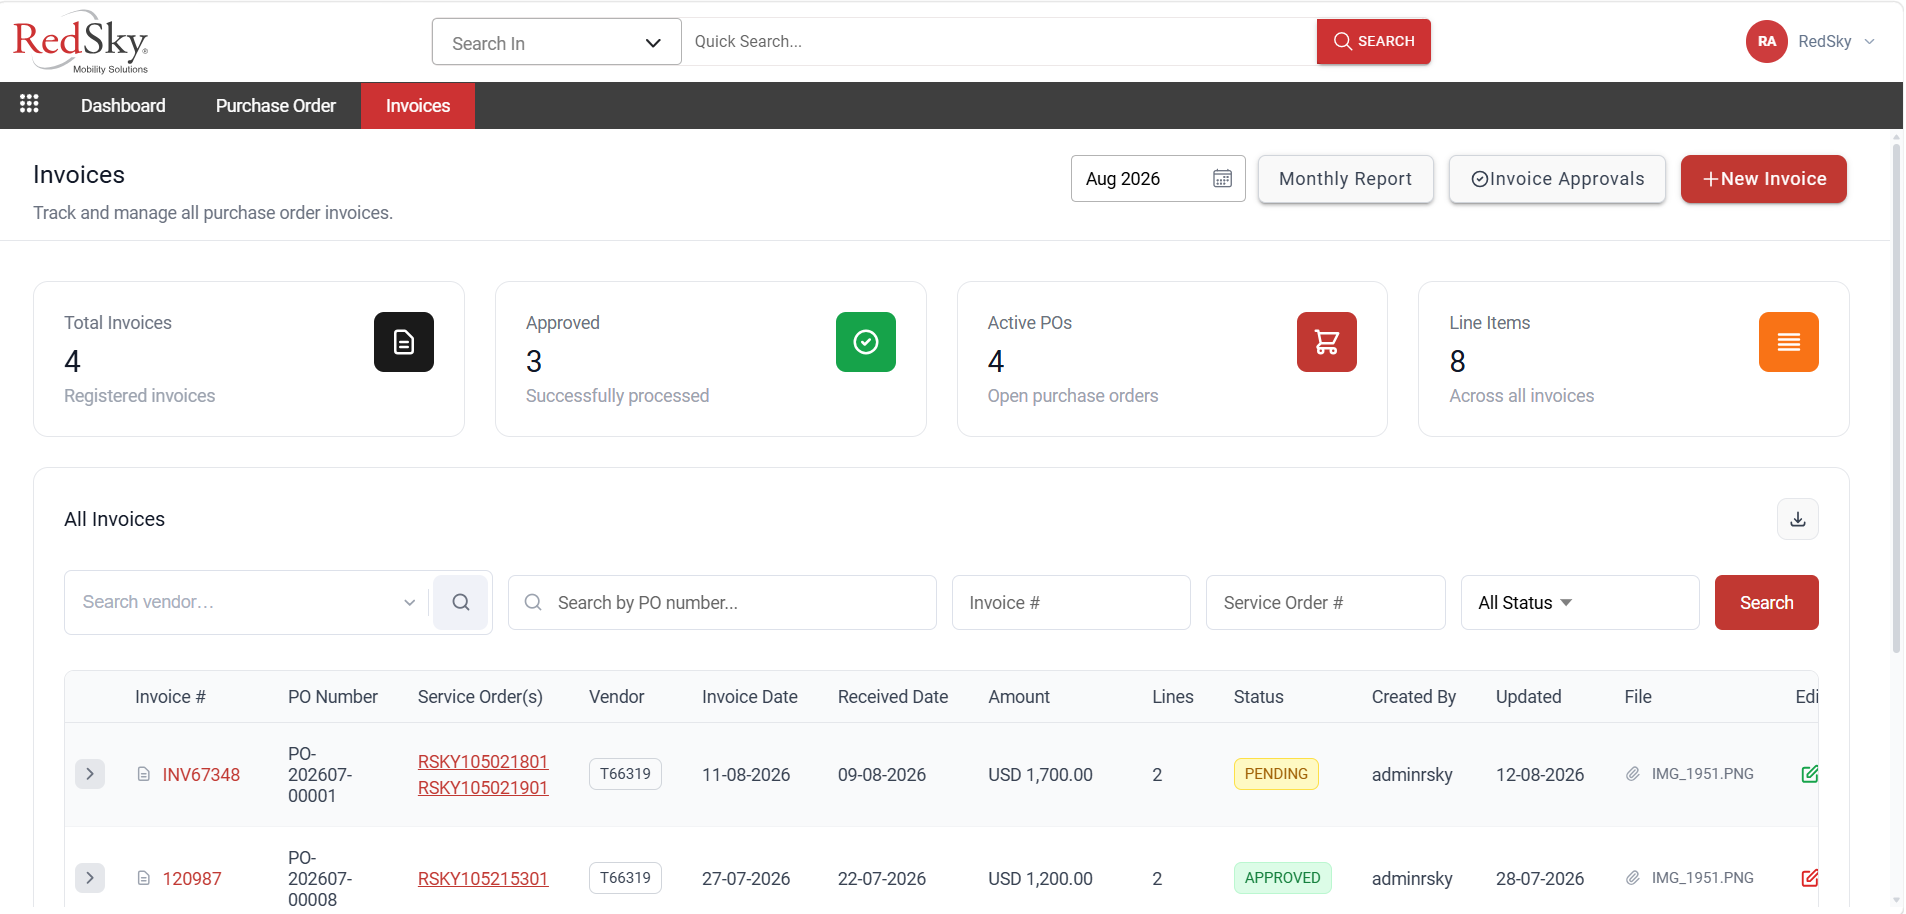
After saving:
- The invoice appears in the Invoice List page.
- The invoice status is displayed as Pending.
- The invoice can still be edited while awaiting approval.
- The uploaded invoice document remains attached to the invoice record for future reference.
Summary
Creating a Vendor Invoice involves the following steps:
- Enter Invoice Information – Provide invoice details and select the related Purchase Order.
- Select PO Lines – Choose the Purchase Order lines to be included in the invoice.
- Review Invoice Lines – Verify and update invoice values if required.
- Upload Vendor Invoice – Attach the invoice document received from the vendor.
- Add Notes – Include any supporting comments.
- Save Invoice – Submit the invoice into the approval workflow.
The invoice is then available in the Invoice List with a Pending status and can be edited until it is approved.
Was this article helpful?
That’s Great!
Thank you for your feedback
Sorry! We couldn't be helpful
Thank you for your feedback
Feedback sent
We appreciate your effort and will try to fix the article