Purpose
This guide explains how crew members can edit or modify the details of items added to rooms in the Inventory tab of the Ops App, including updating item information, photos, conditions, and handling instructions.
Prerequisites
- A crew login account has been created.
- The crew has received valid login credentials (username and password).
- The Ops App is installed on the device.
- A job is assigned to the crew.
- The survey has been completed, and survey details (items) are available under the respective rooms.
- At least one room has been added in the Inventory tab.
- At least one item has been added to a room.
For instructions on how to add items, refer to:
https://redskymobility.freshdesk.com/support/solutions/articles/43000779851-how-to-add-items-in-the-inventory-tab-
Step 1: Log In to the Ops App
- Open the Ops App on your device.
- Enter the provided username and password.
- Tap Login
- After successful login, you will be directed to the Dashboard.
Step 2: Open an Assigned Job
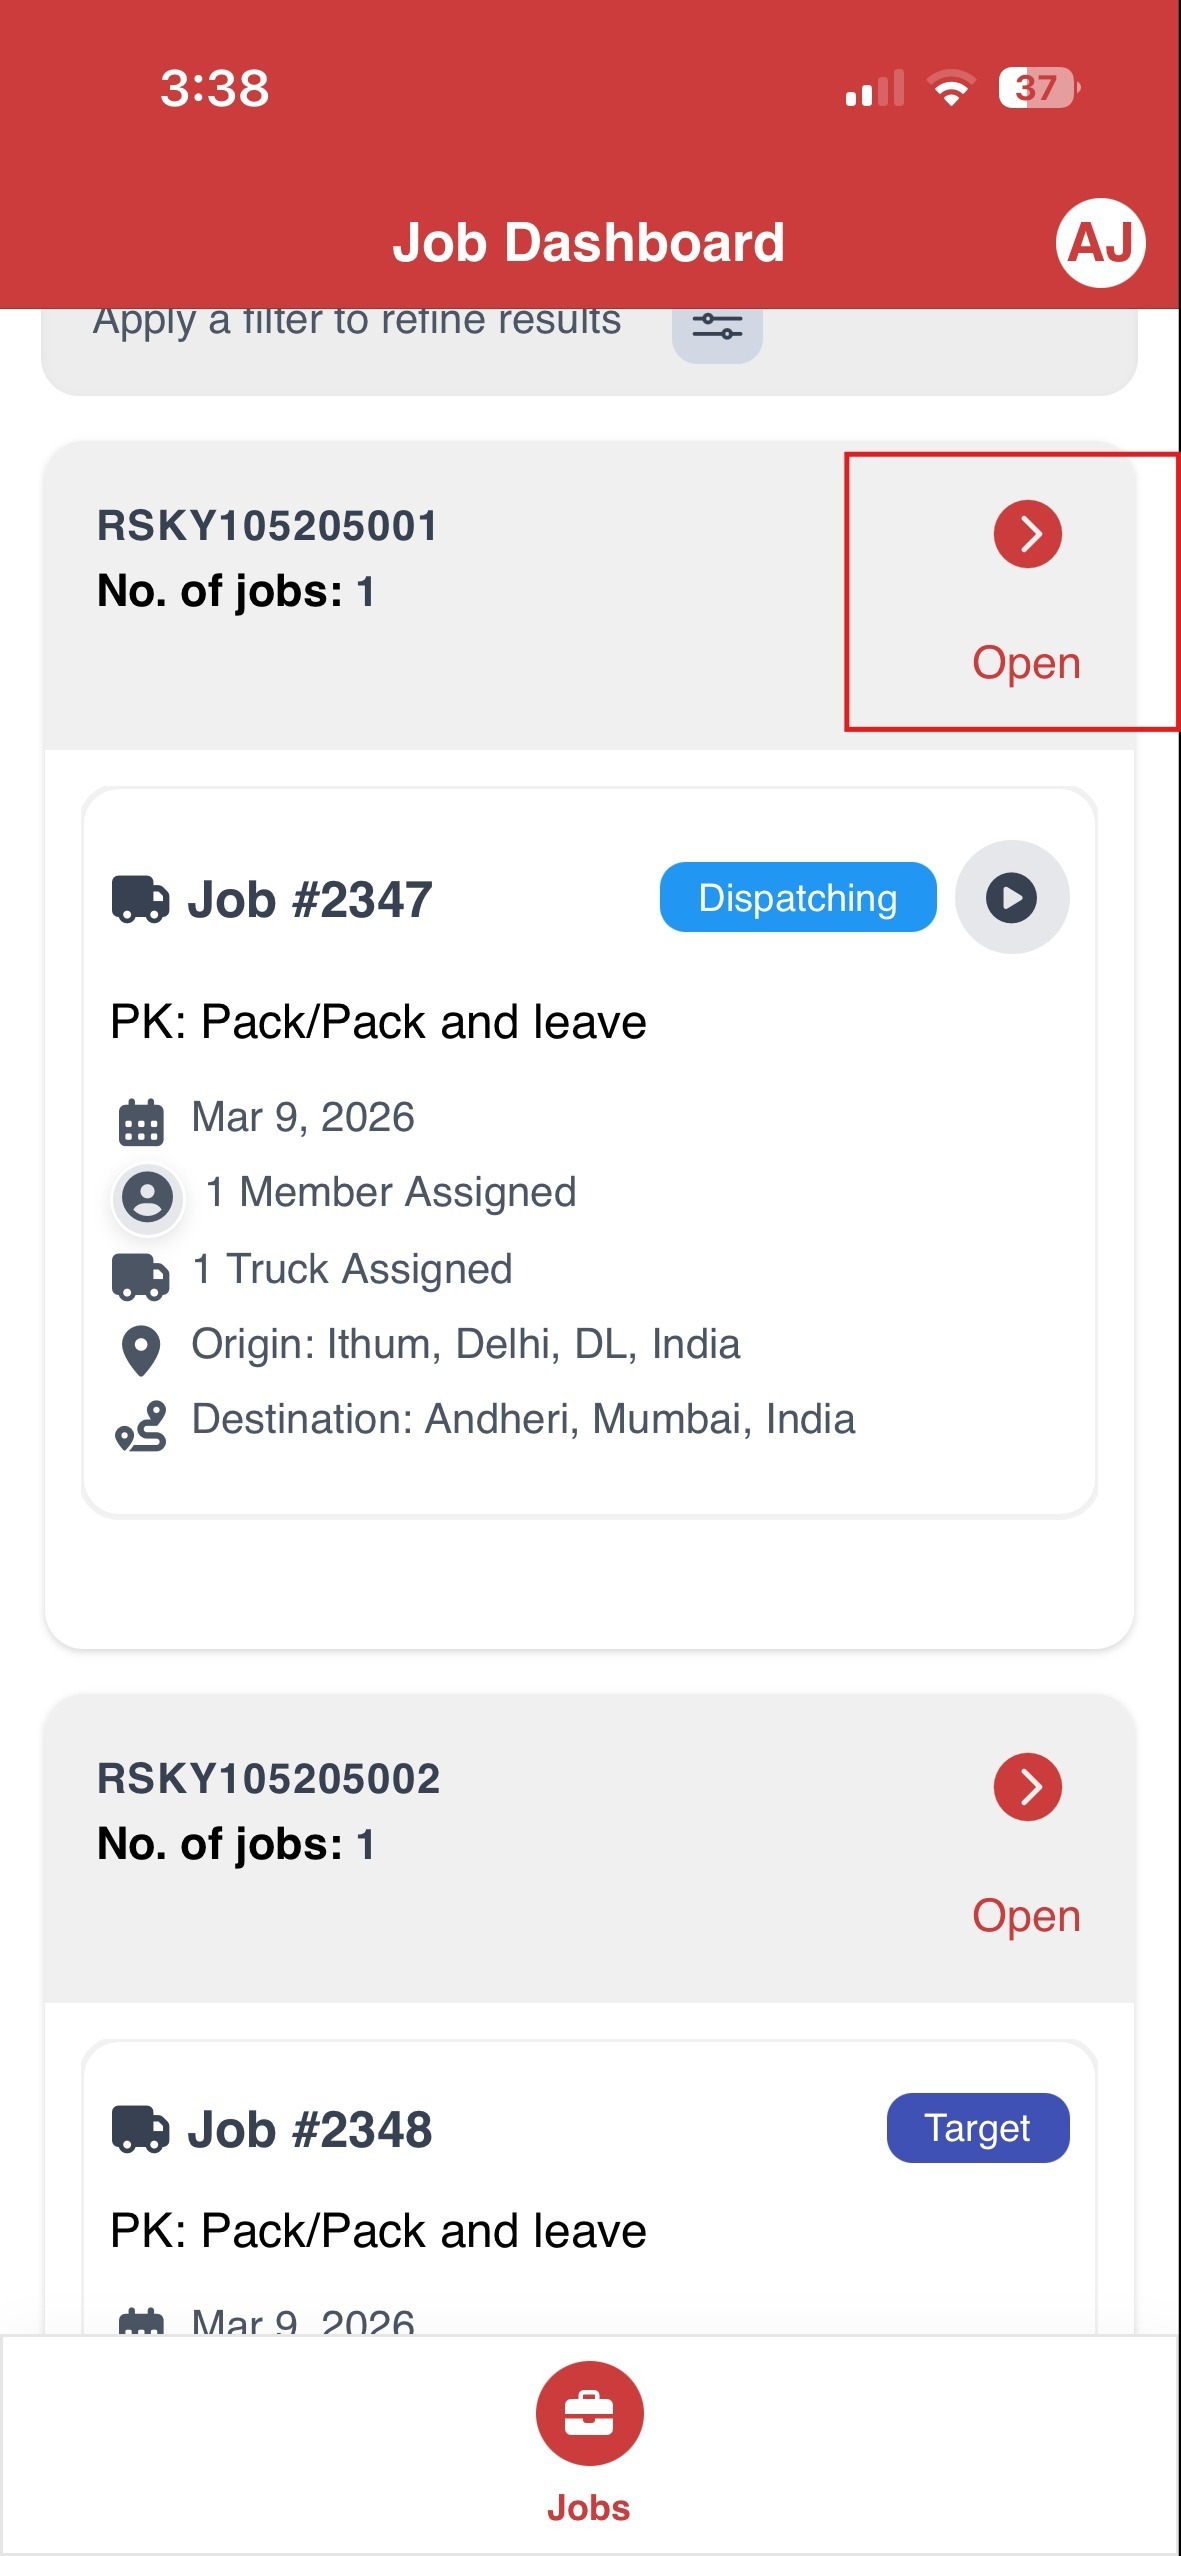
- From the Dashboard, locate your assigned job.
- Tap the Open button located at the top left of the job ticket to open it and start working.
Step 3: Access the Inventory Tab
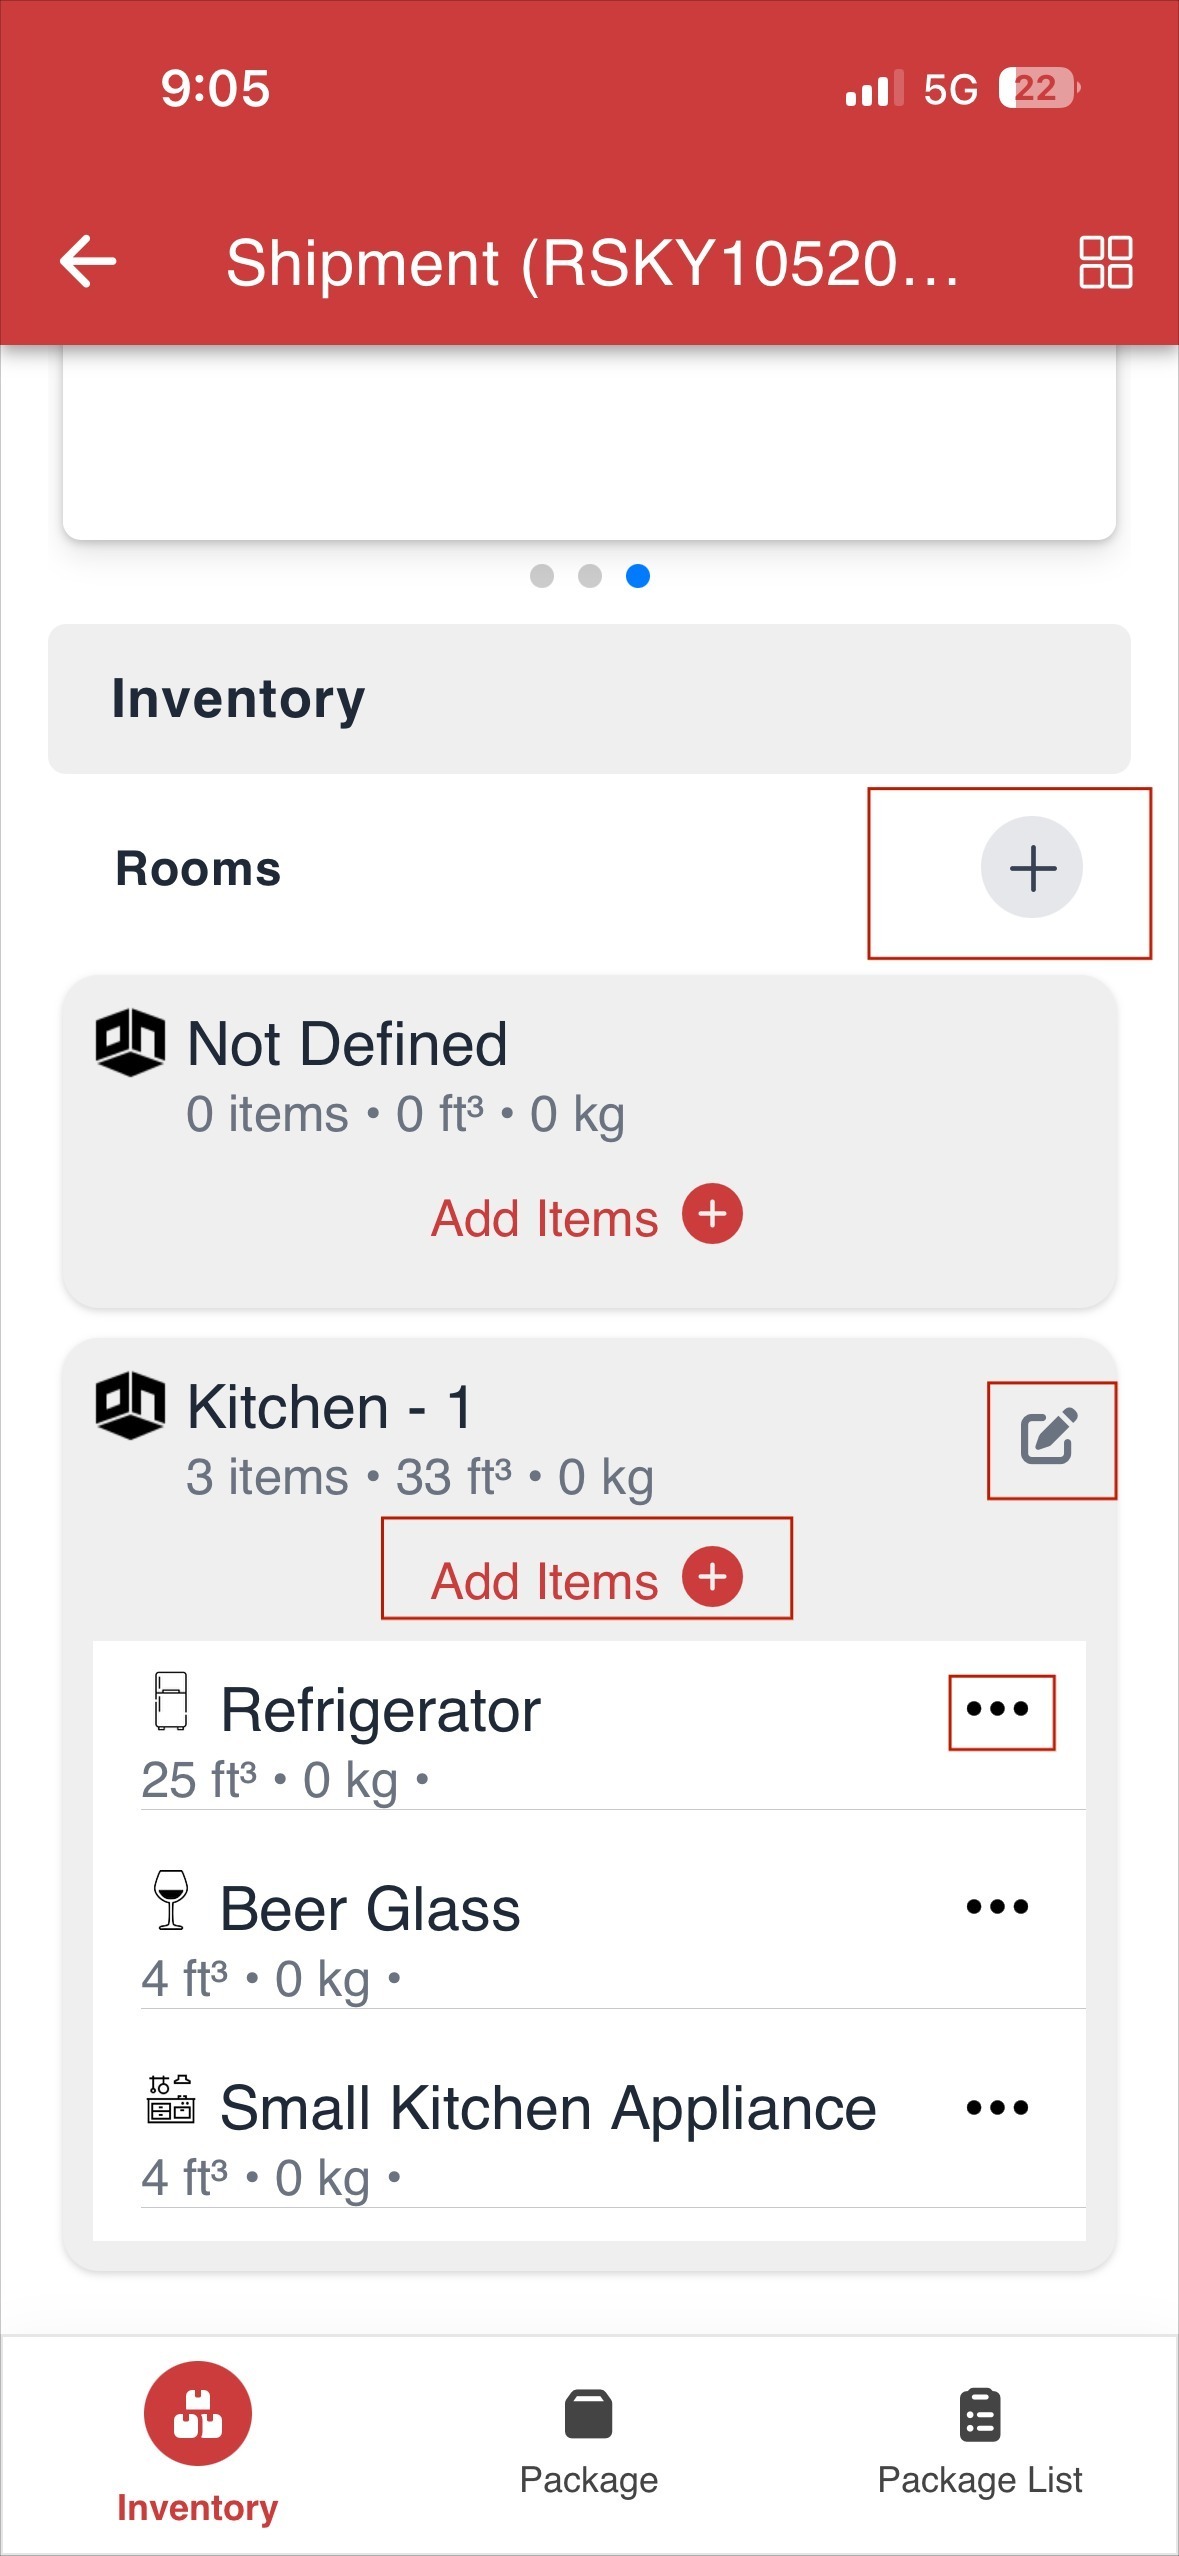
- Navigate to the Inventory tab inside the job.
- Inventory is displayed room-wise, with all items listed under their respective rooms.
Step 4: Open Item Options
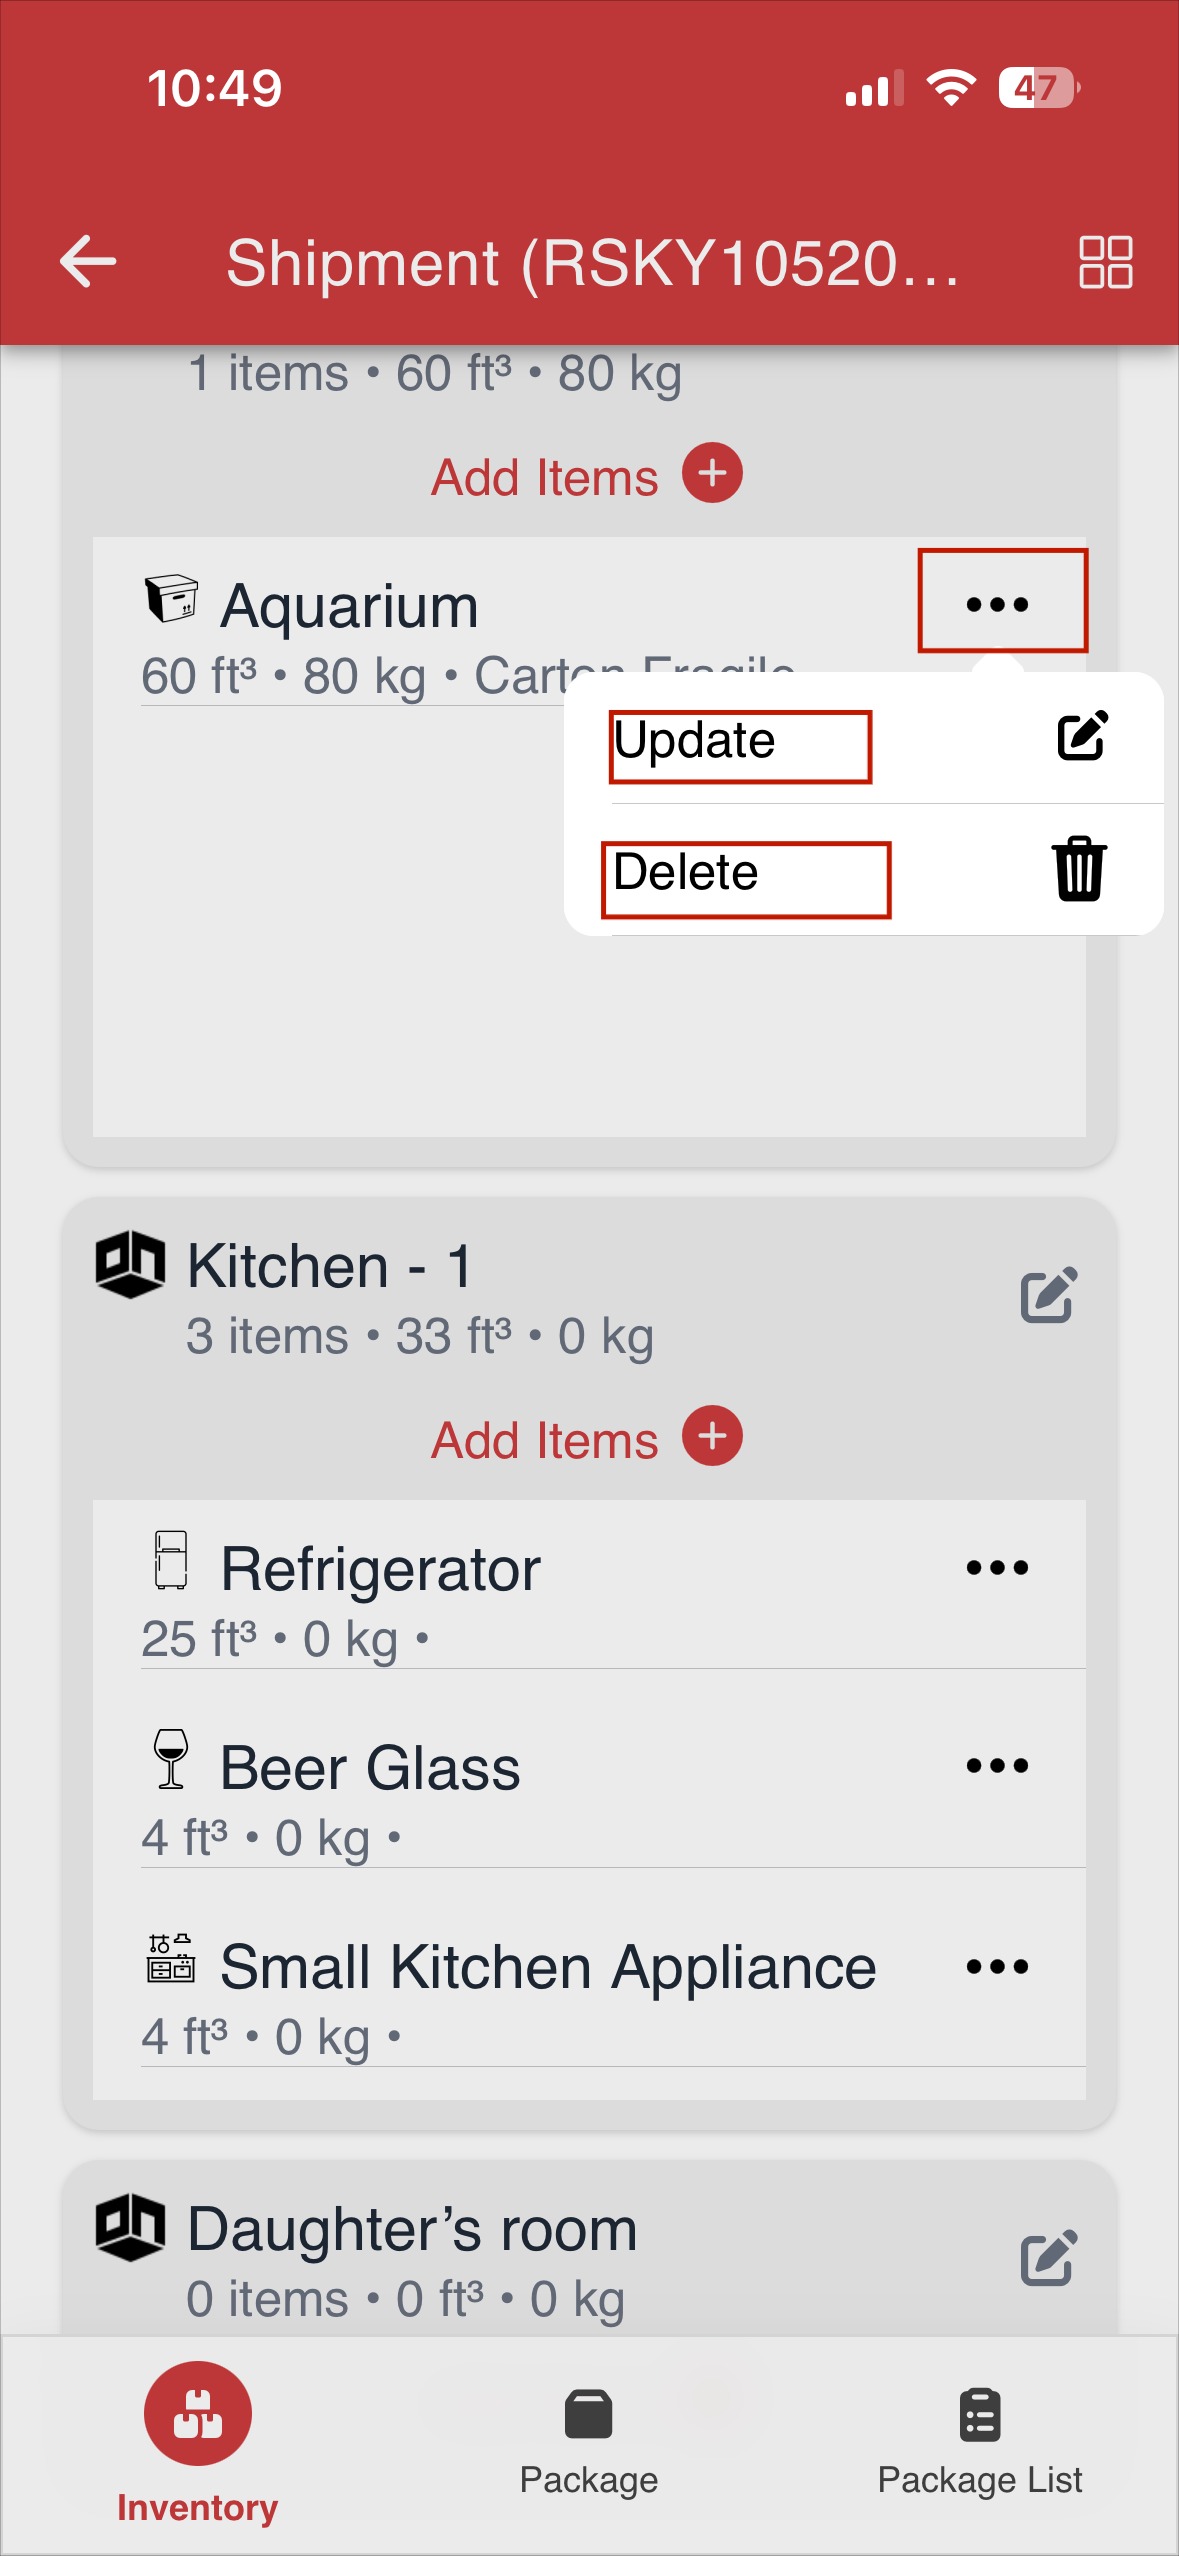
- Locate the item you want to edit under the selected room.
- Tap on the three horizontal dots (menu) next to the item.
- The following options will be displayed:
- Delete
- Update
Delete Item
- Tap Delete to remove the item from the inventory list.
Update Item
- Tap Update to modify the item details.
- The Edit Item screen will open.
Step 5: Edit Item Details
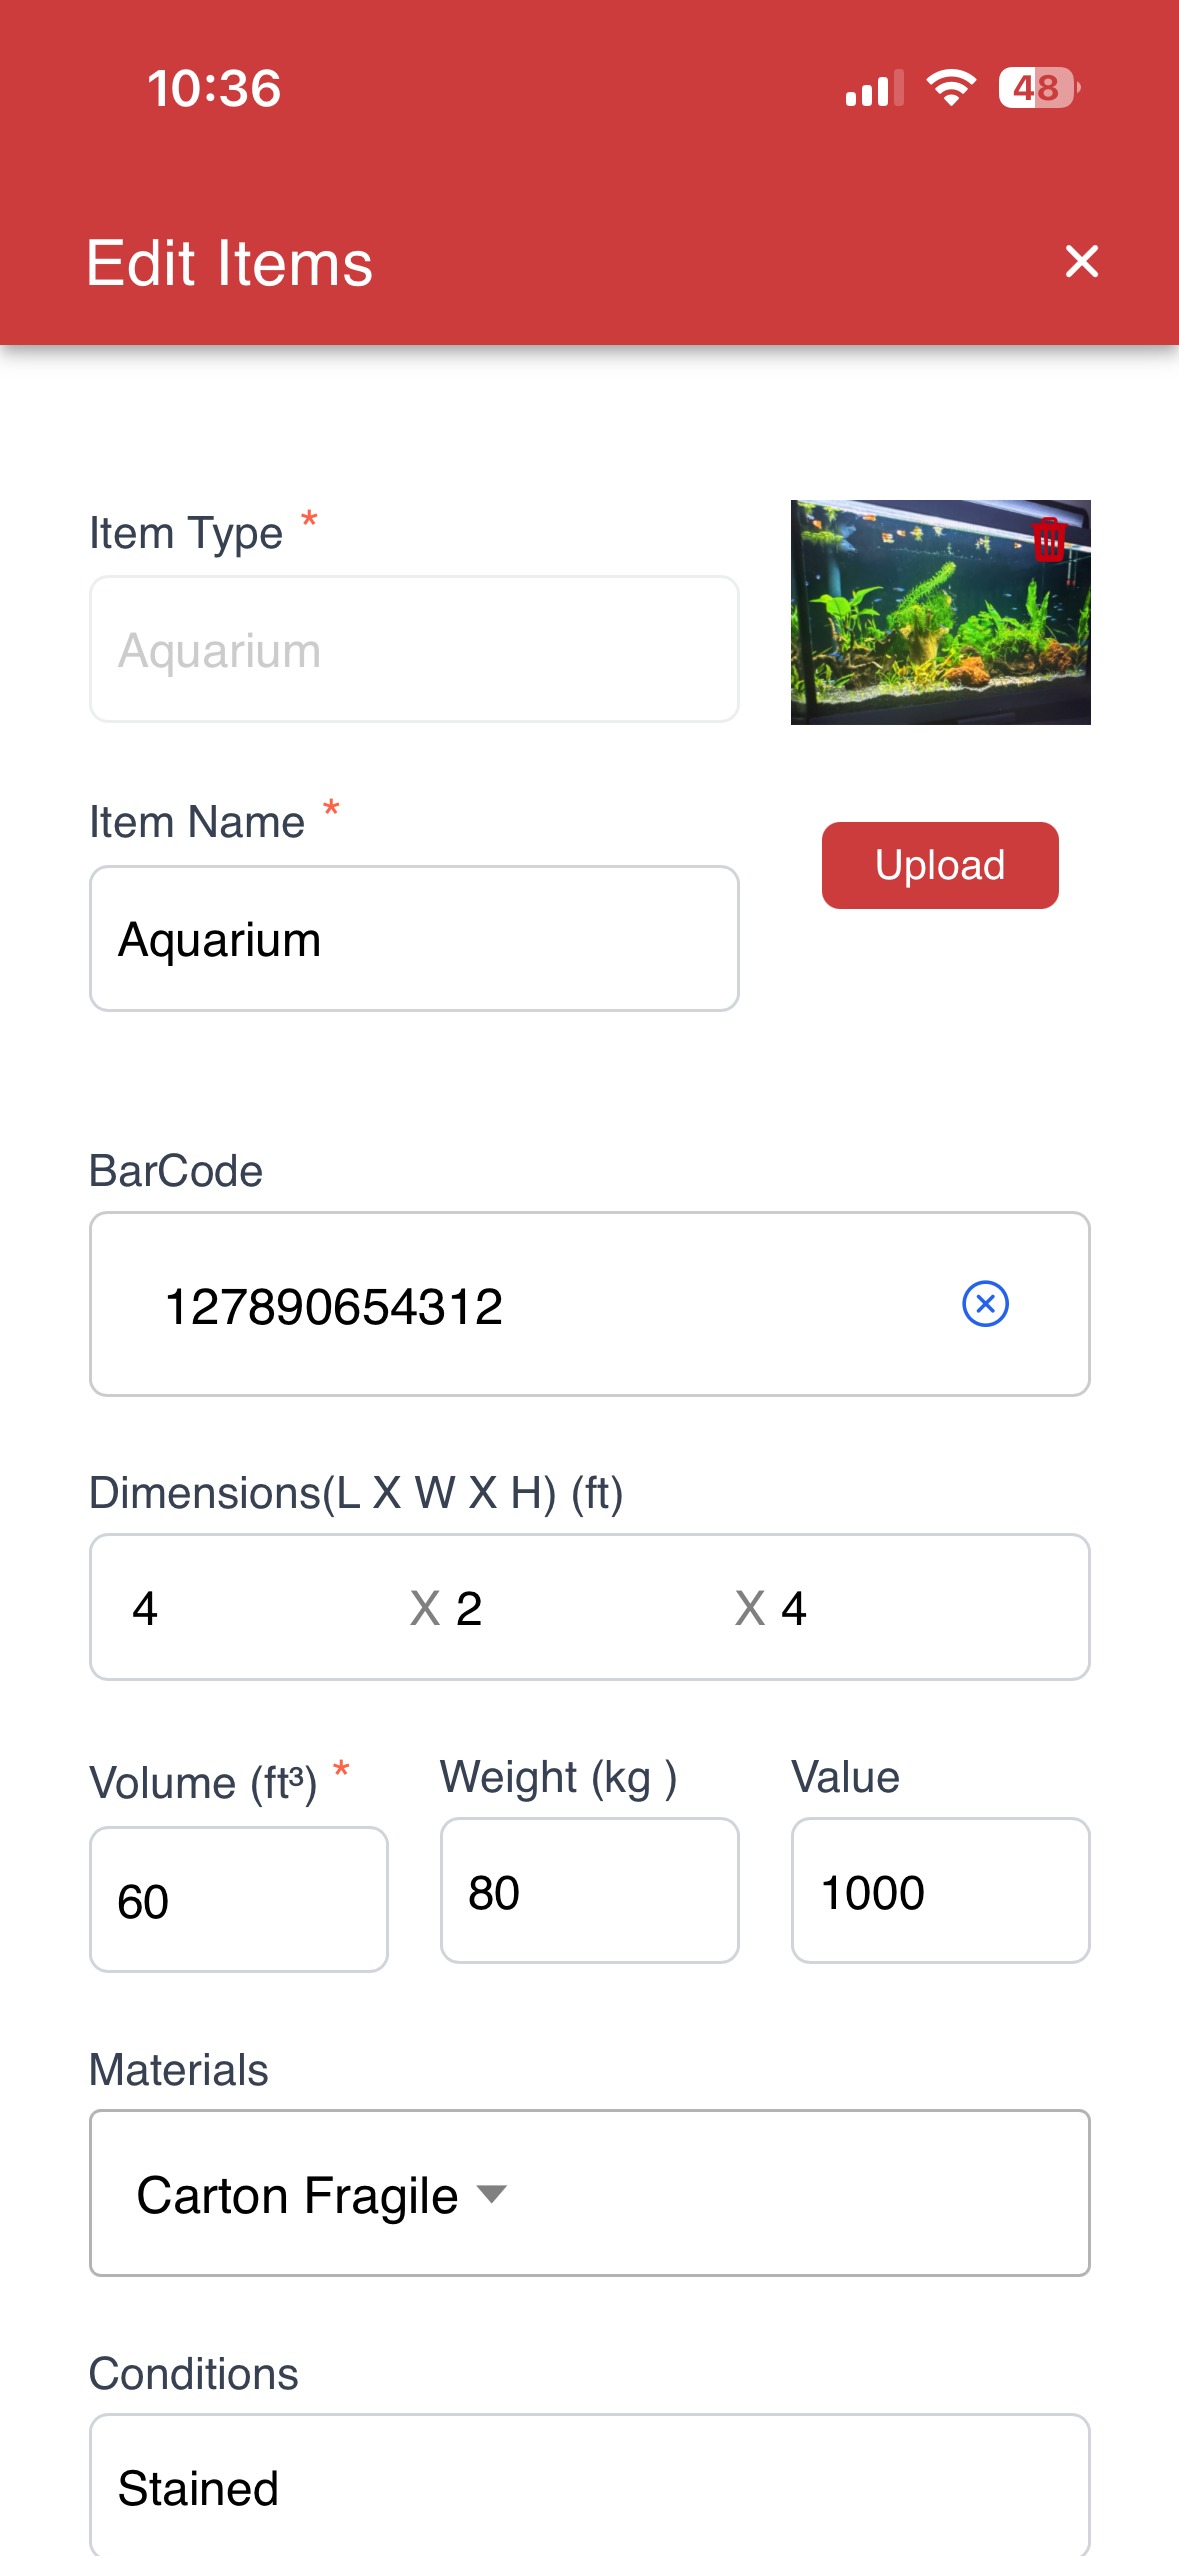
On the Edit Item screen, you can update the following fields:
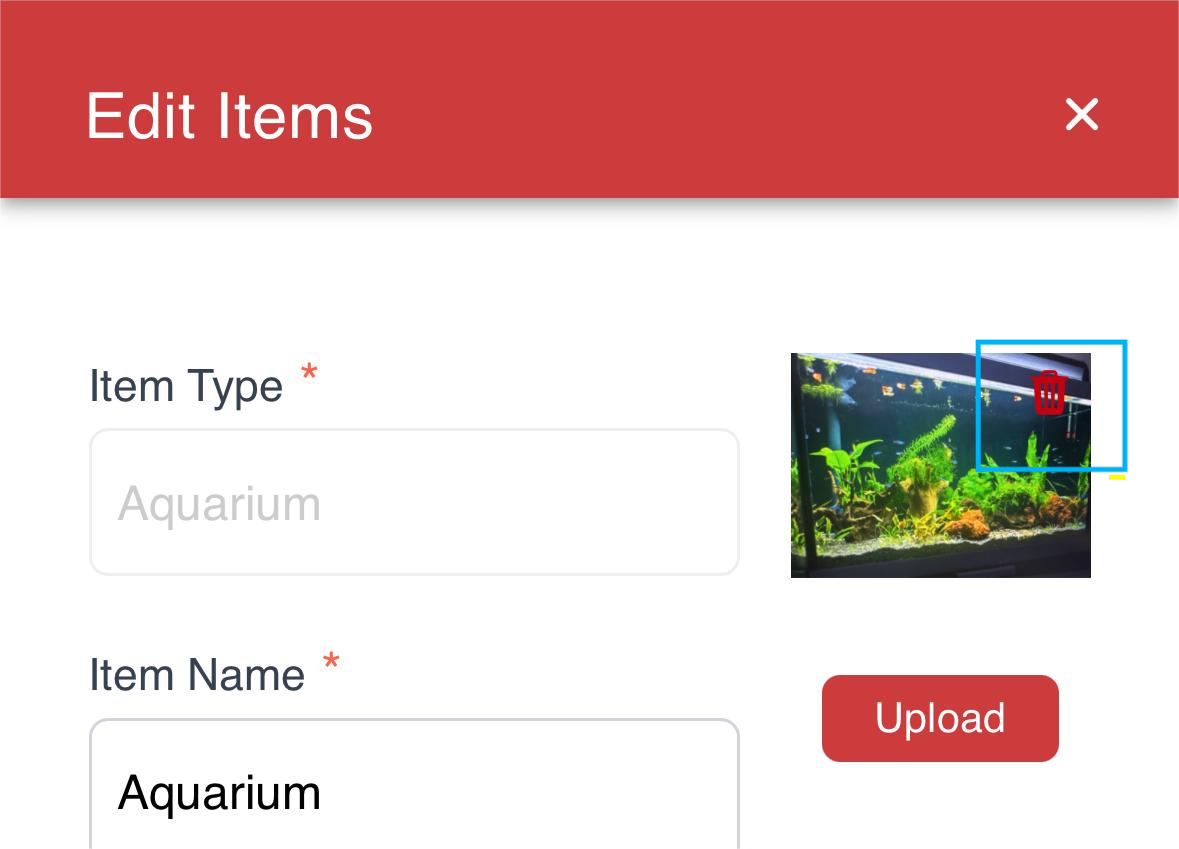
Item Type
- The Item Type cannot be edited and will appear greyed out.
Item Name
- Edit the Item Name by updating the text field.
Photo
- Remove an existing photo by tapping the delete icon on the image.
- Add new photos by taking a photo or uploading from the device.
- Up to 5 photos can be added per item.
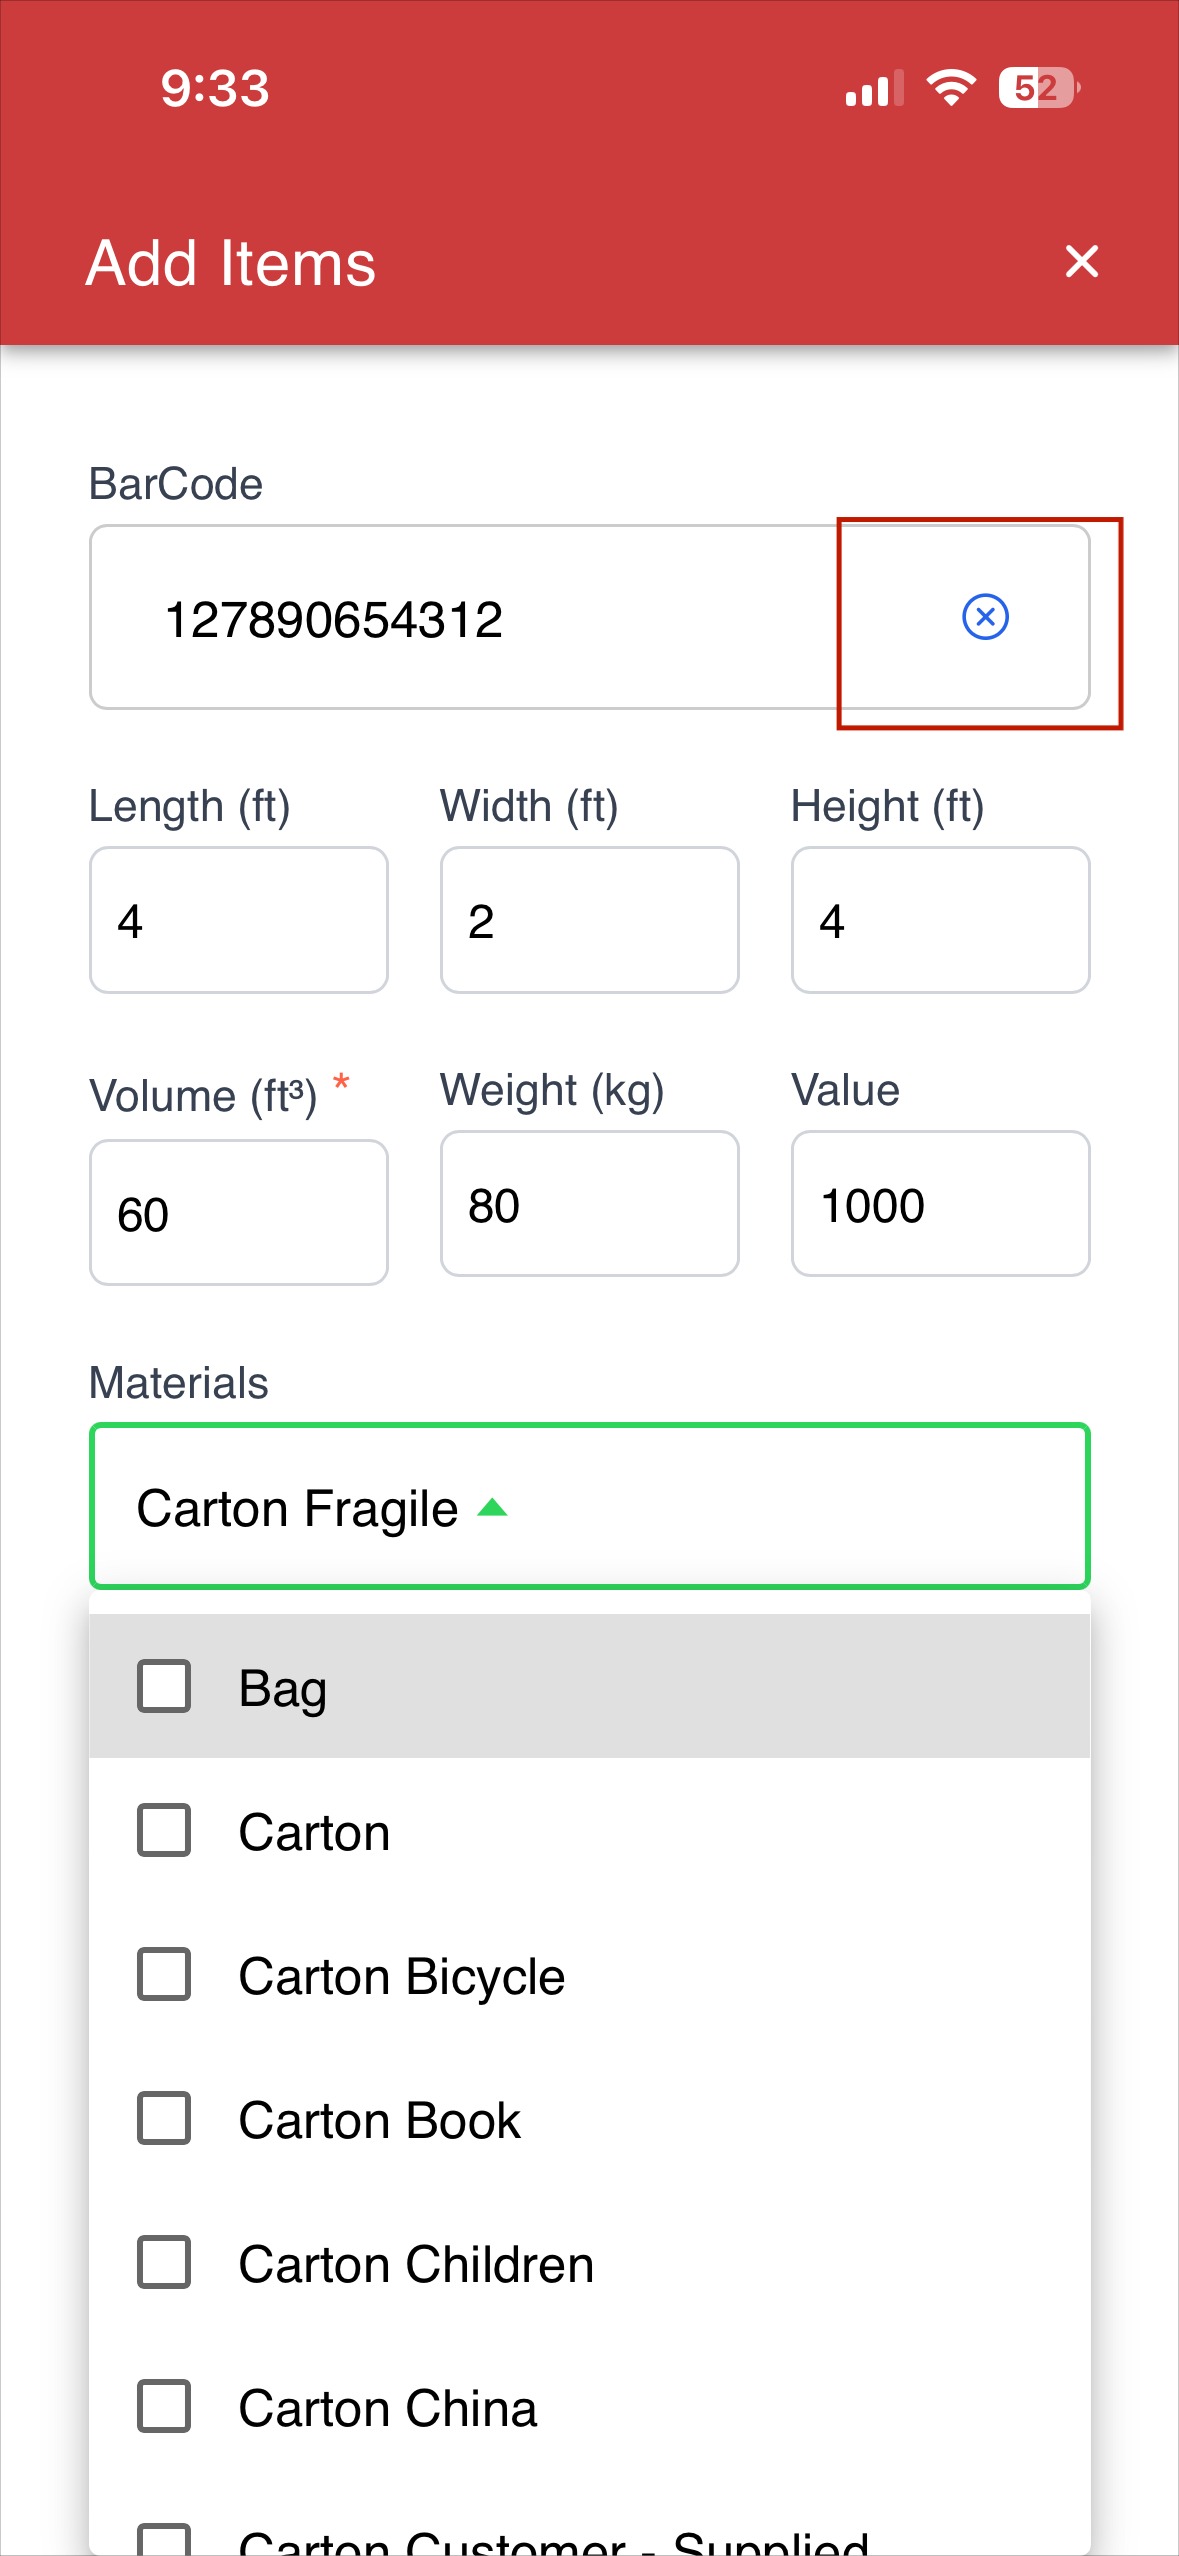
Barcode
- Remove the existing barcode by tapping the cross (×) icon.
- Add a new barcode by scanning it or entering the number manually.
Dimensions
- Update the item’s length, width, and height.
Volume
- Update the volume of the item.
Weight
- Update the weight of the item (in kilograms).
Value
- Update the value of the item (in dollars).
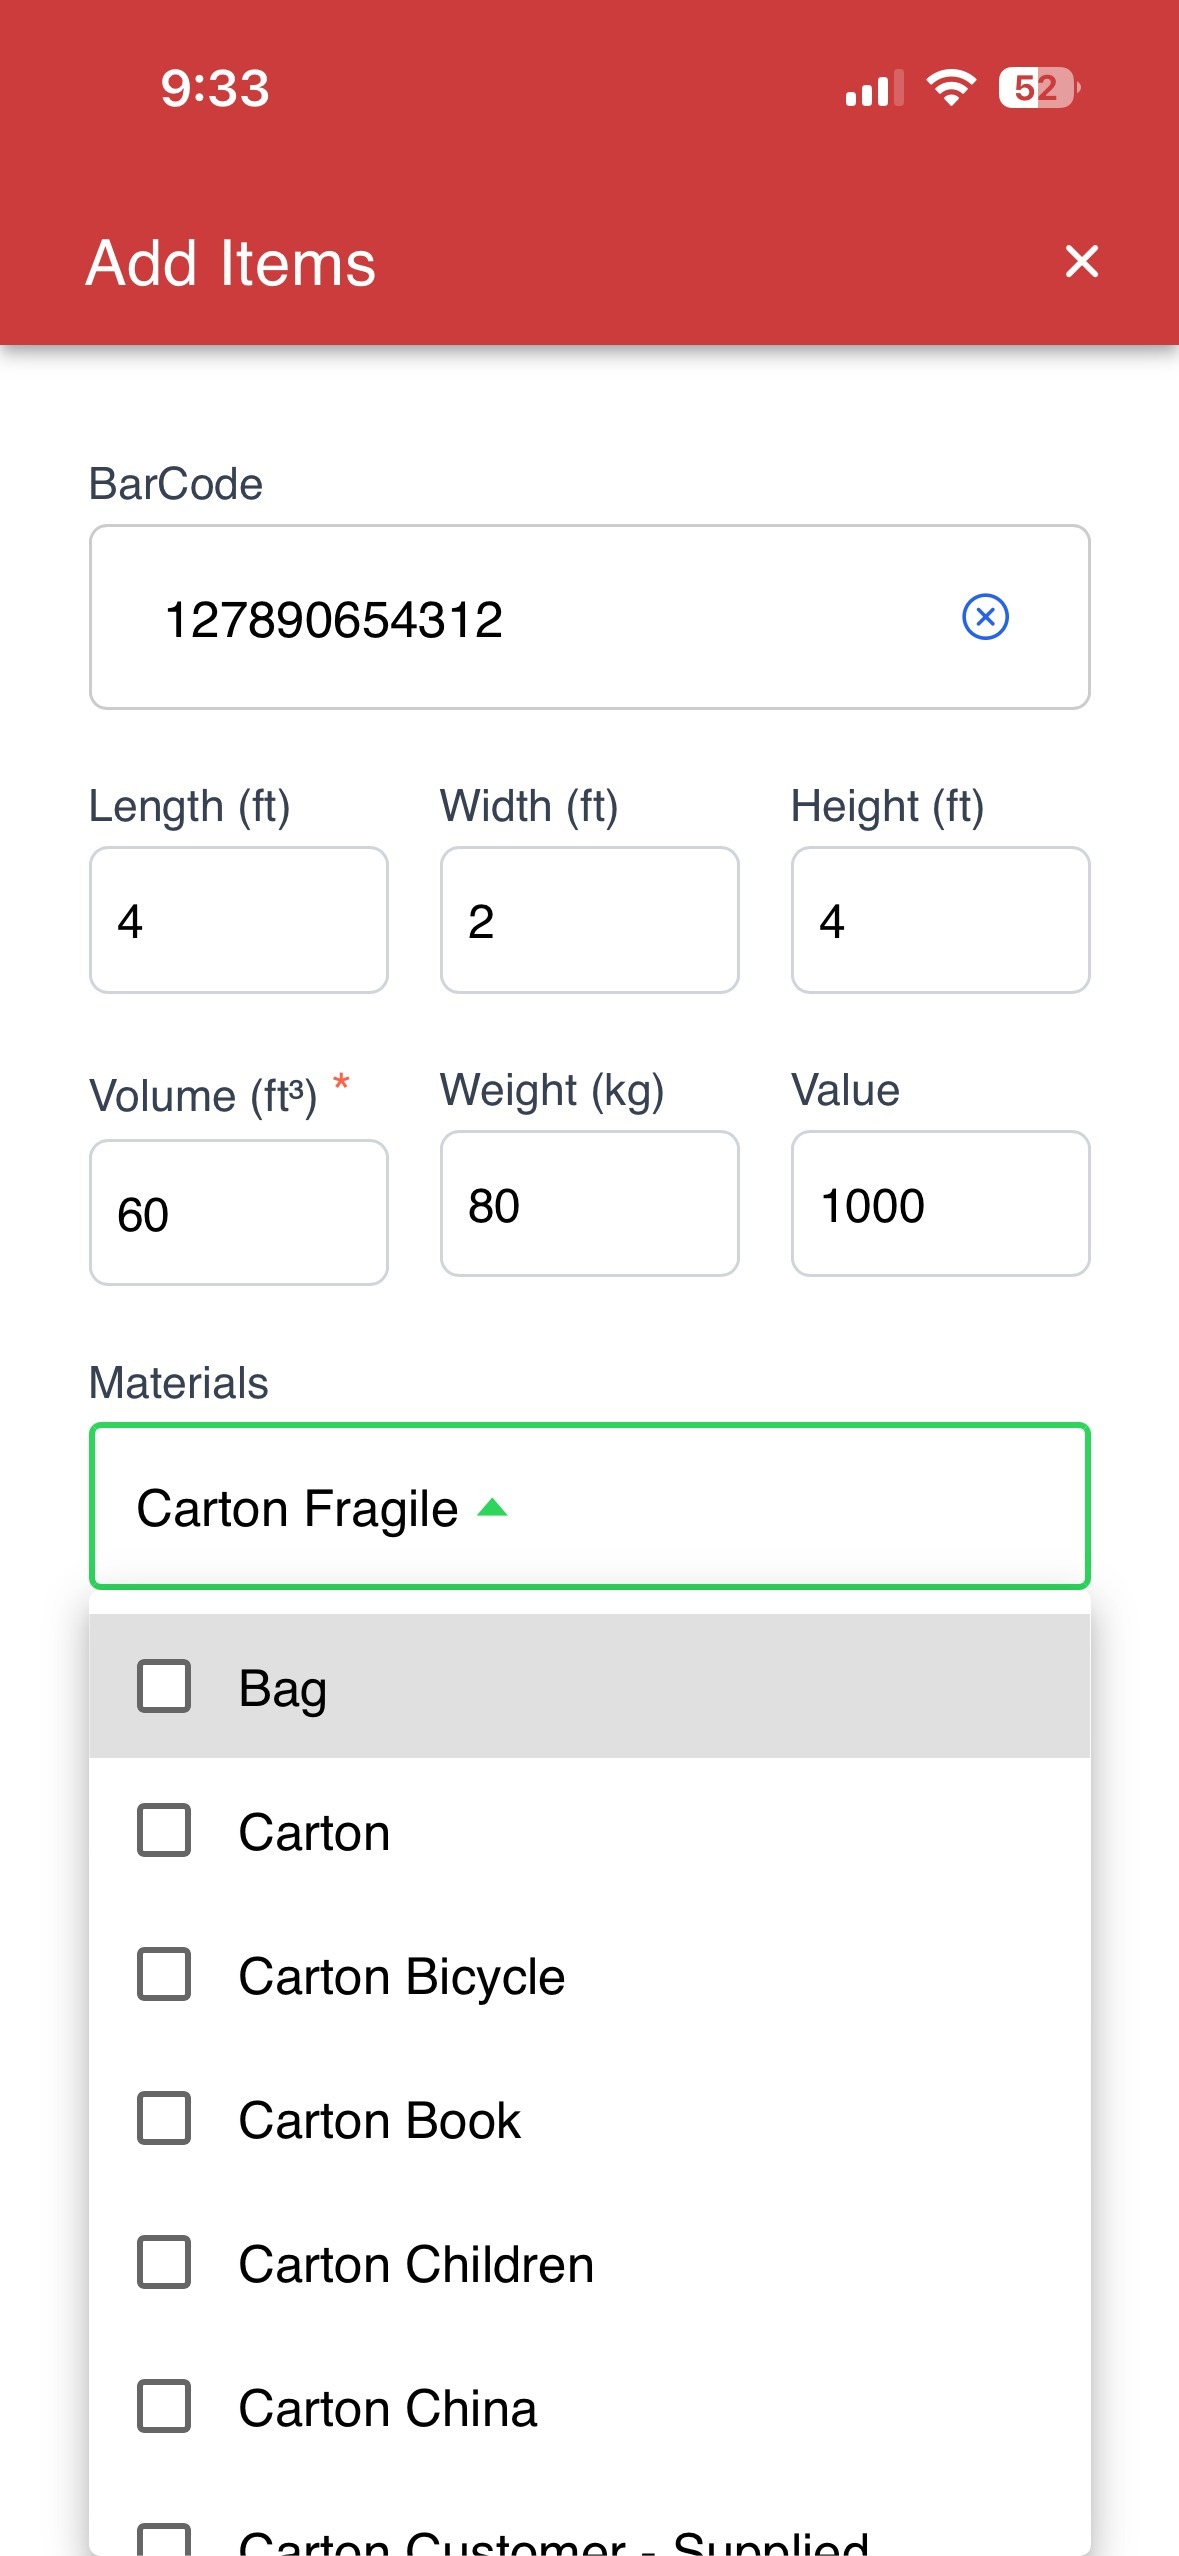
Materials
- Add or modify packing materials by selecting from the Materials dropdown.
- Choose the required materials by checking the box next to each option.
Step 6: Update Conditions and Exceptions
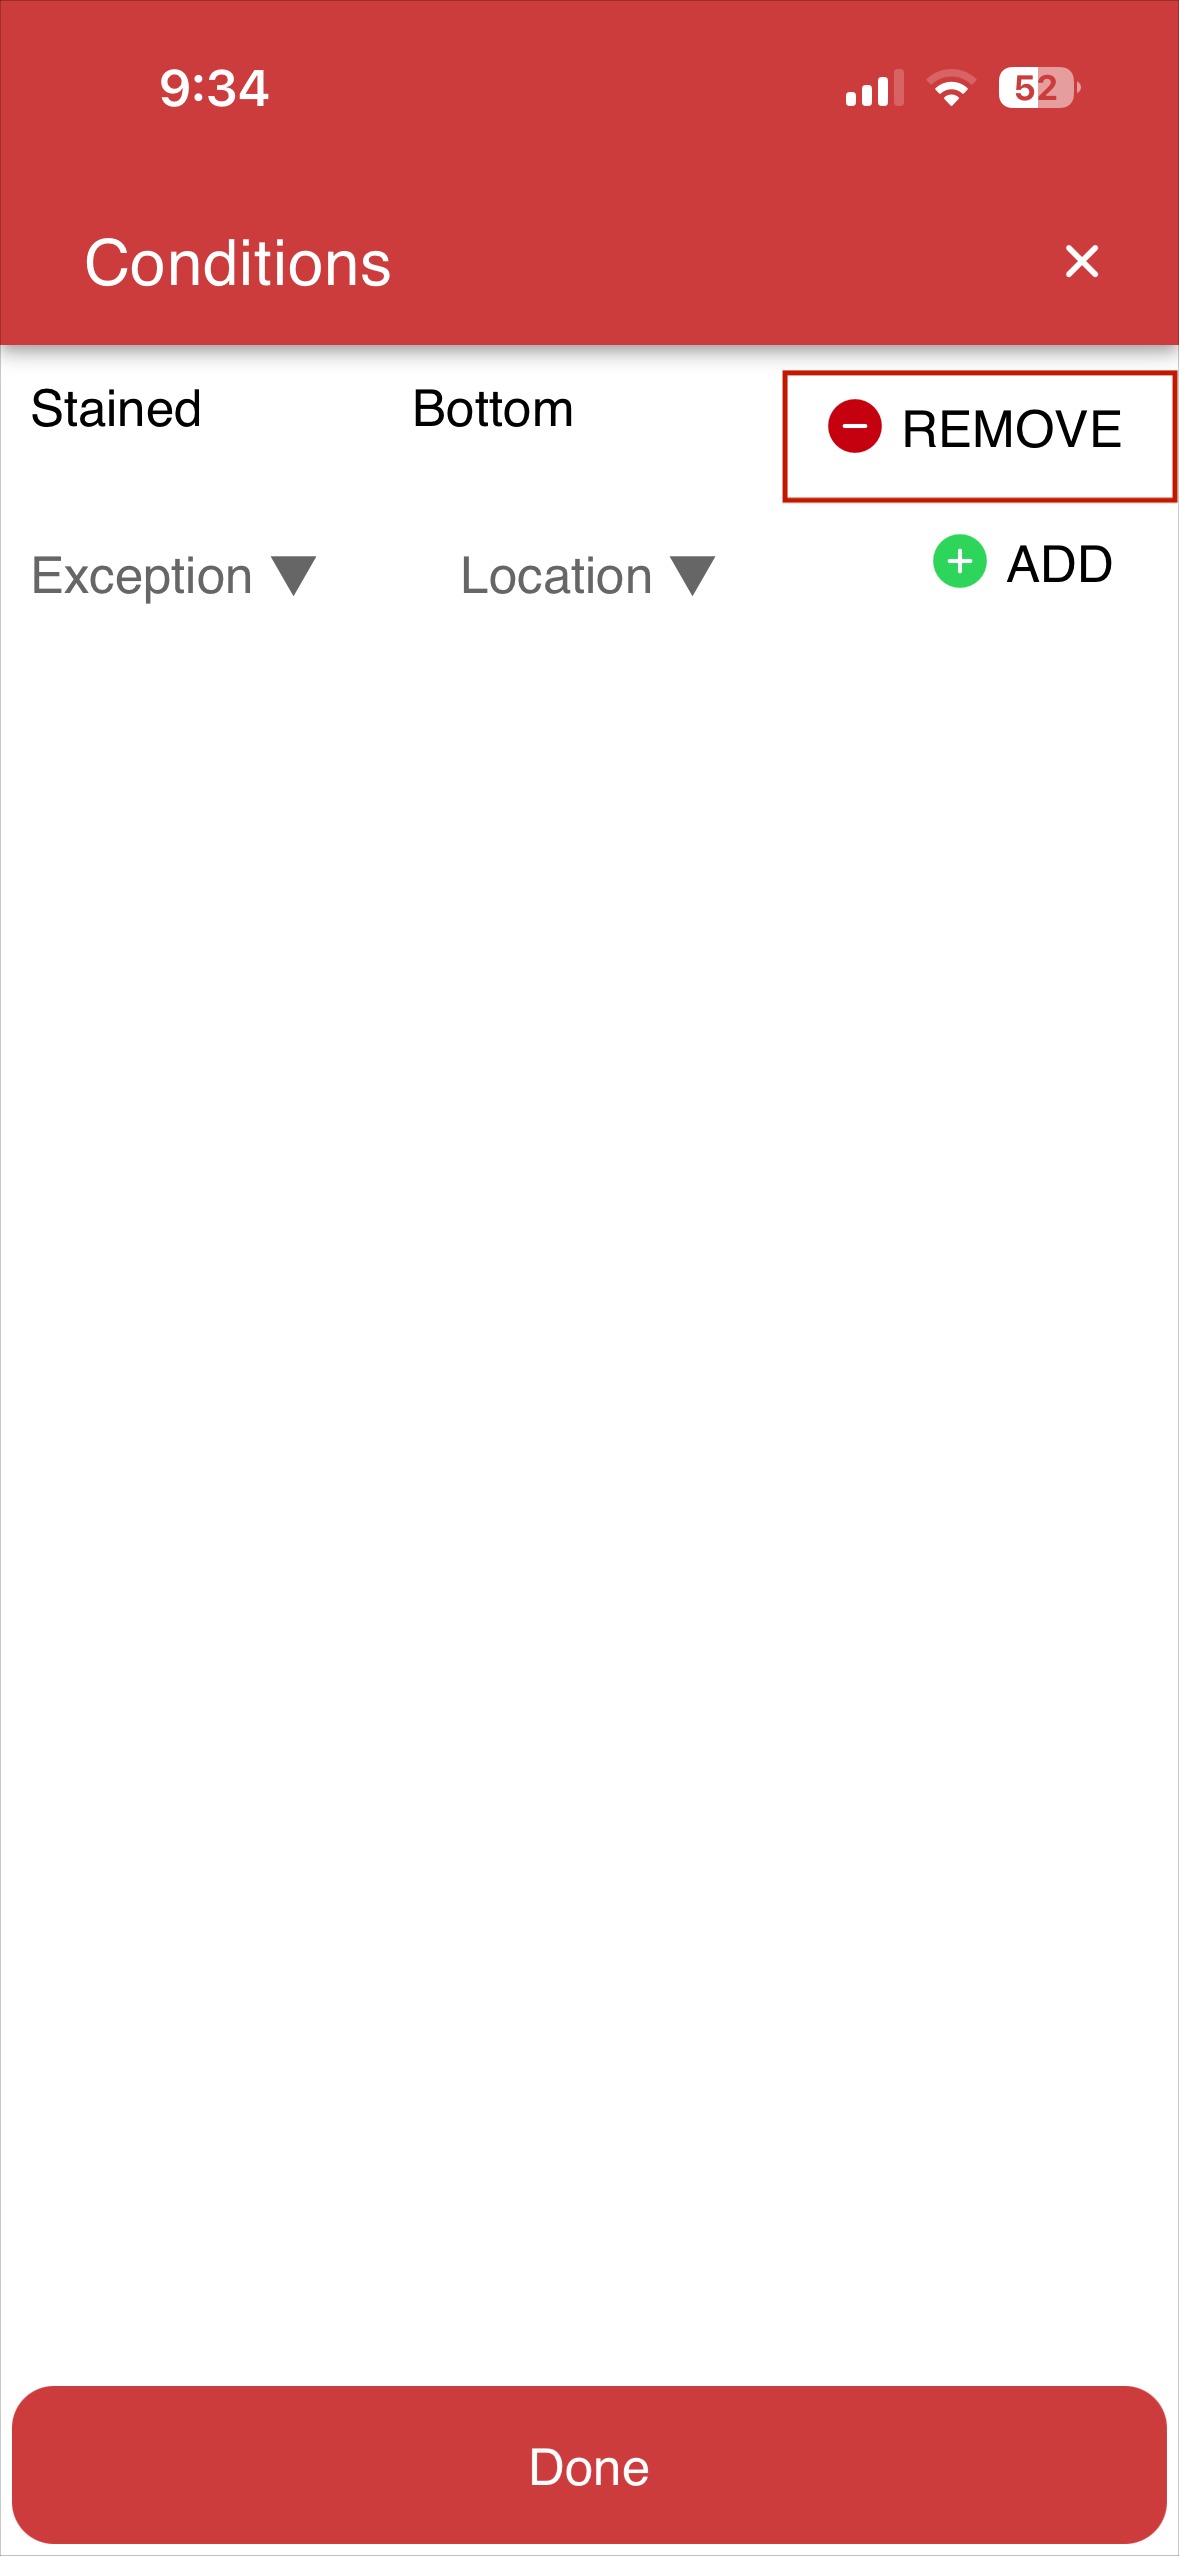
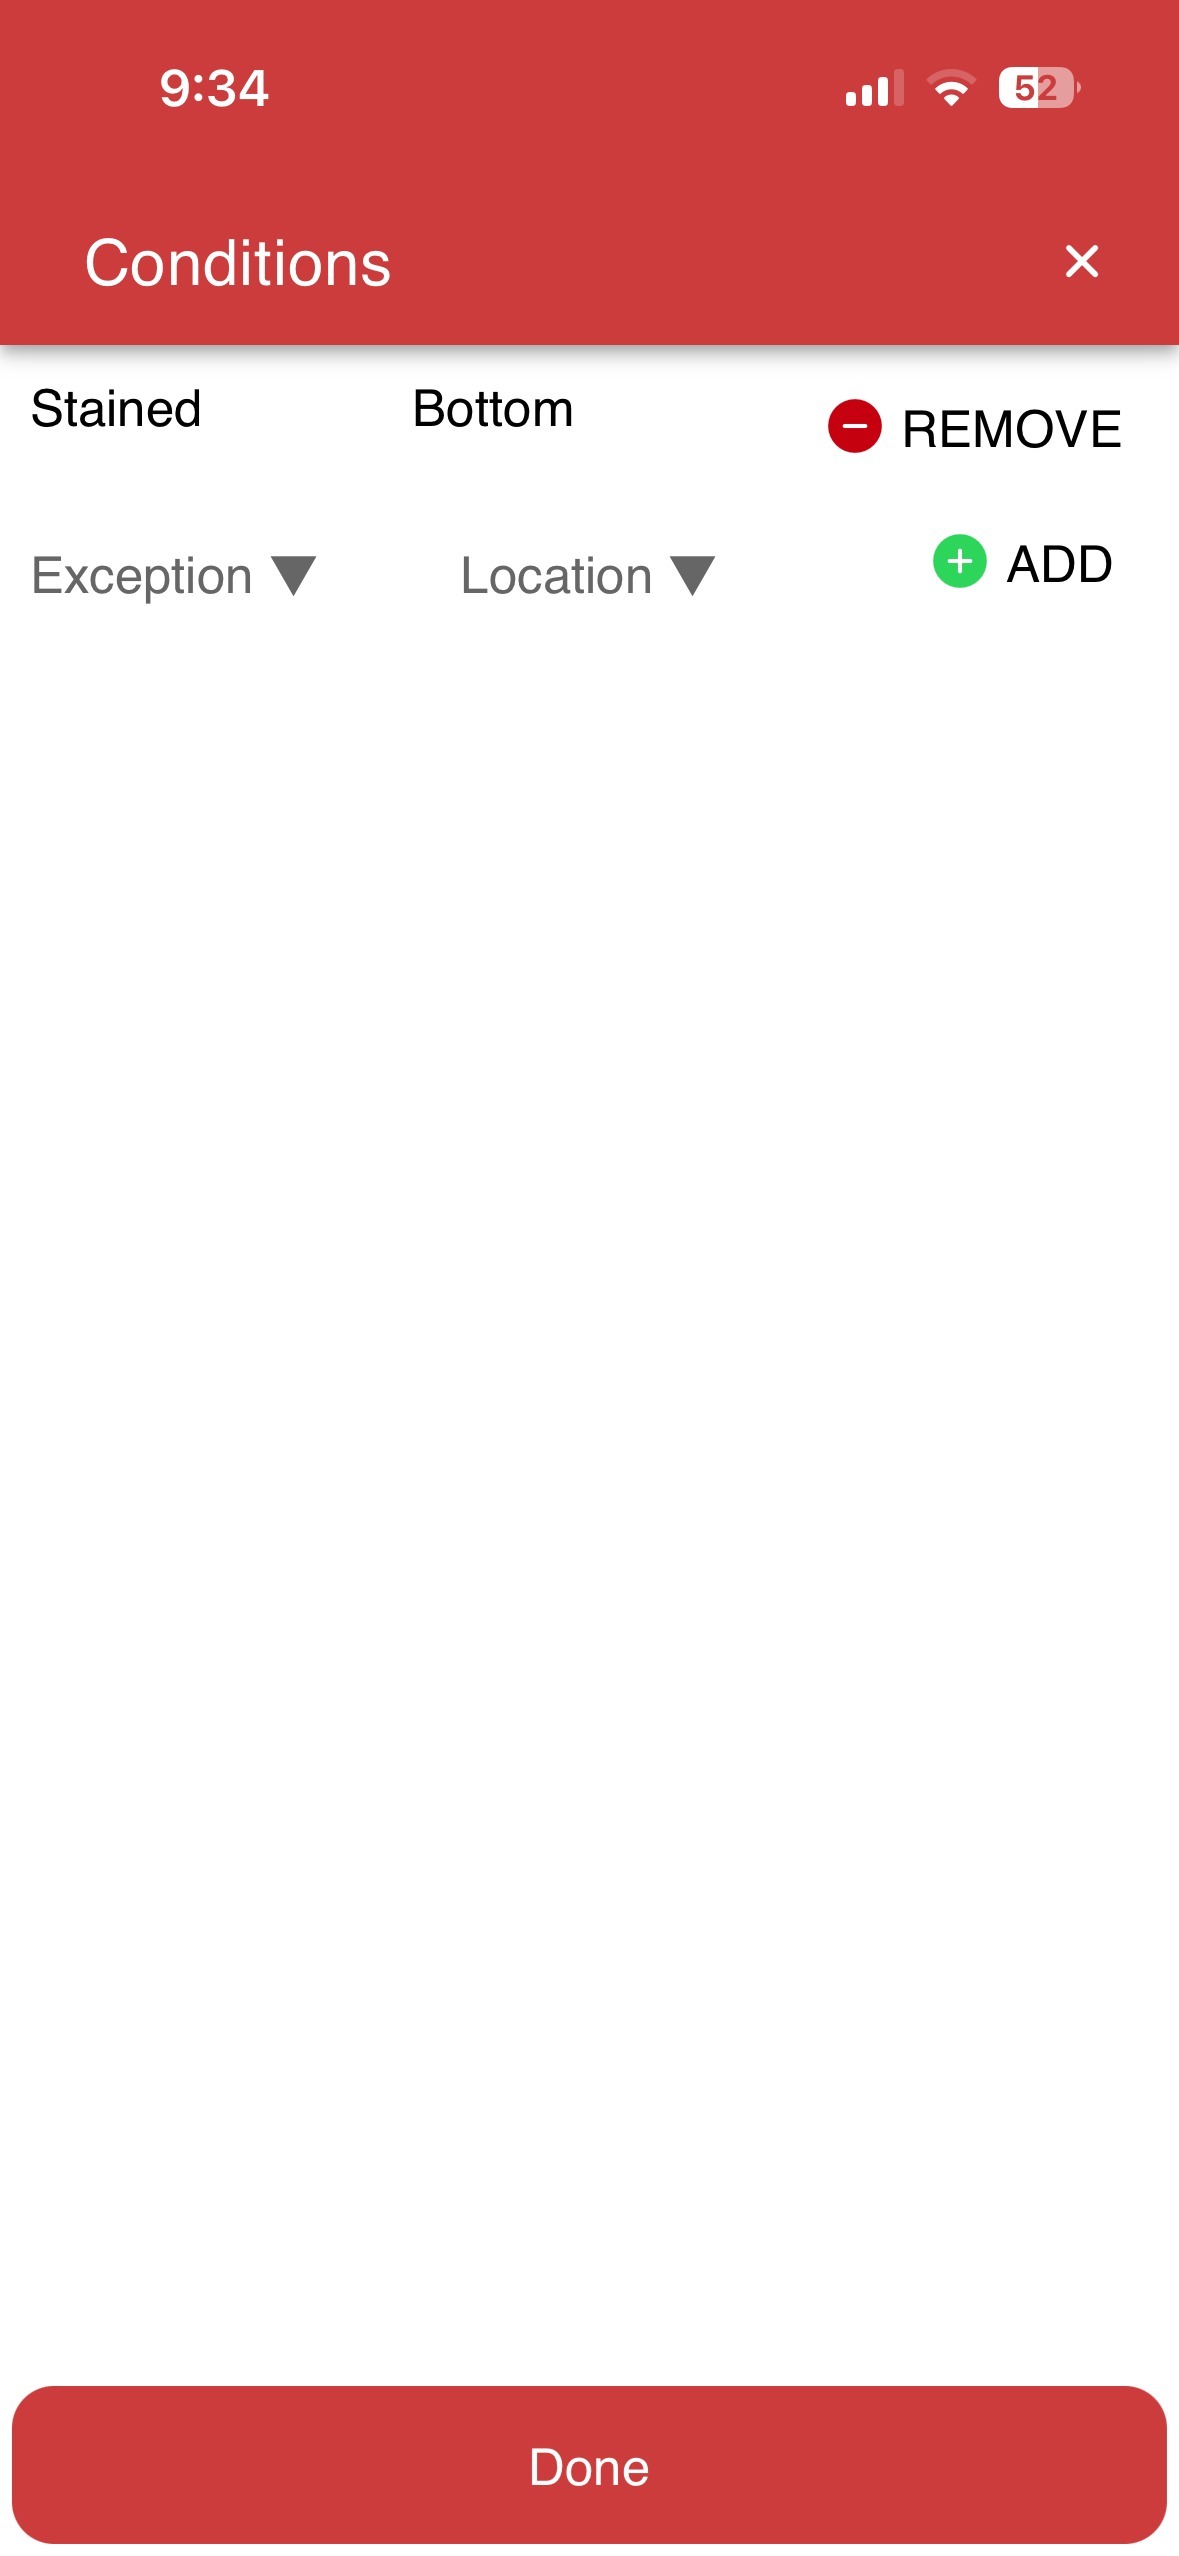
Tap the Condition field to manage item conditions. You can add new conditions or remove existing conditions as required.
Remove a Condition
- Tap Remove next to the condition to delete it.
Add a Condition
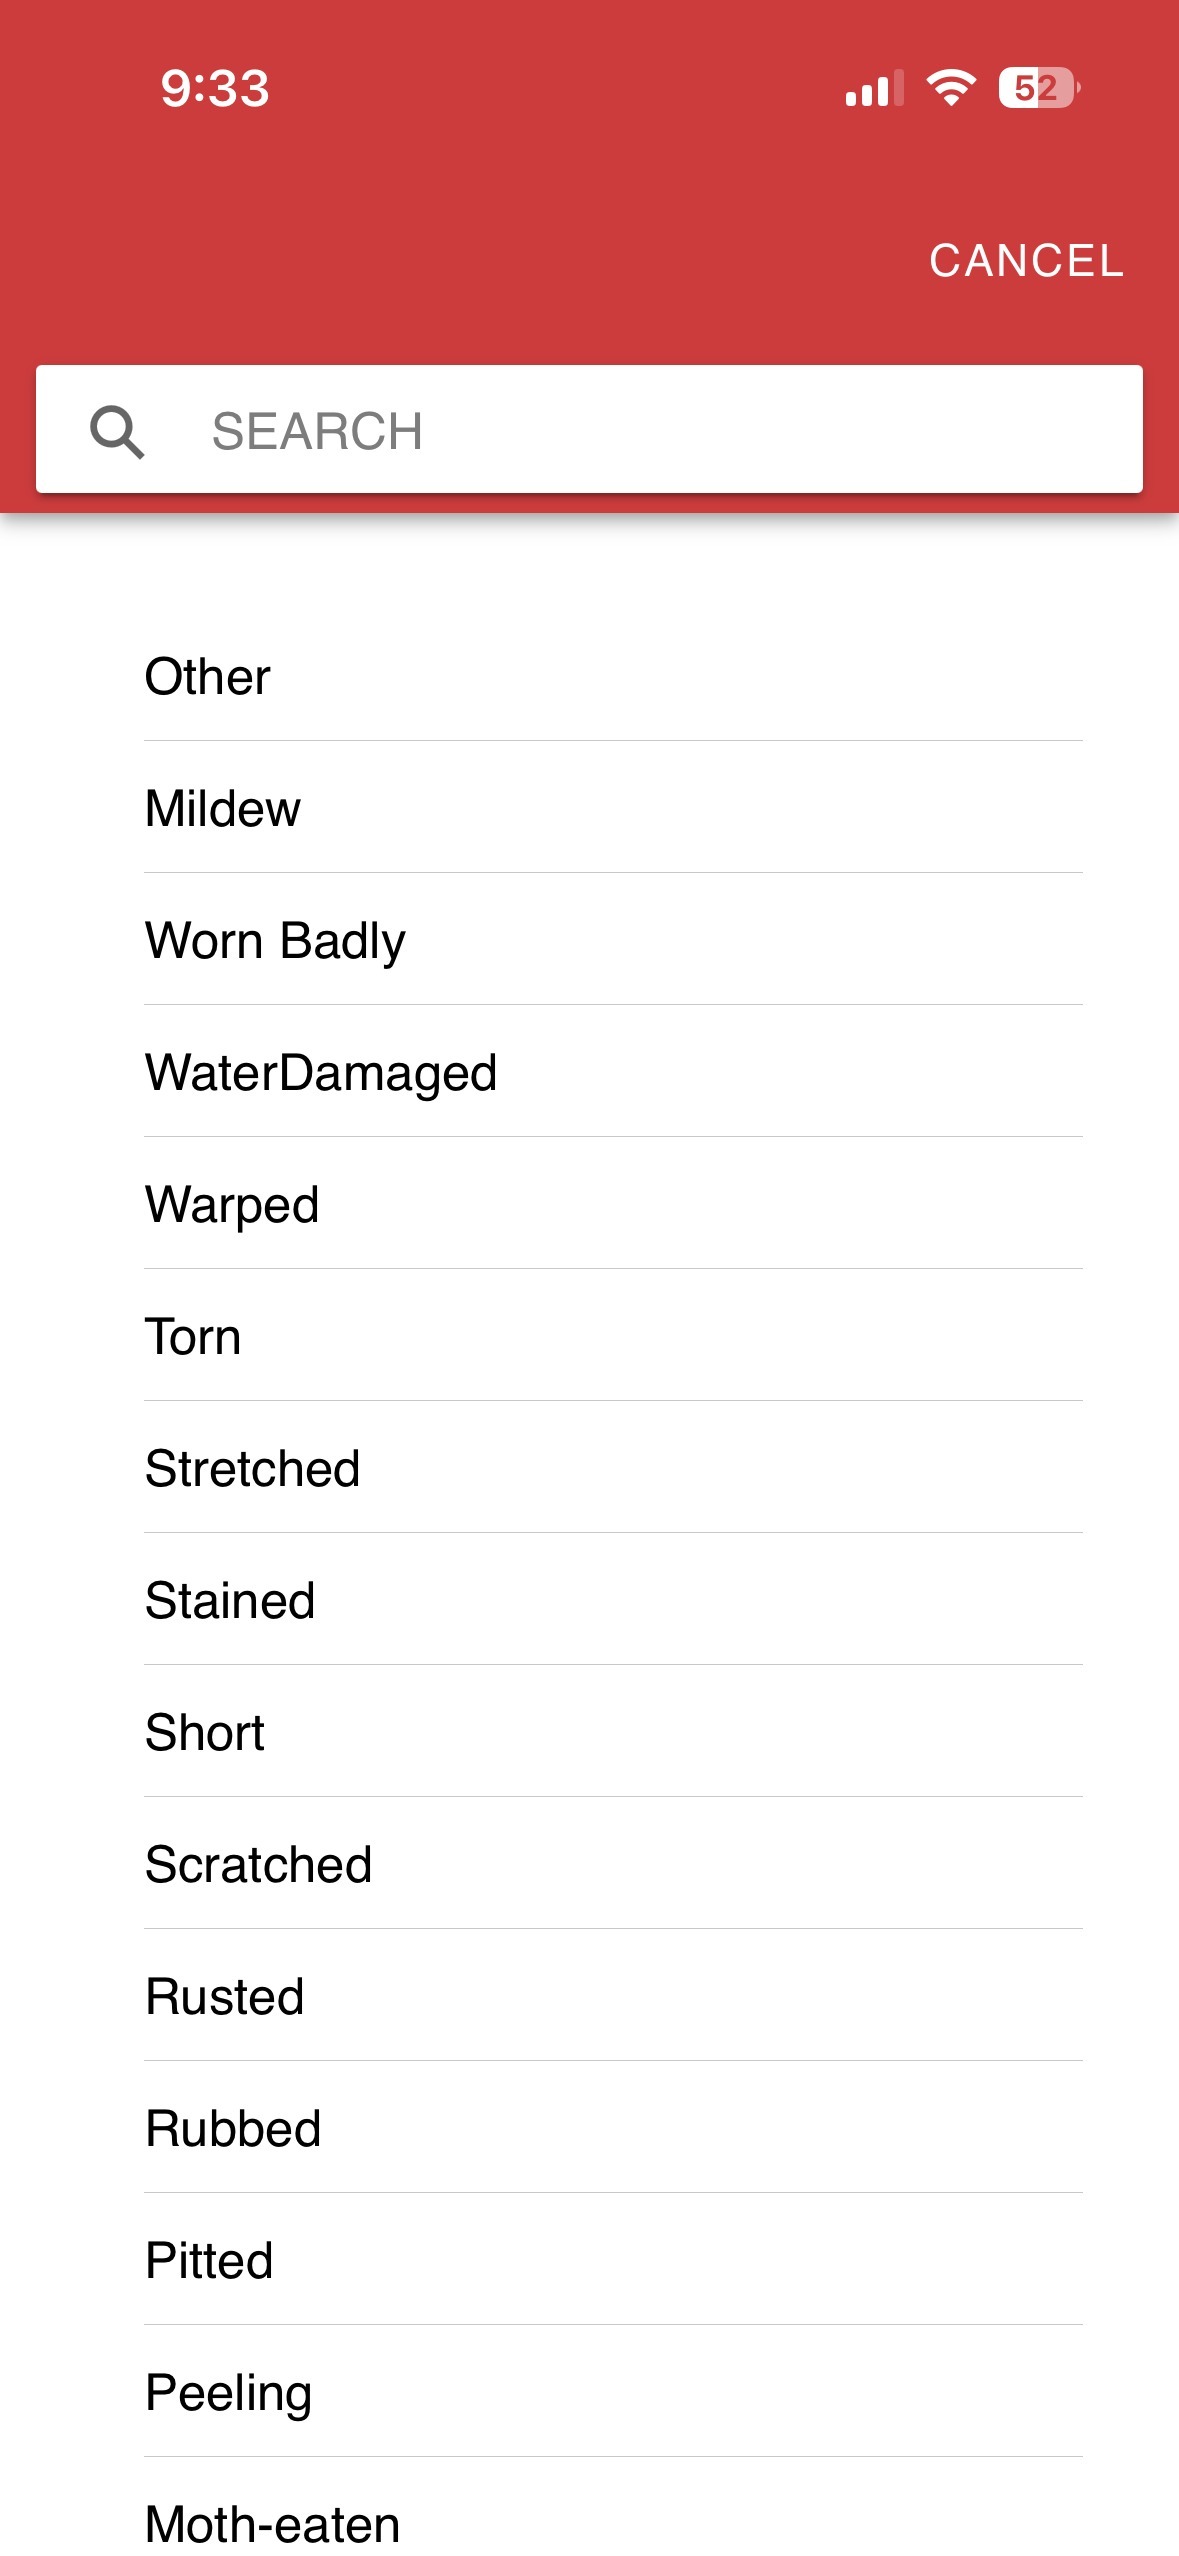
Exception
- Select the Exception field to choose from options such as worn, scratched, torn etc
 .
.
Location
- Specify the location of the exception on the item.
Example: Scratched at the right corner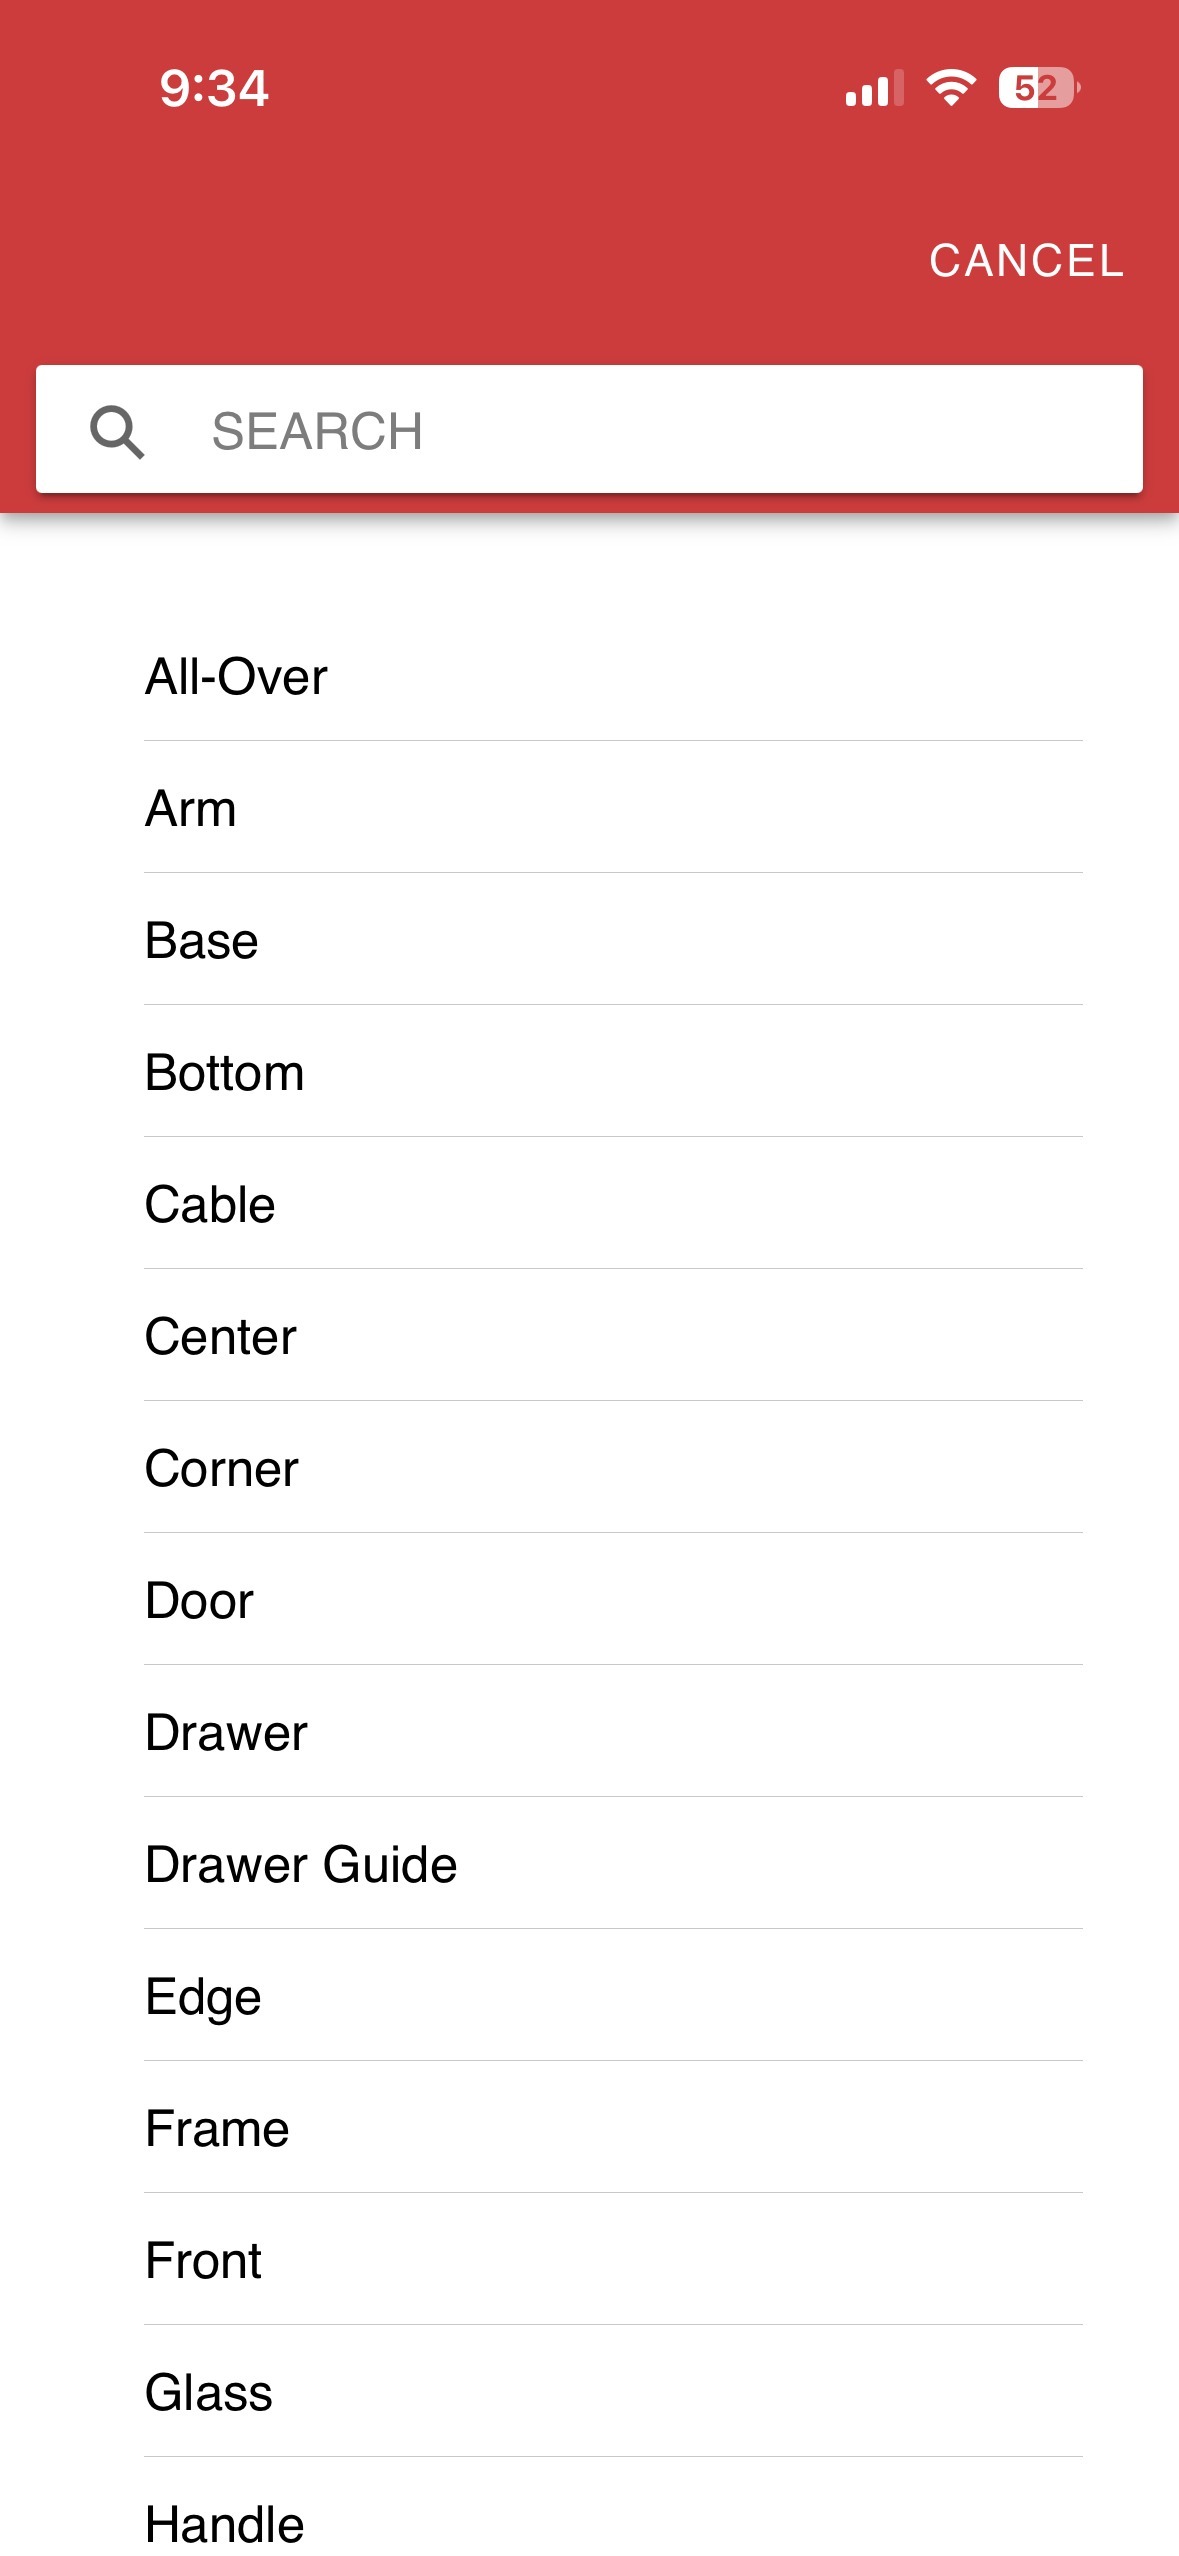
- Tap Add to save the condition.
- Multiple conditions can be added if required.
Step 7: Update Handling Information
- Use the Handling Infodropdown to update instructions such as:
- Fragile
- Do not tilt
- Handle with care etc
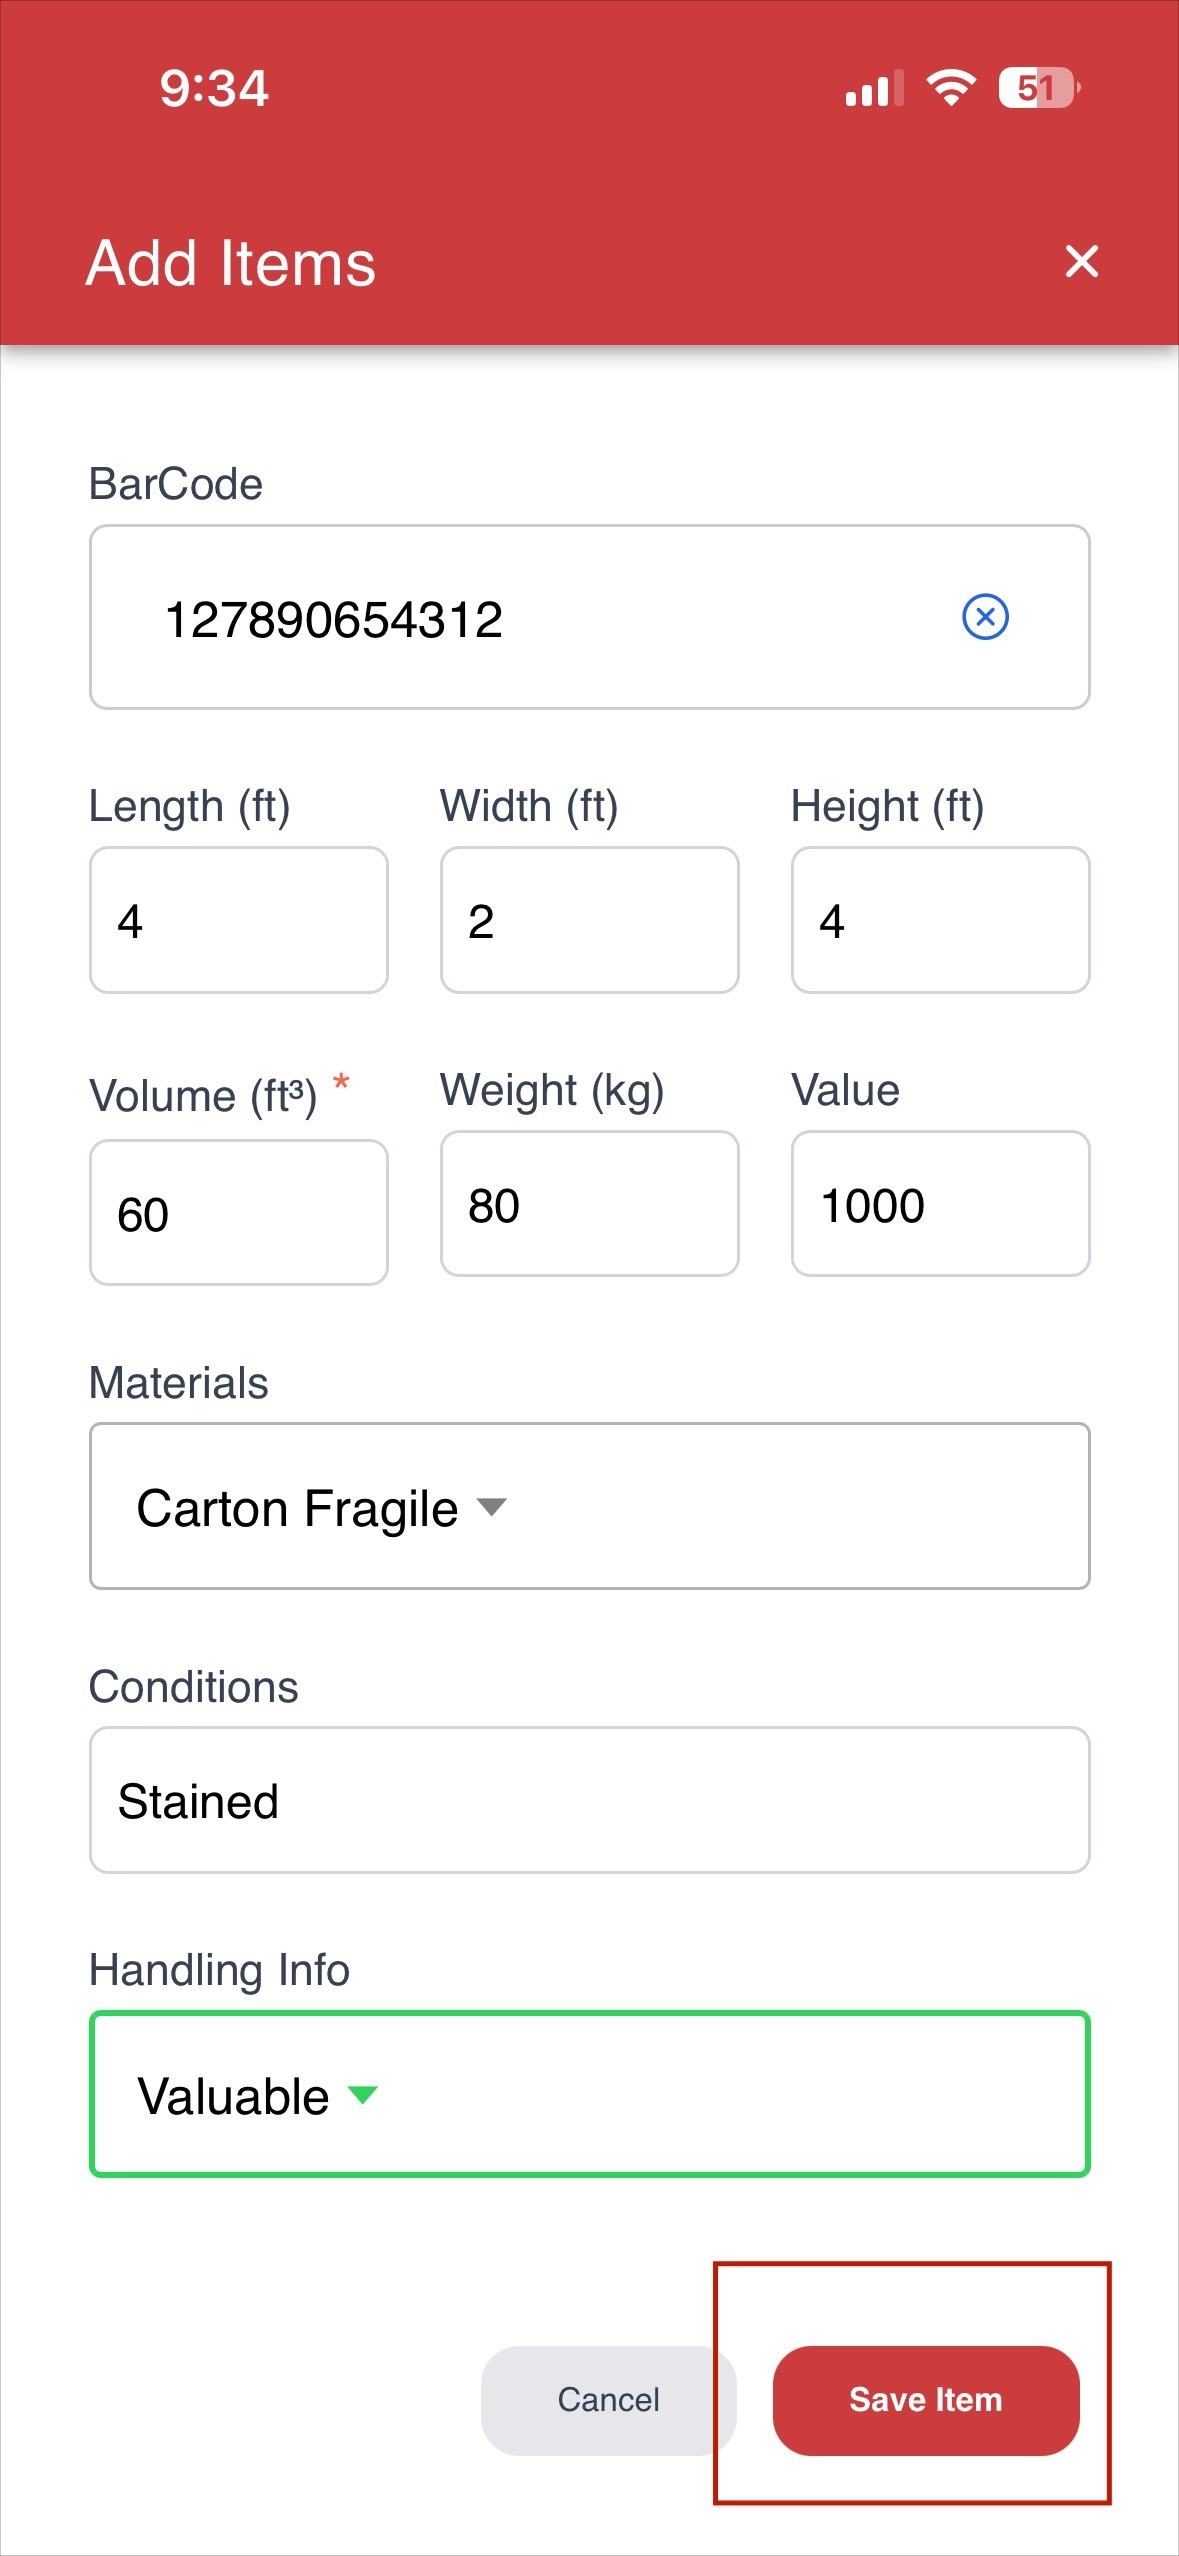
Step 8: Save Item
- After making the required updates, tap Save Item.
- The updated item details will be displayed in the Inventory list under the selected room.
Step 9: Next Steps
- Crew members can continue adding or editing items under each room.
- Once inventory updates are complete, packages can be created under the Package section.
For instructions on how to create a package, refer to:
https://redskymobility.freshdesk.com/support/solutions/articles/43000779861-how-to-create-a-package-
Summary
Editing items in the Inventory tab allows crew members to:
- Maintain accurate and up-to-date inventory records
- Update item conditions, photos, and handling instructions
- Ensure correct information before package creation
- Improve operational accuracy and efficiency during job execution.
Was this article helpful?
That’s Great!
Thank you for your feedback
Sorry! We couldn't be helpful
Thank you for your feedback
Feedback sent
We appreciate your effort and will try to fix the article