Purpose
This guide explains how crew members can apply filters on the Job Dashboard in the Ops App to quickly find and manage their assigned job tickets based on crew, status, and date.
Prerequisites
A crew login account has been created.
The crew has received valid login credentials (username and password).
The Ops App is installed on the crew member’s device.
For instructions on creating a crew login account, refer to:
https://redskymobility.freshdesk.com/support/solutions/articles/43000779749-how-to-create-credentials-for-your-crew-from-redsky
Step 1: Log In to the Ops App
Open the Ops App on your device.
Enter the provided username and password.
Tap "Login".
After successful login, you will land on the Dashboard.
Step 2: Understand the Dashboard
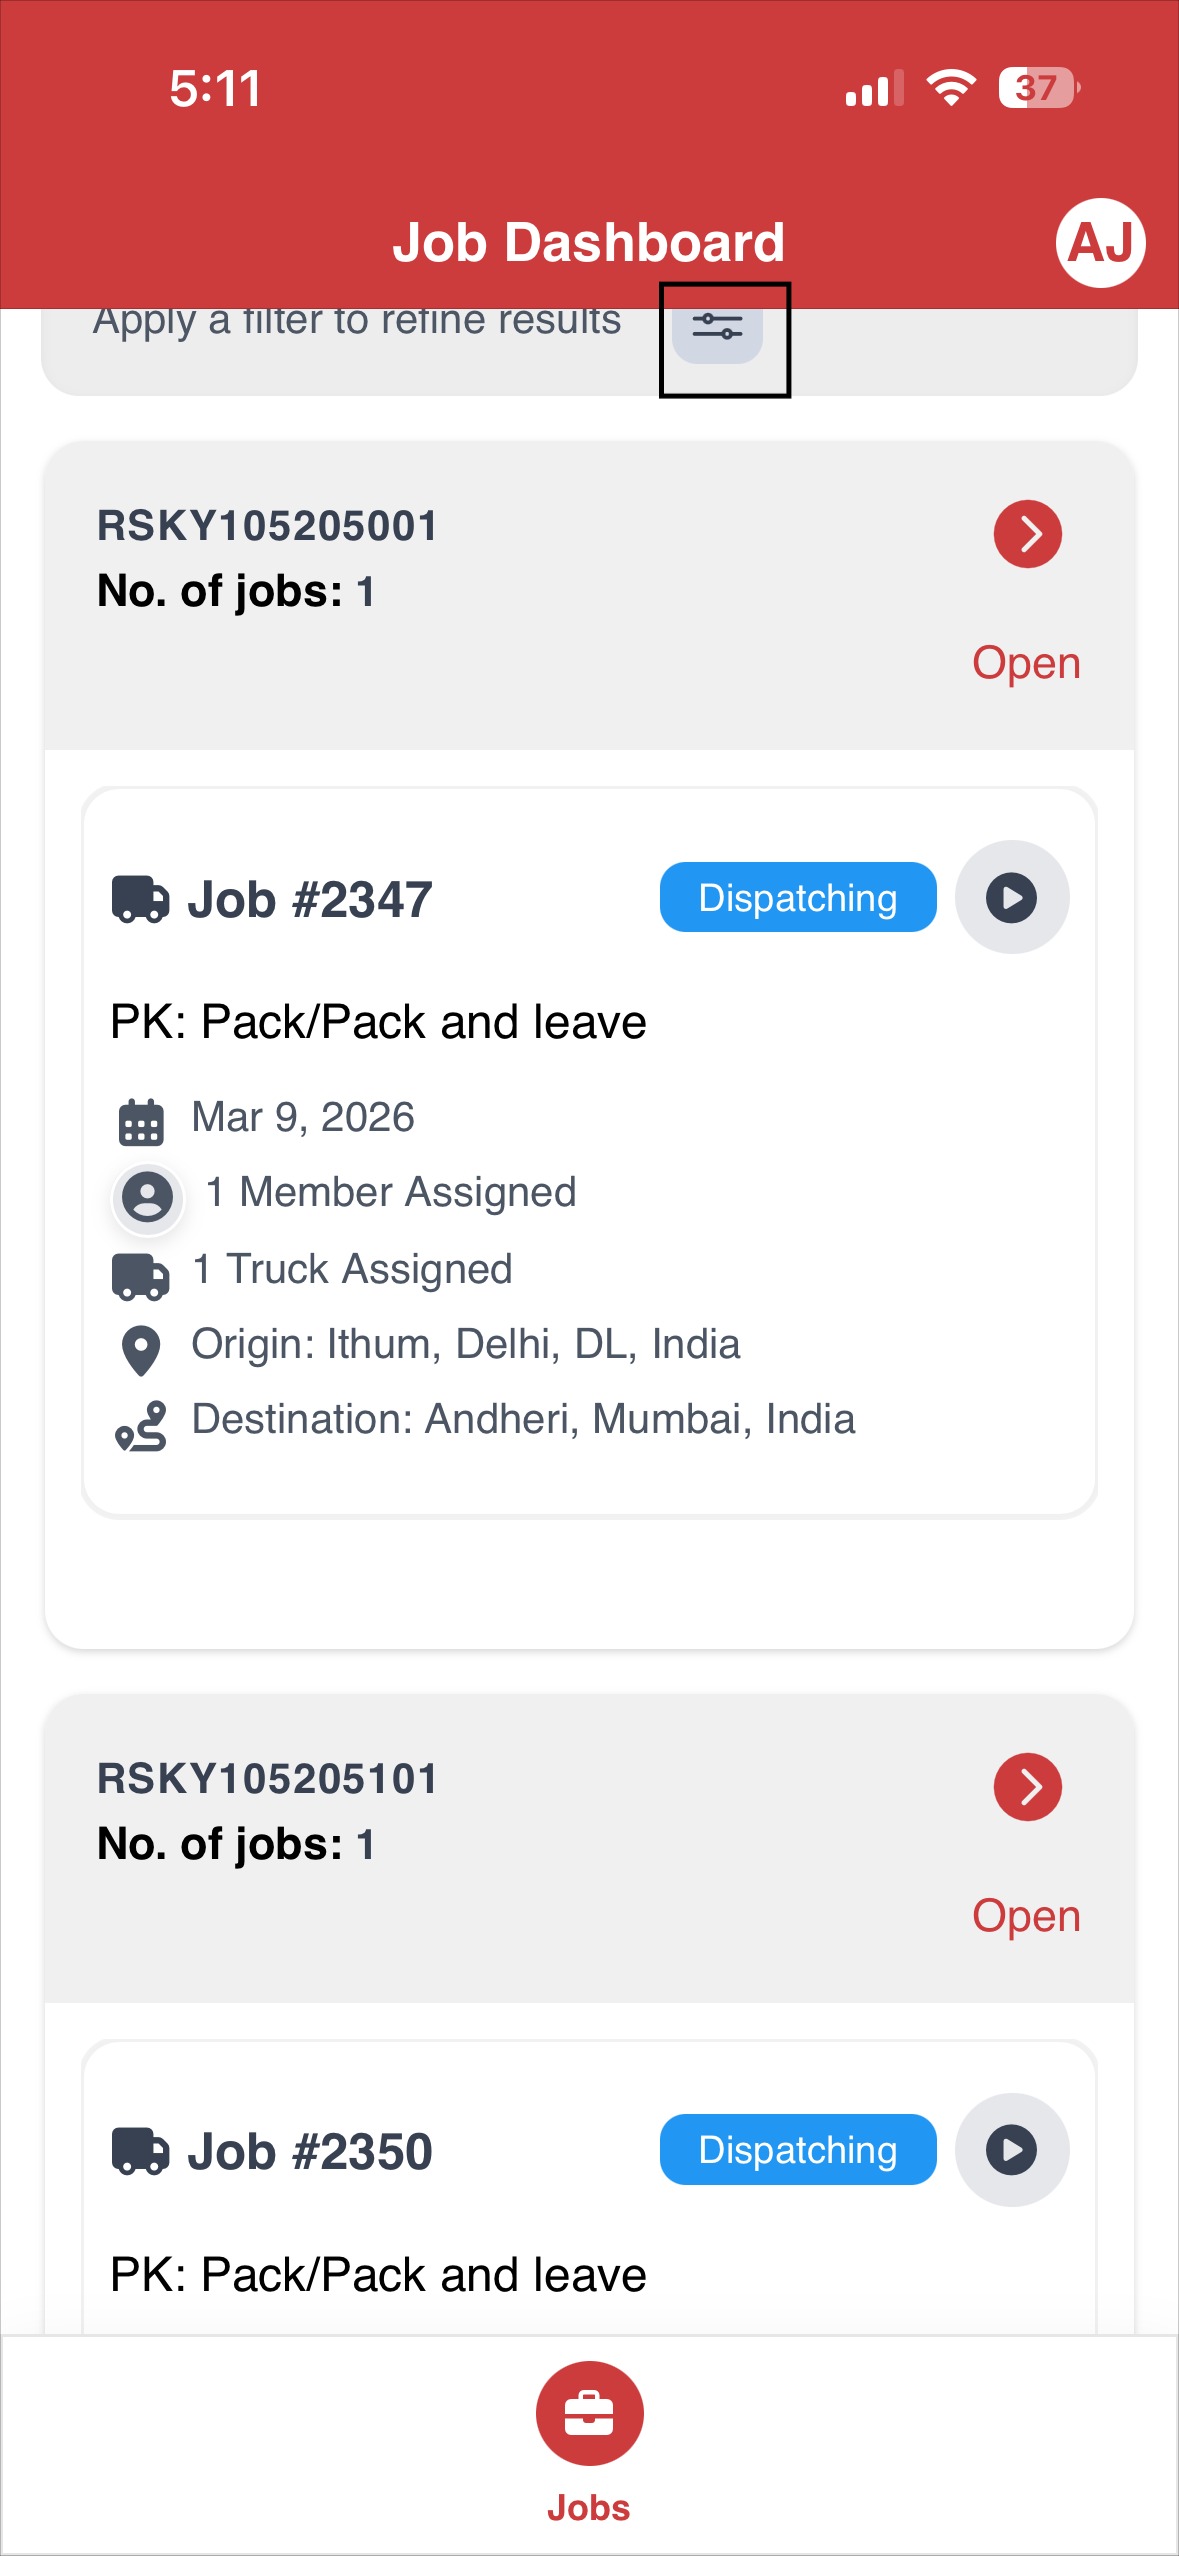
The Dashboard displays all job tickets assigned to the crew along with the following details:
Shipment number on RedSky
Work ticket number (job number)
Number of jobs assigned
Tasks assigned for each job
Number of crew members assigned to each ticket
Number of trucks assigned to each ticket
Origin and destination addresses
Step 3: Open the Filter Options
On the Dashboard screen, locate the "Filter" icon at the top of the screen.
Tap the Filter icon.
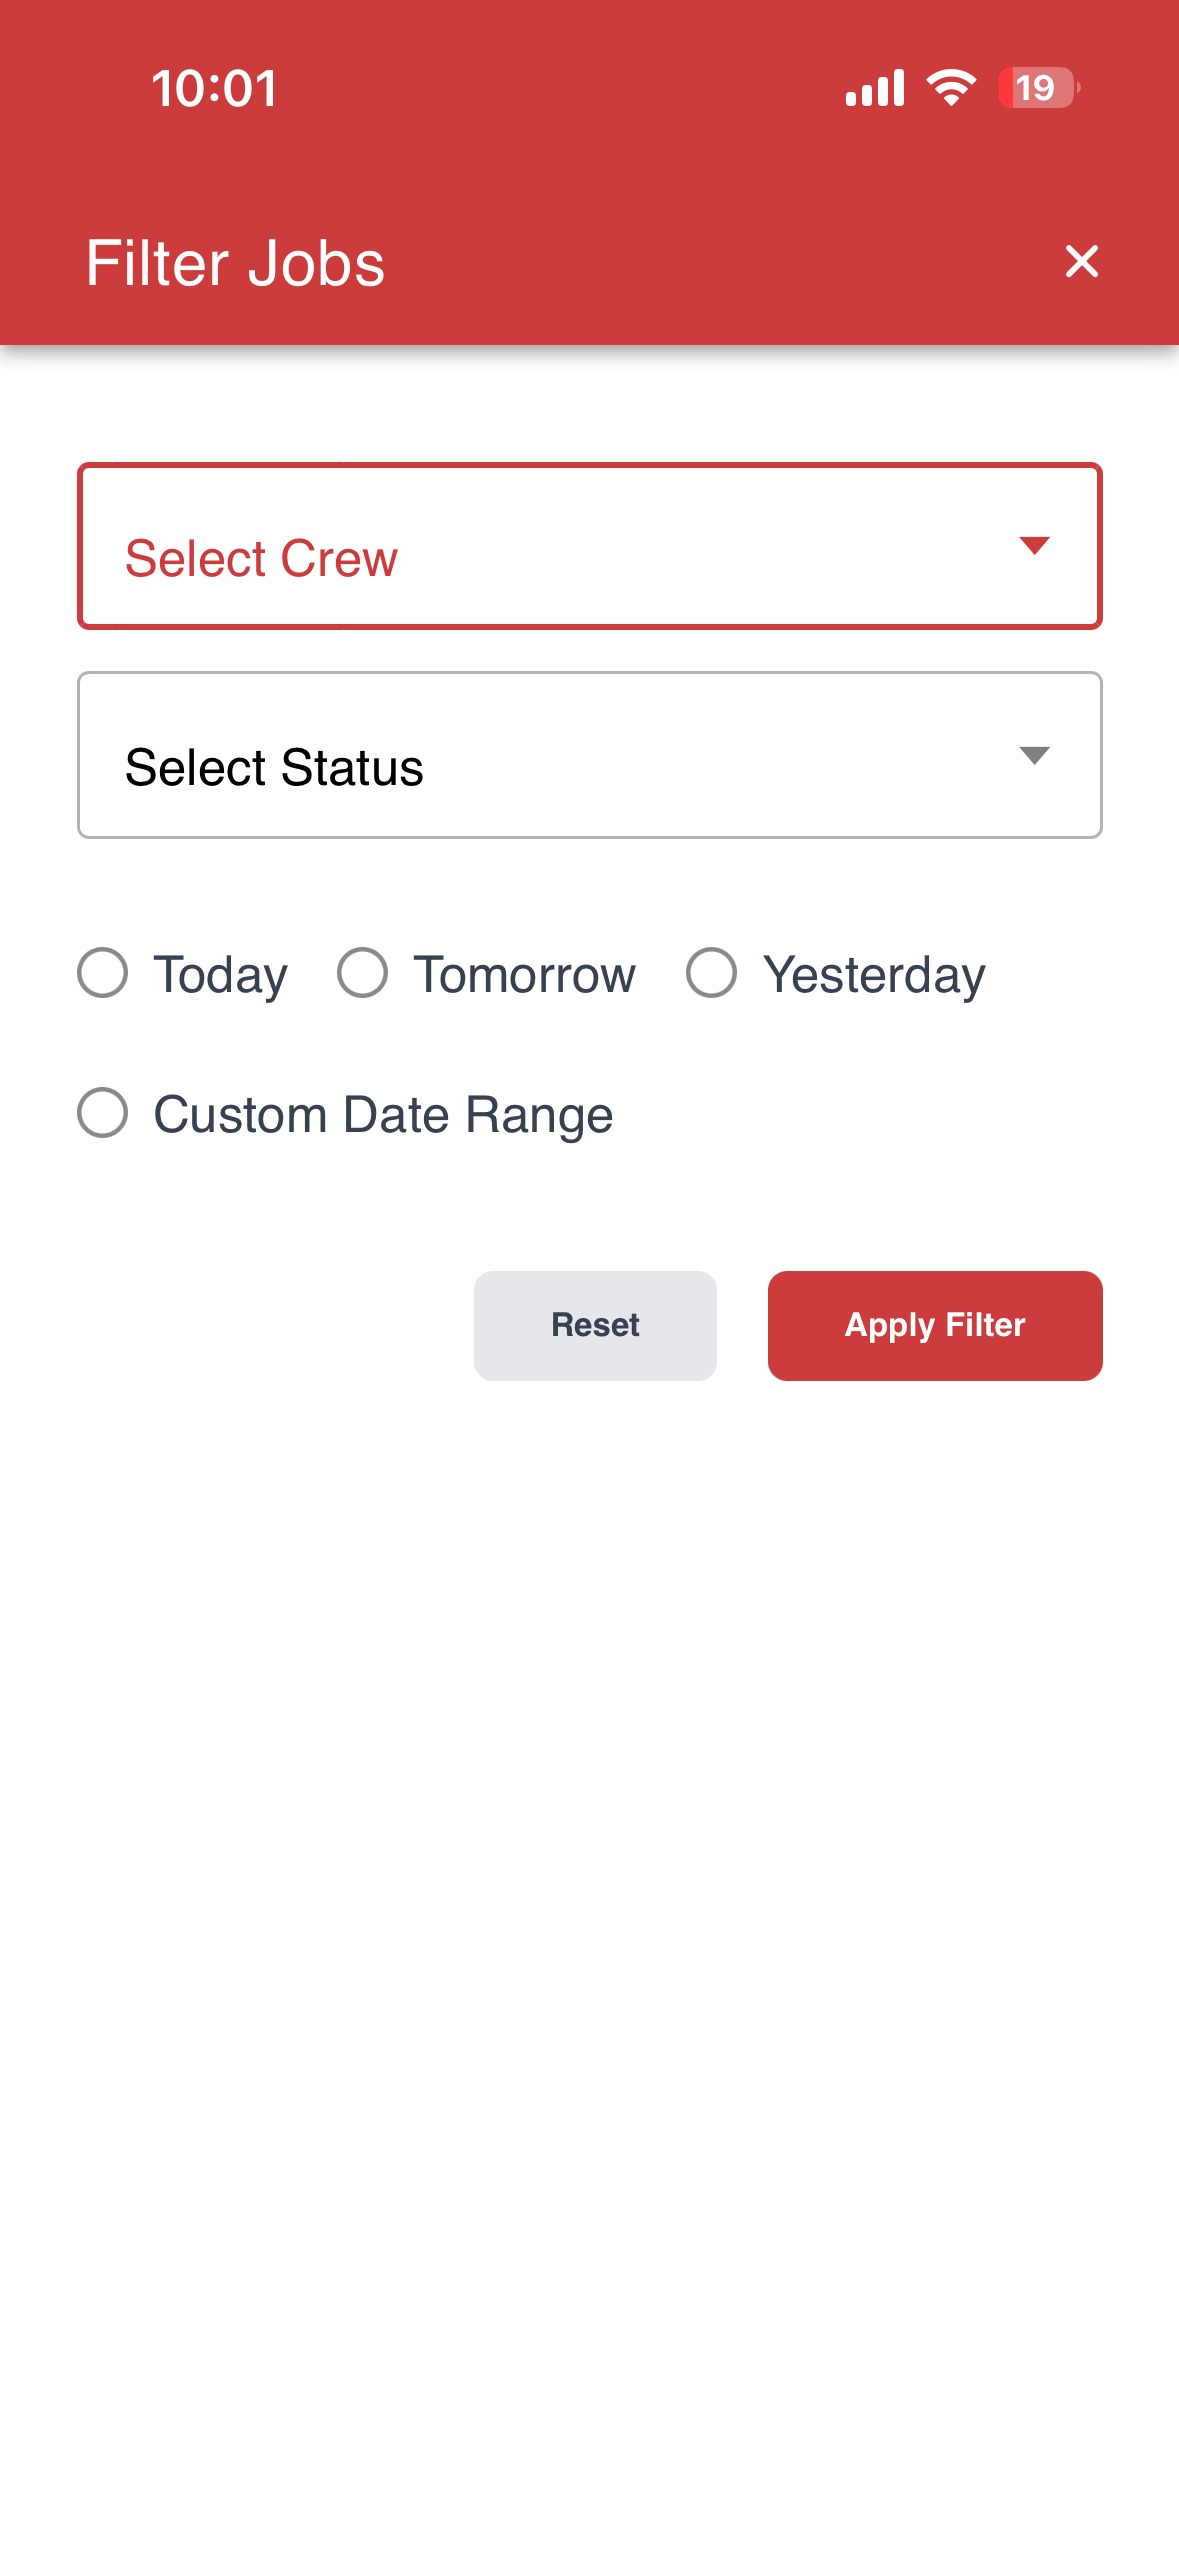
The Filter Job screen will be displayed.
Step 4: Apply Filters
Crew members can filter job tickets using one or more of the following options:
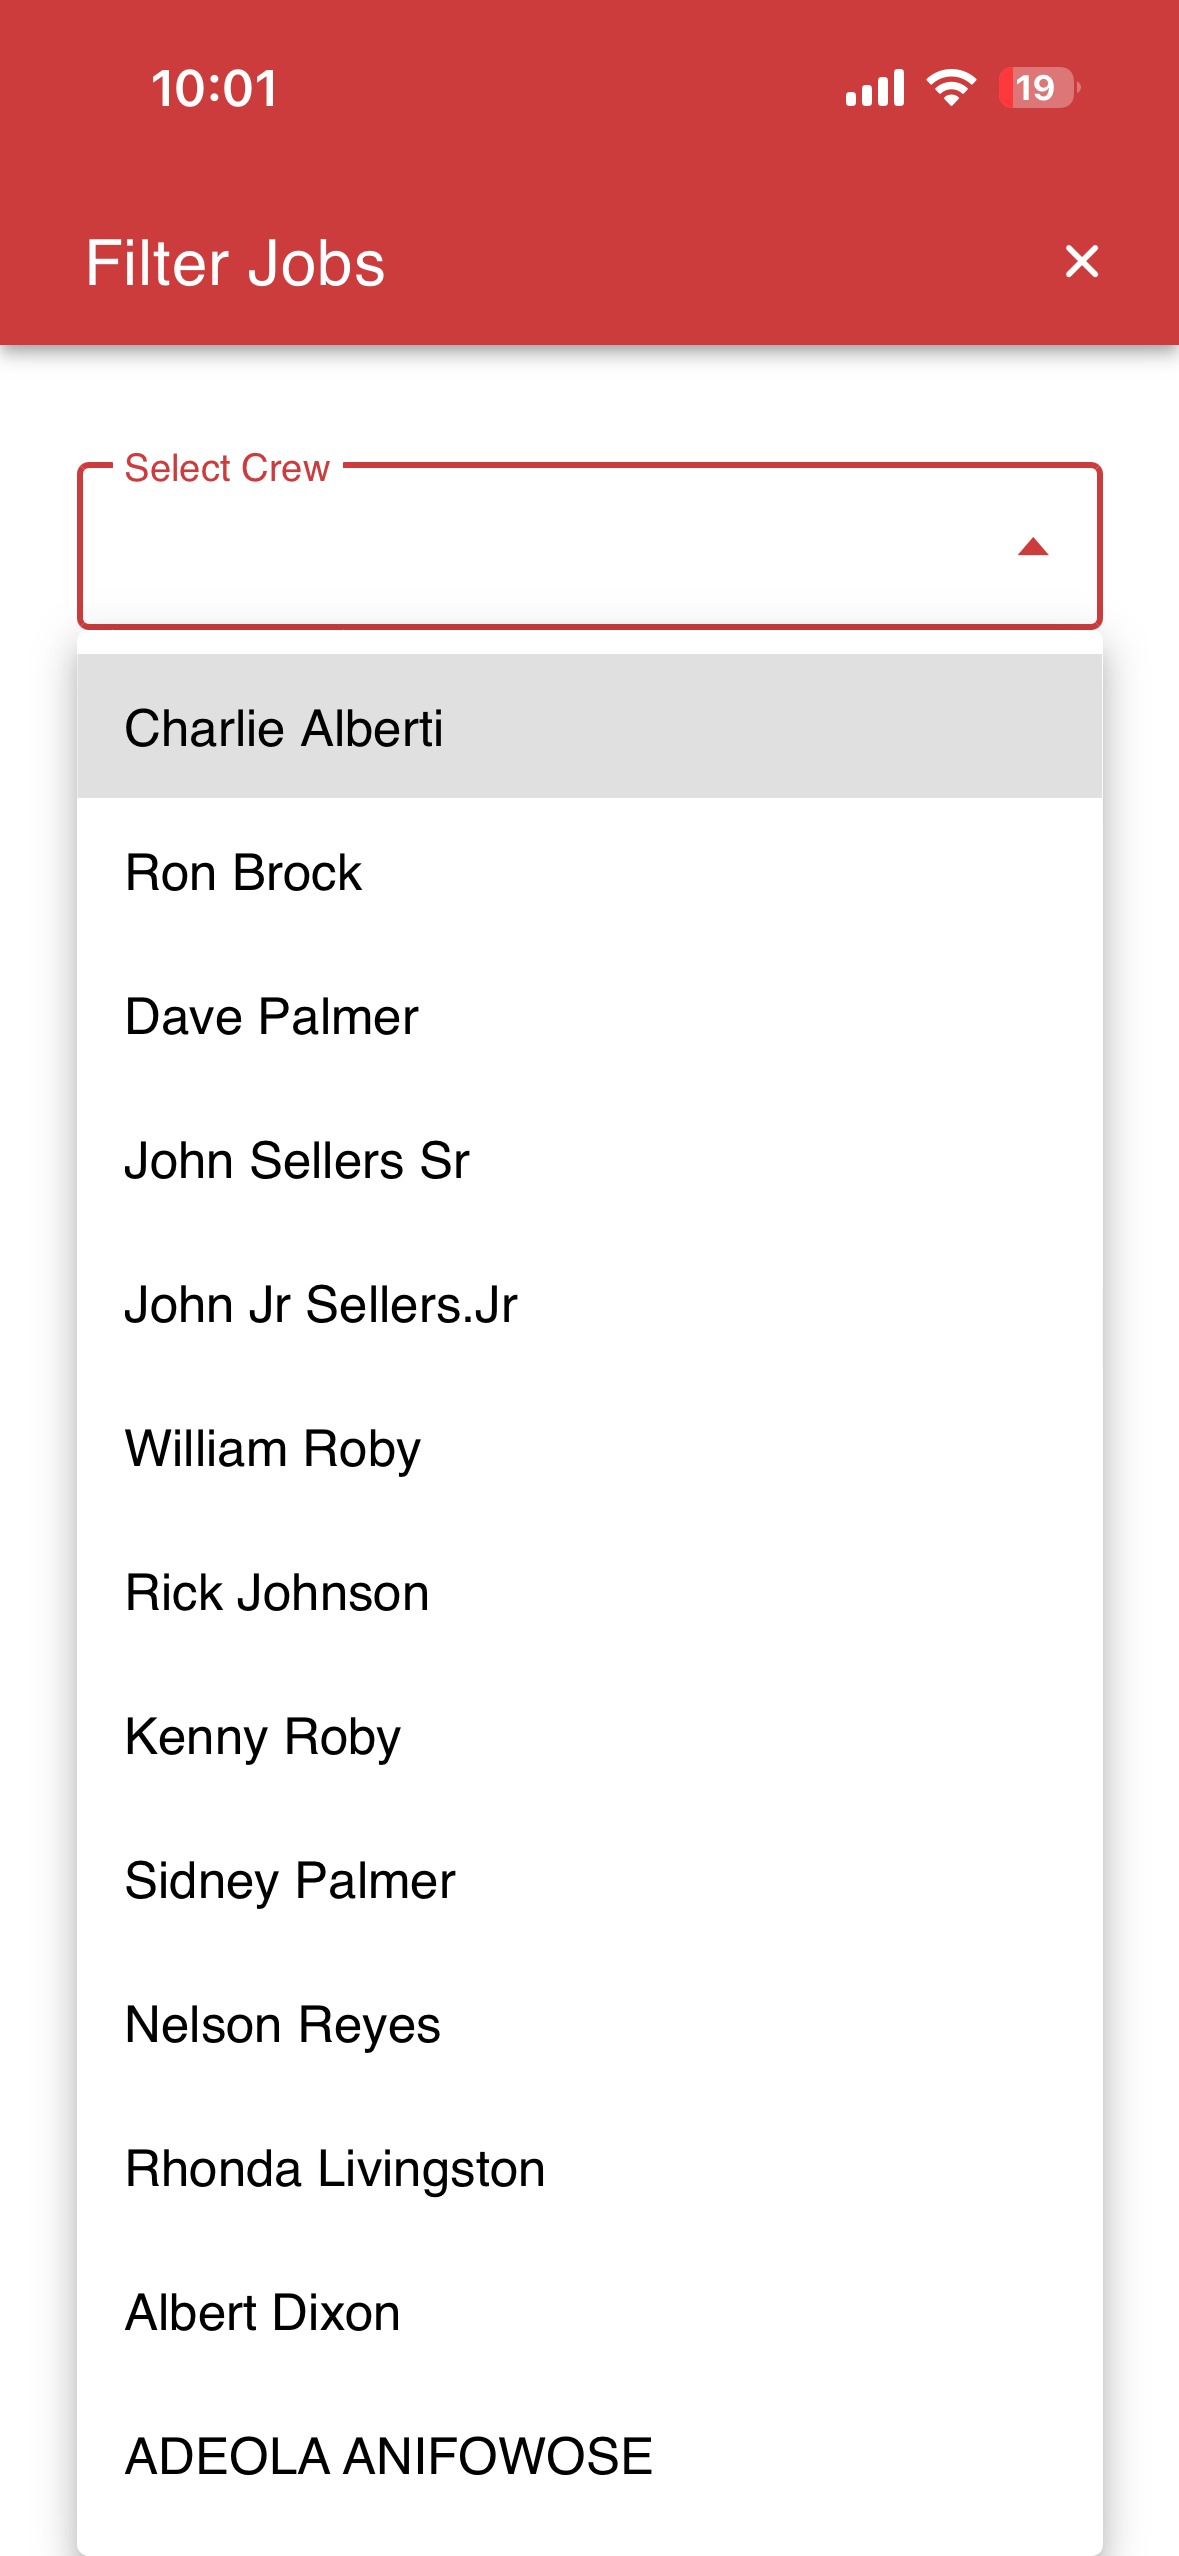
Filter by Crew
Tap the "Select Crew" dropdown.
Choose the required crew name to view jobs assigned to that crew.
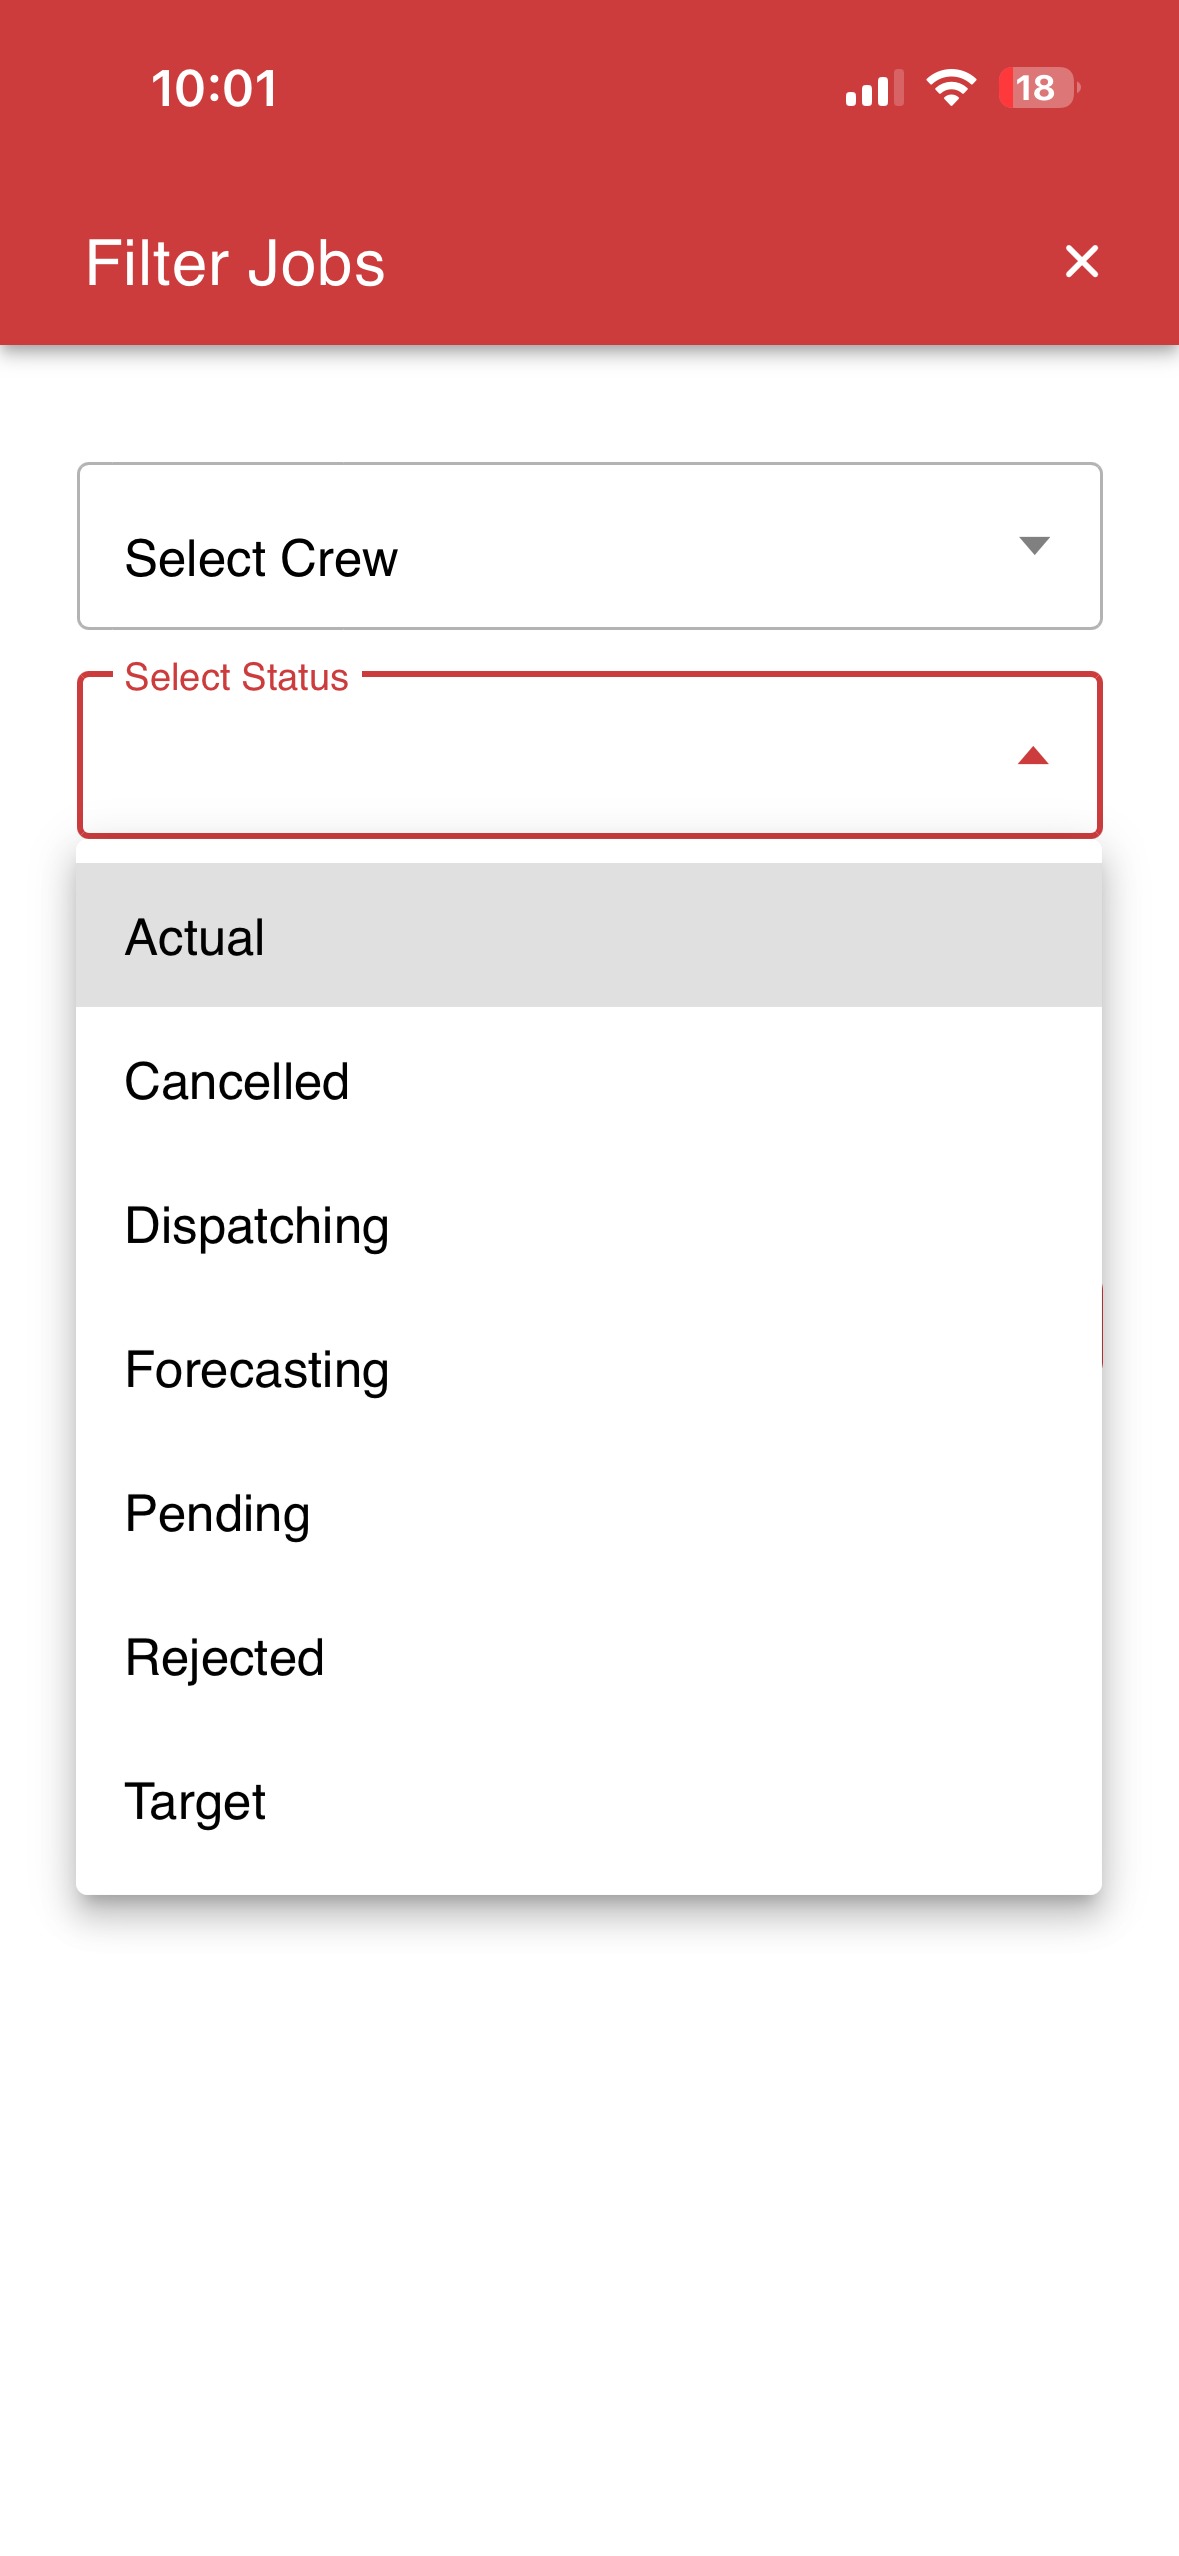
Filter by Status
Select the required job status, such as:
Actual
Cancelled
Dispatching
Forecasting
Pending
Rejected
Target
Only job tickets matching the selected status will be displayed.
Filter by Date
Select the radio button for the following options:
Today
Tomorrow
Yesterday
Custom Date Range
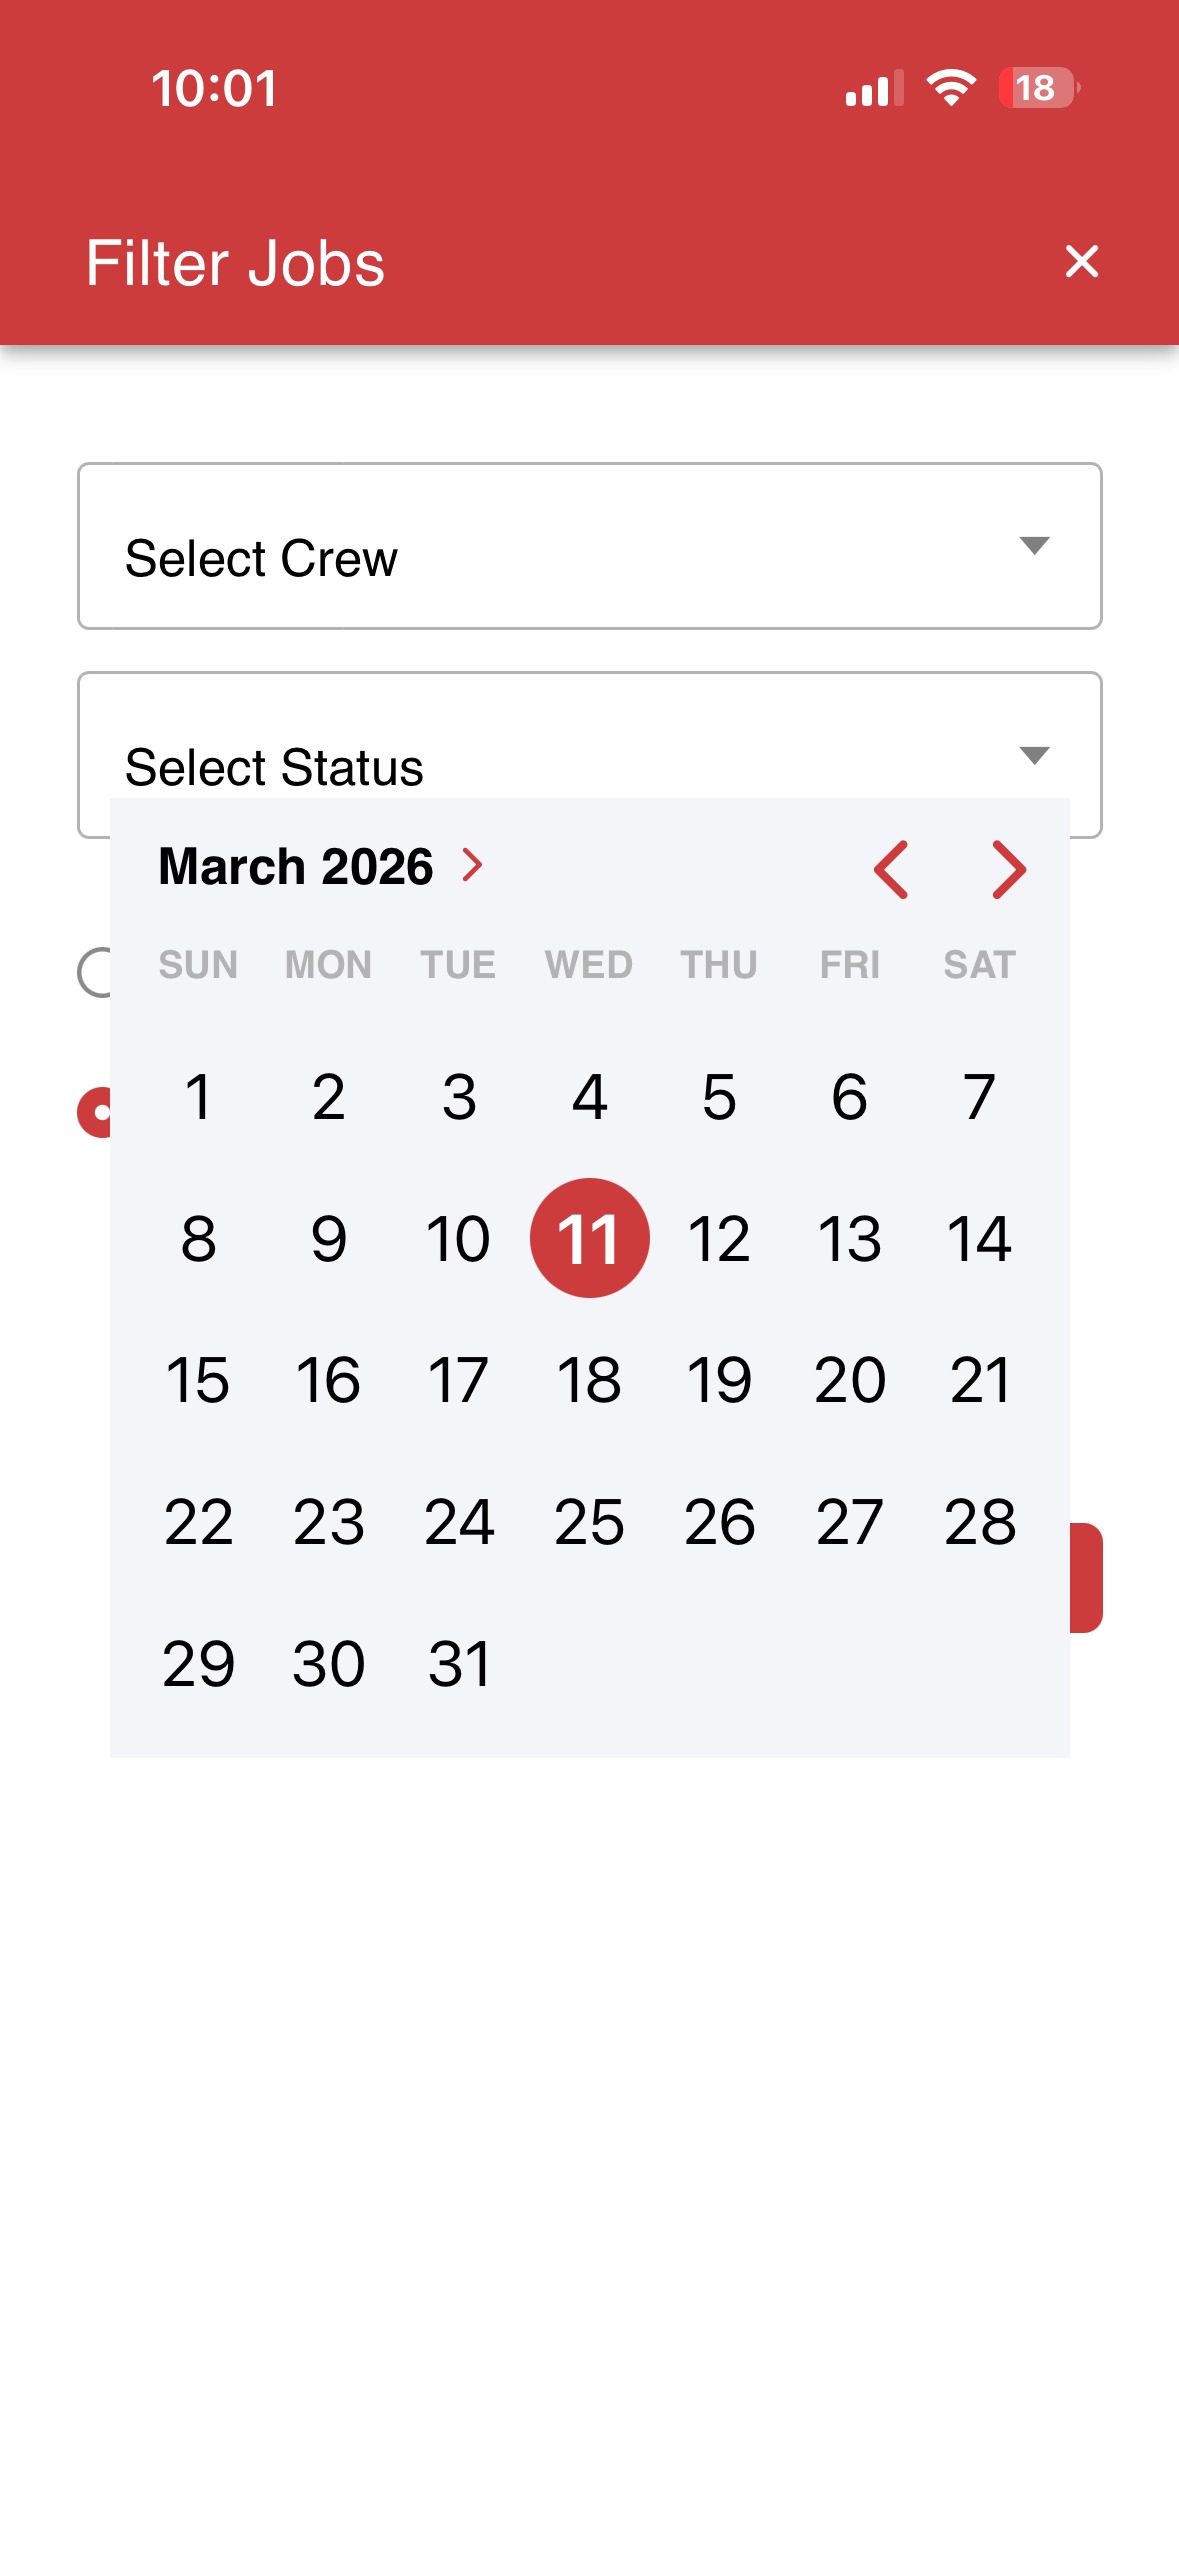
Custom Date Range
Select the "Custom Date Range" radio button.
A calendar view will open.
Choose the start and end dates based on when the work ticket was assigned.
Step 5: Apply or Reset Filters
Apply Filter:
Tap the "Apply Filter" button to display job tickets that match the selected criteria.Reset:
Tap the "Reset" button to clear all selected filters and return to the default dashboard view.
Step 6: View and Open Jobs
After applying the filters, the Dashboard refreshes and displays only the relevant job tickets.
Tap on a job ticket to open it and begin working on the assigned tasks.
Summary
Using dashboard filters allows crew members to:
Quickly locate specific job tickets
Focus on relevant jobs by crew, status, or date
Improve efficiency and reduce time spent searching for jobs.
Was this article helpful?
That’s Great!
Thank you for your feedback
Sorry! We couldn't be helpful
Thank you for your feedback
Feedback sent
We appreciate your effort and will try to fix the article